FAQ
Bounce Payment for different currency
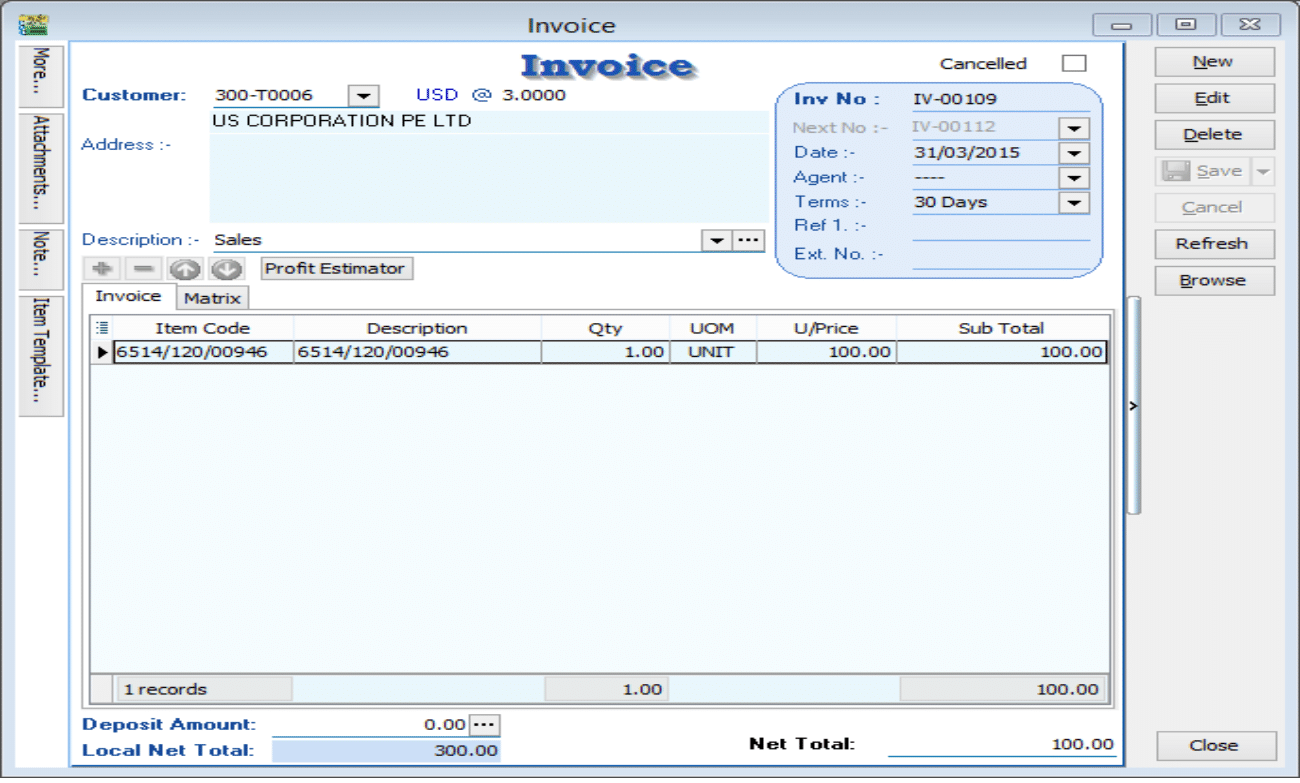
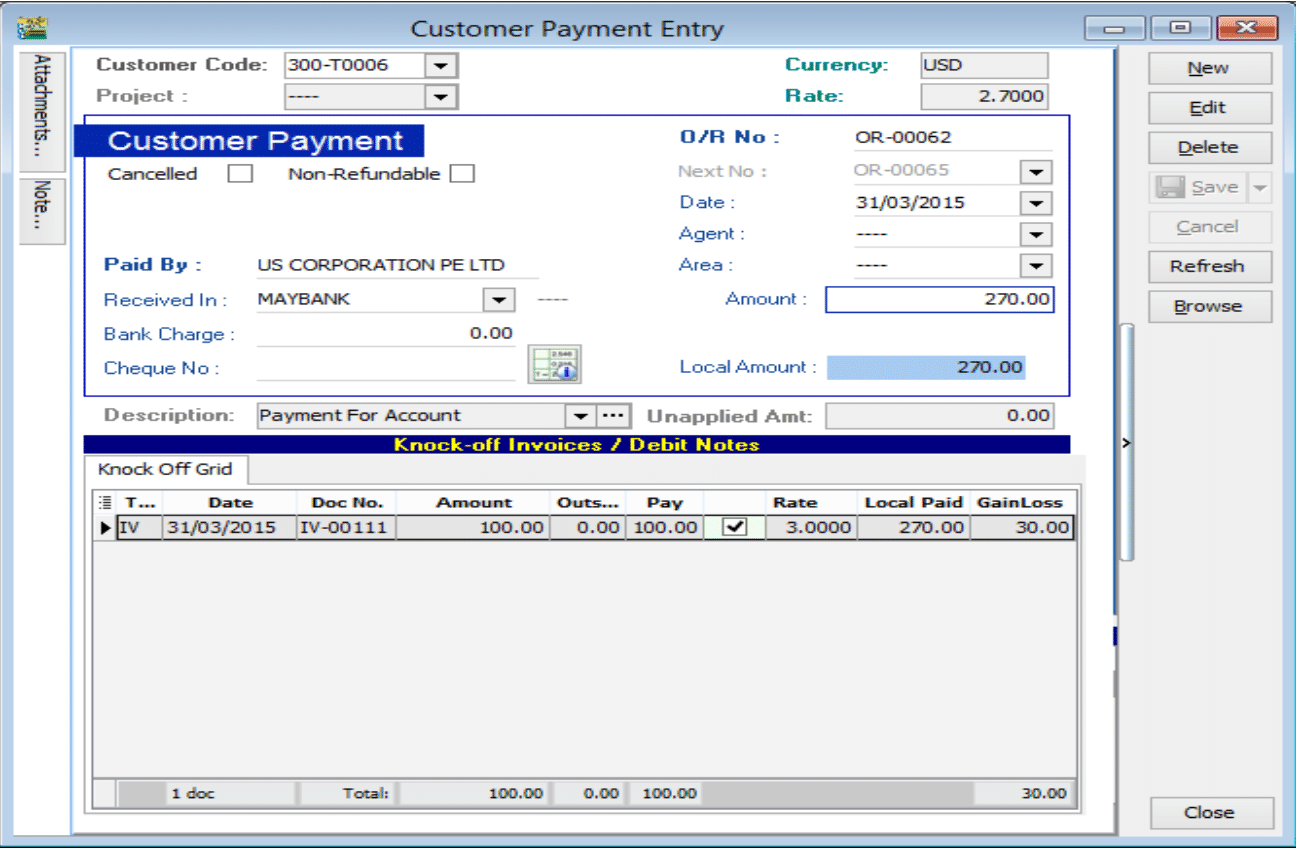
Customer Invoice
Invoice amount USD 100 | Rate 3.00 | Local net total = RM300
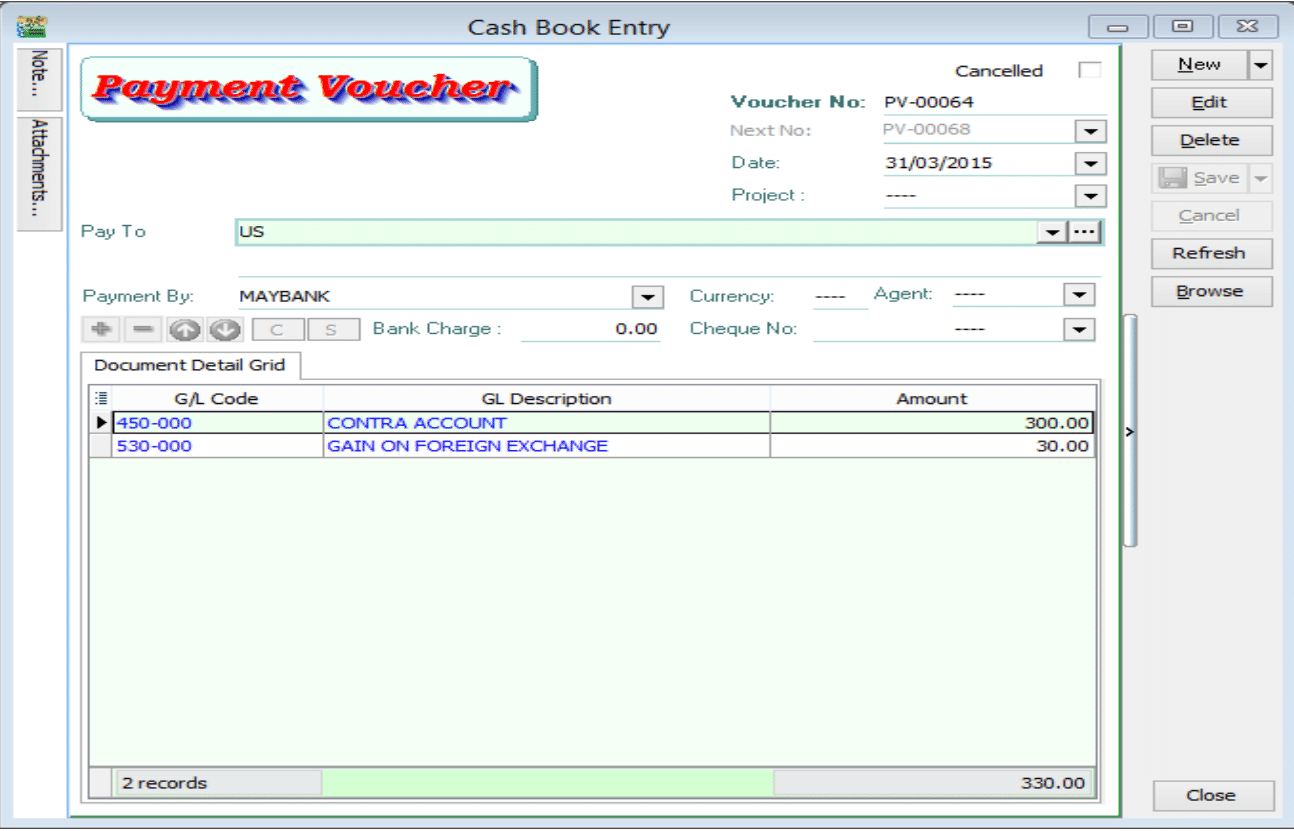
Situation 1: Received payment RM330, so Gain RM30
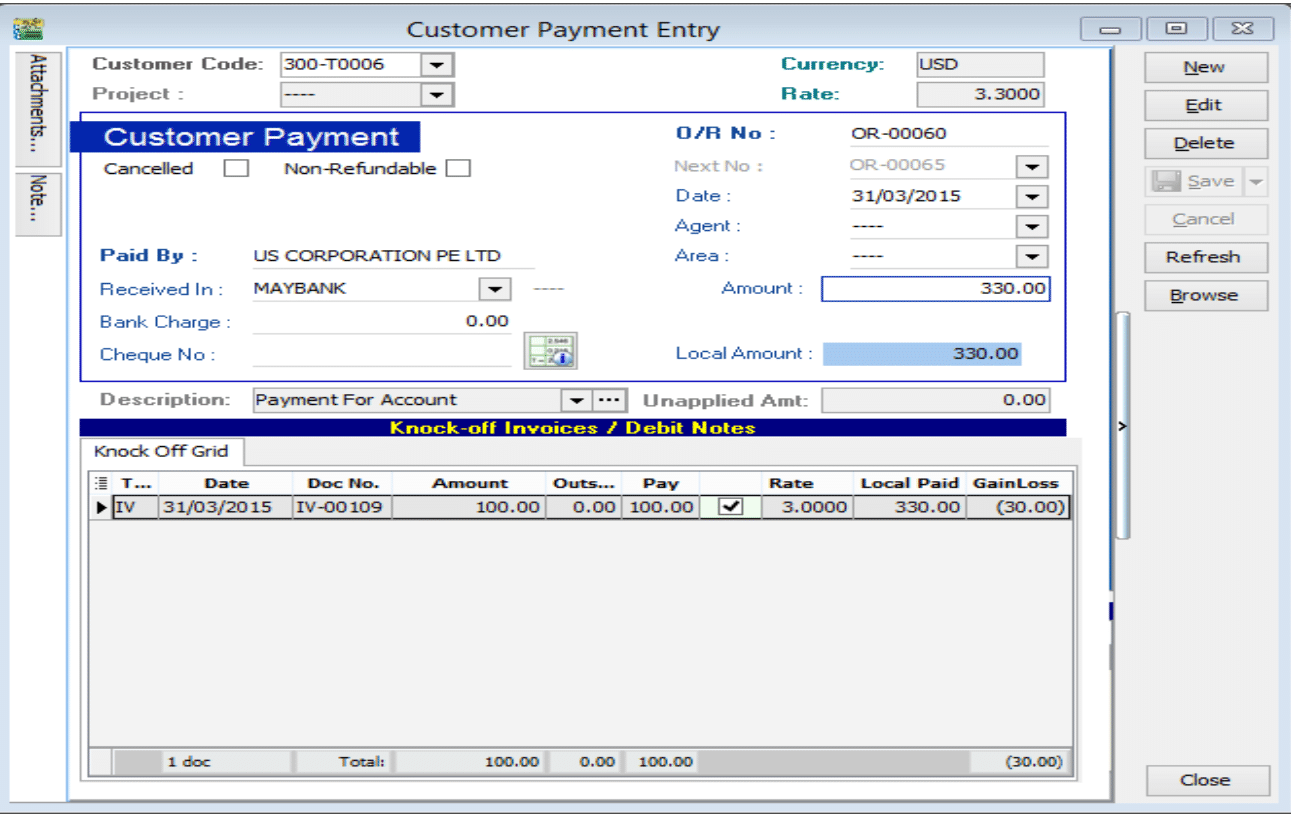
Please follow the steps below to do the bounce payment:
-
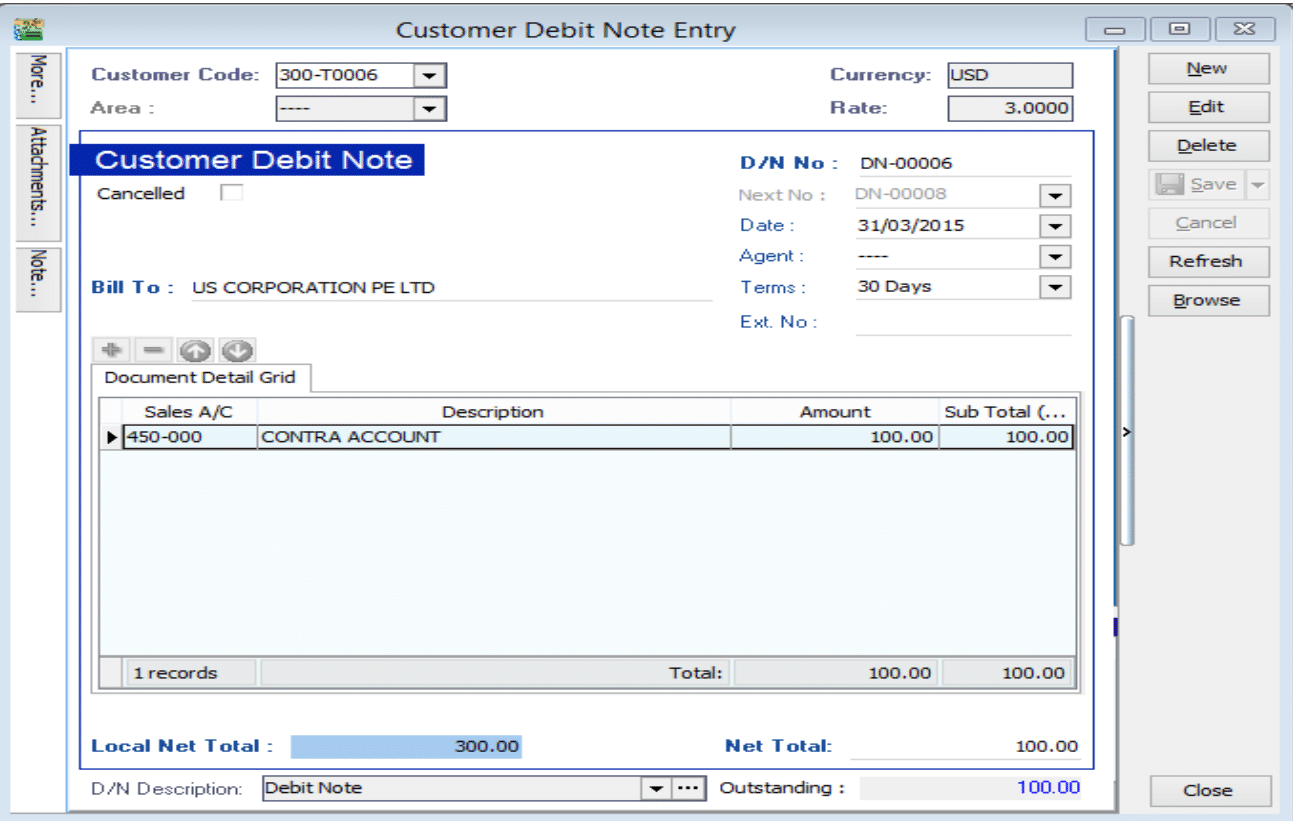
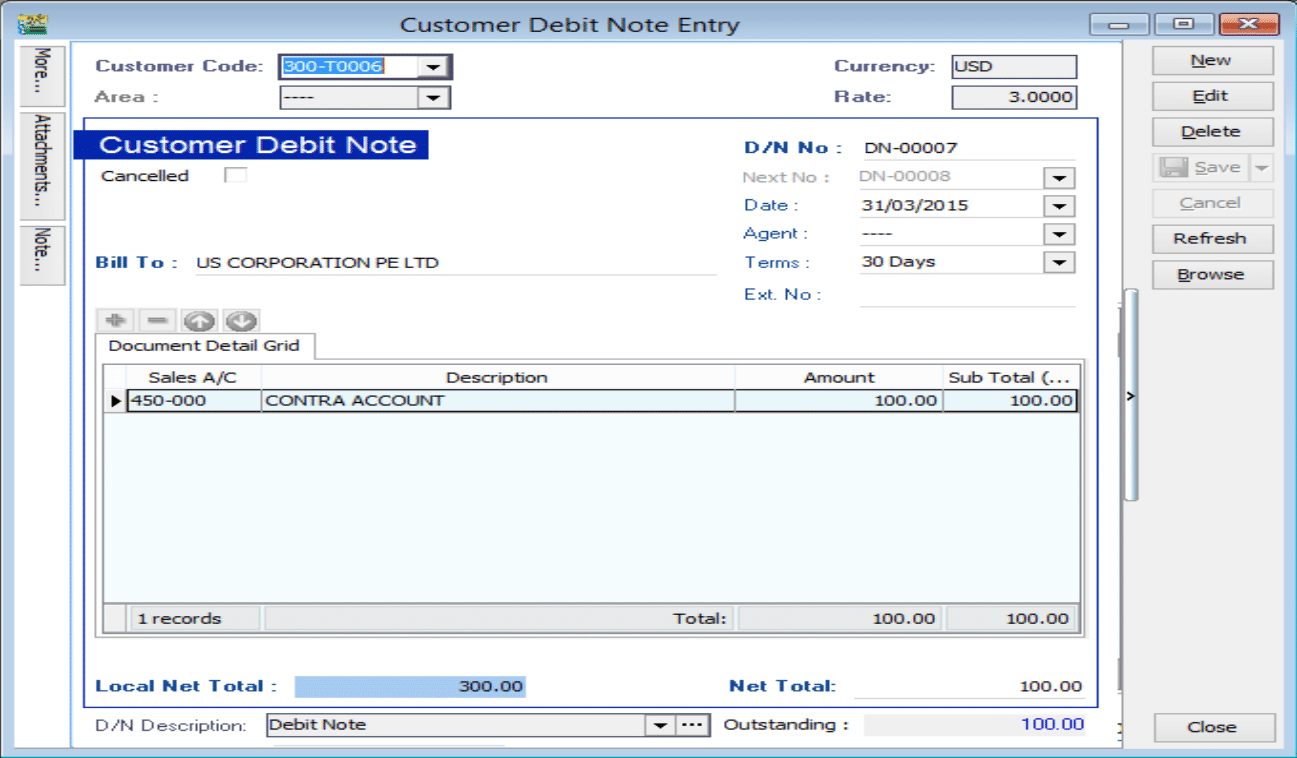
Issue a Customer Debit Note as the previous invoice that had issue.
-
Issue a payment voucher to credit out the amount that already knock off.
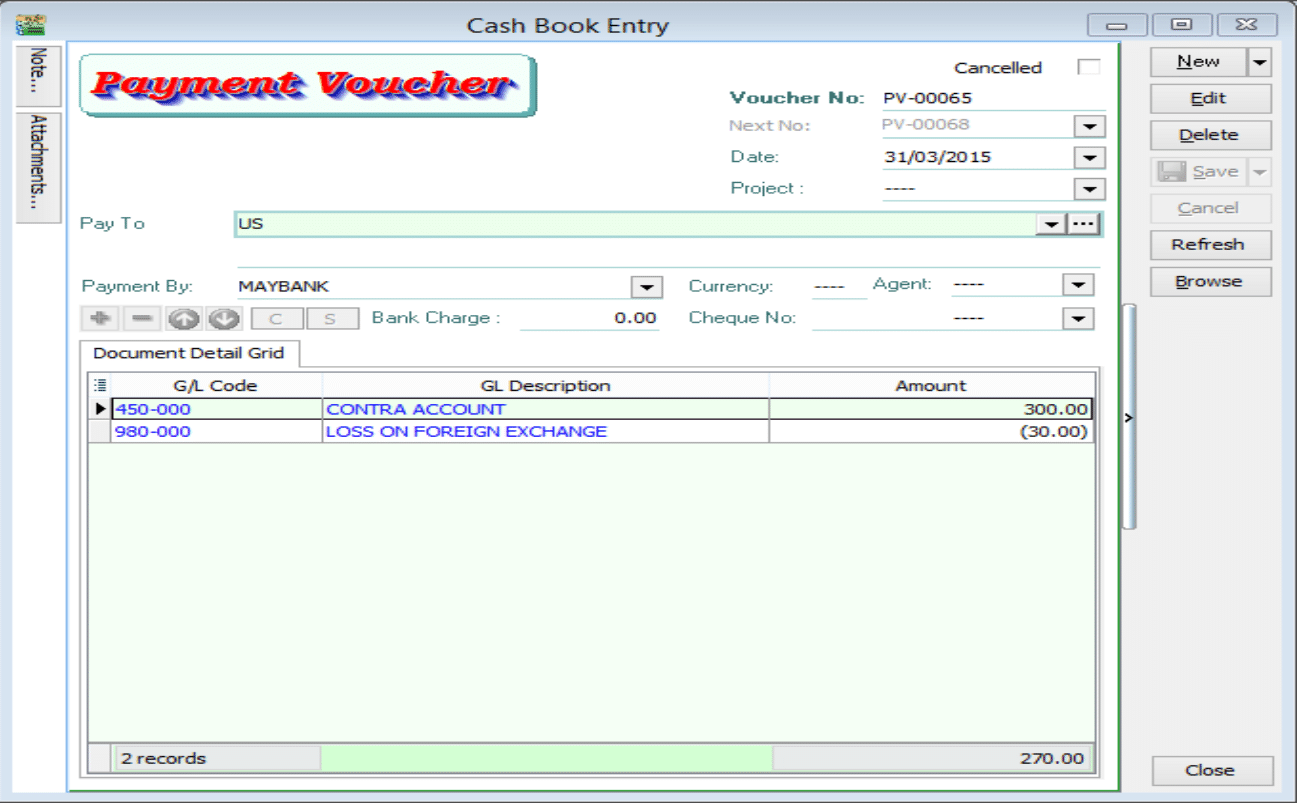
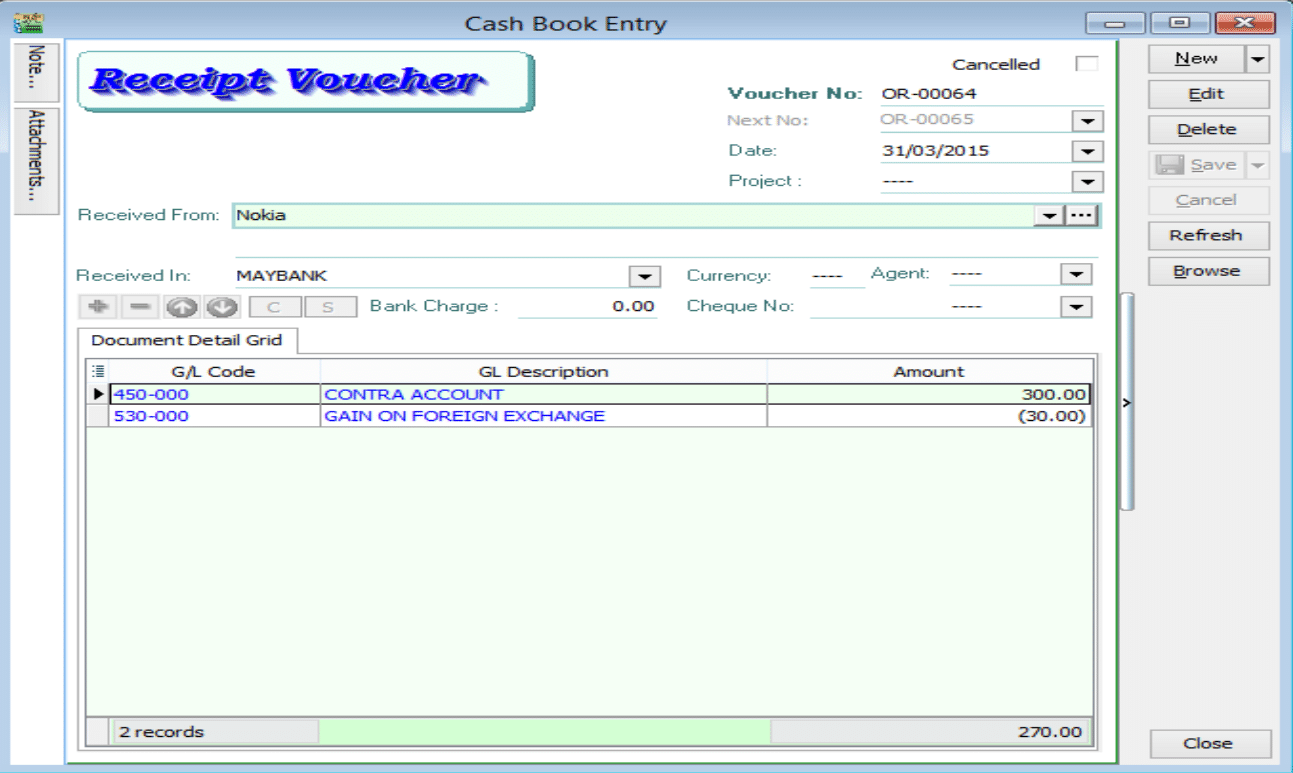
Situation 2: Received payment RM270, so Loss RM30
Please follow the steps below to do the bounce payment:
-
Issue a Customer Debit Note as the previous invoice that had issue.
-
Issue a payment voucher to credit out the amount that already knock off.
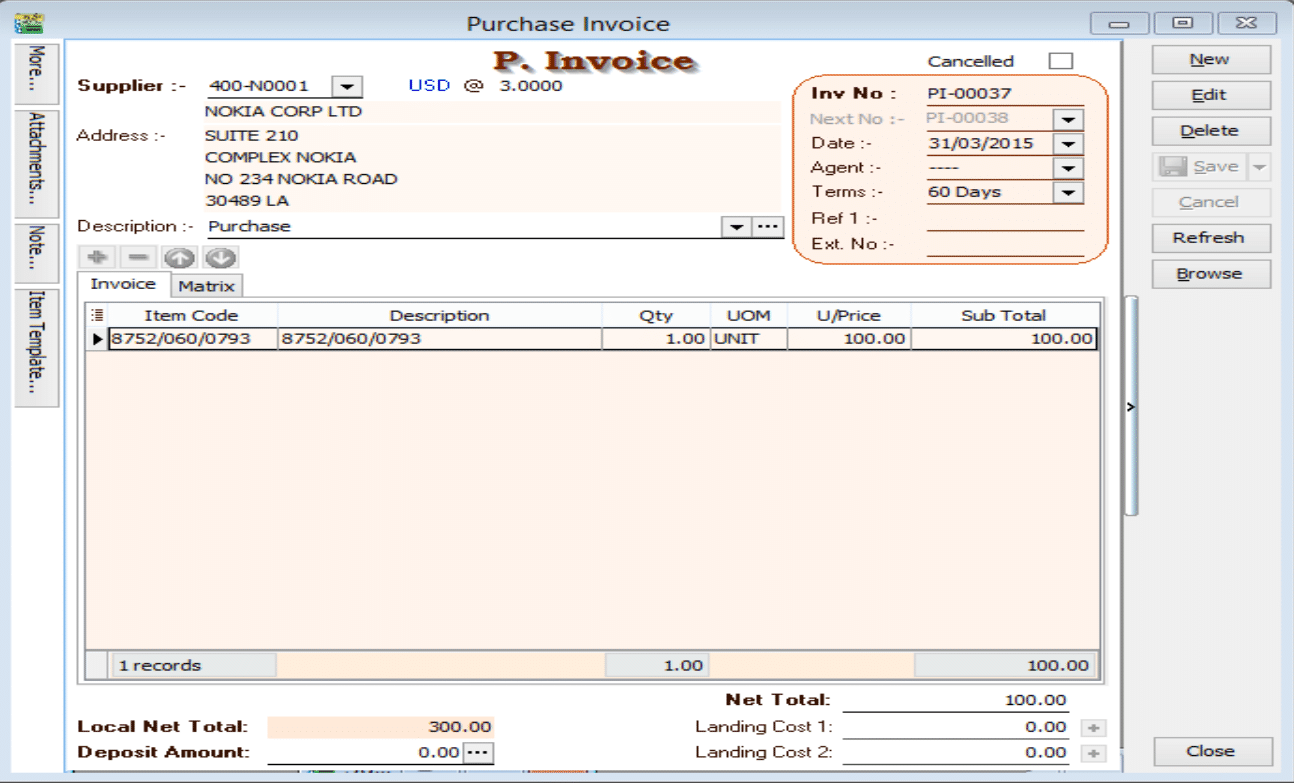
Supplier Invoice
Supplier Invoice amount USD100 | Rate 3.00 | Local net total = RM300
Situation 1: Make payment RM330, so Loss RM30
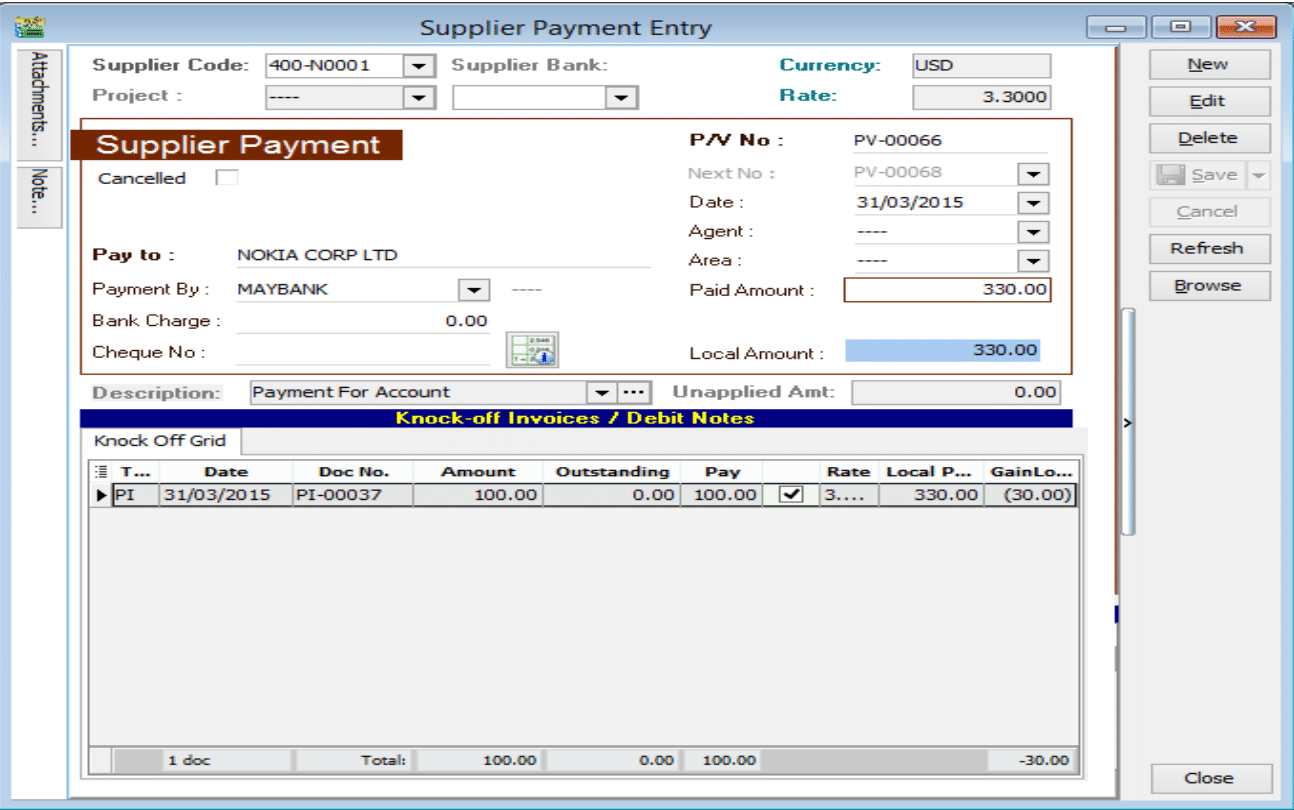
Please follow the steps below to do the bounce payment:
-
Issue a Supplier Debit Note as the previous invoice that had issue.

-
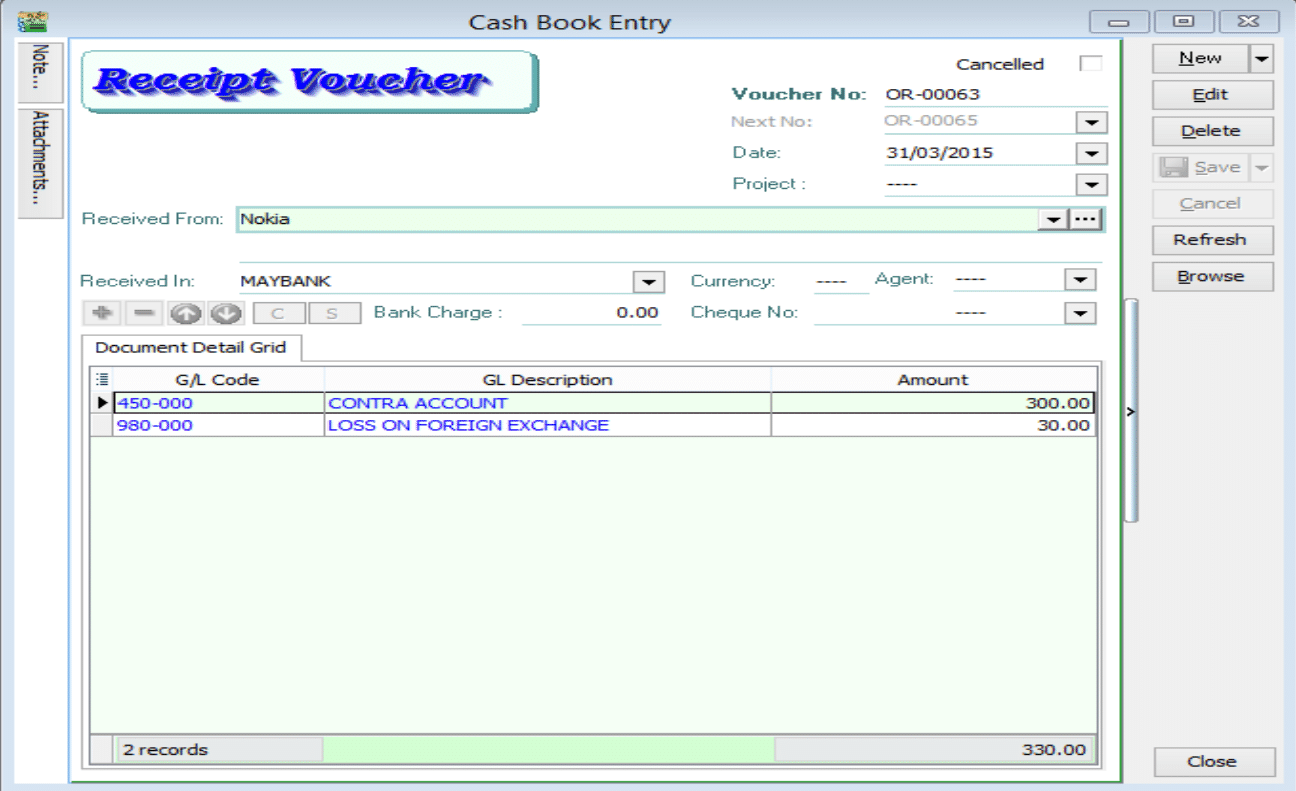
Issue an Official receipt to debit the amount that already knock off.
*Put USD30 into loss GL account because we need to paid more USD30 to supplier,but we loss USD.
Situation 2: Make payment RM270, so Gain RM30
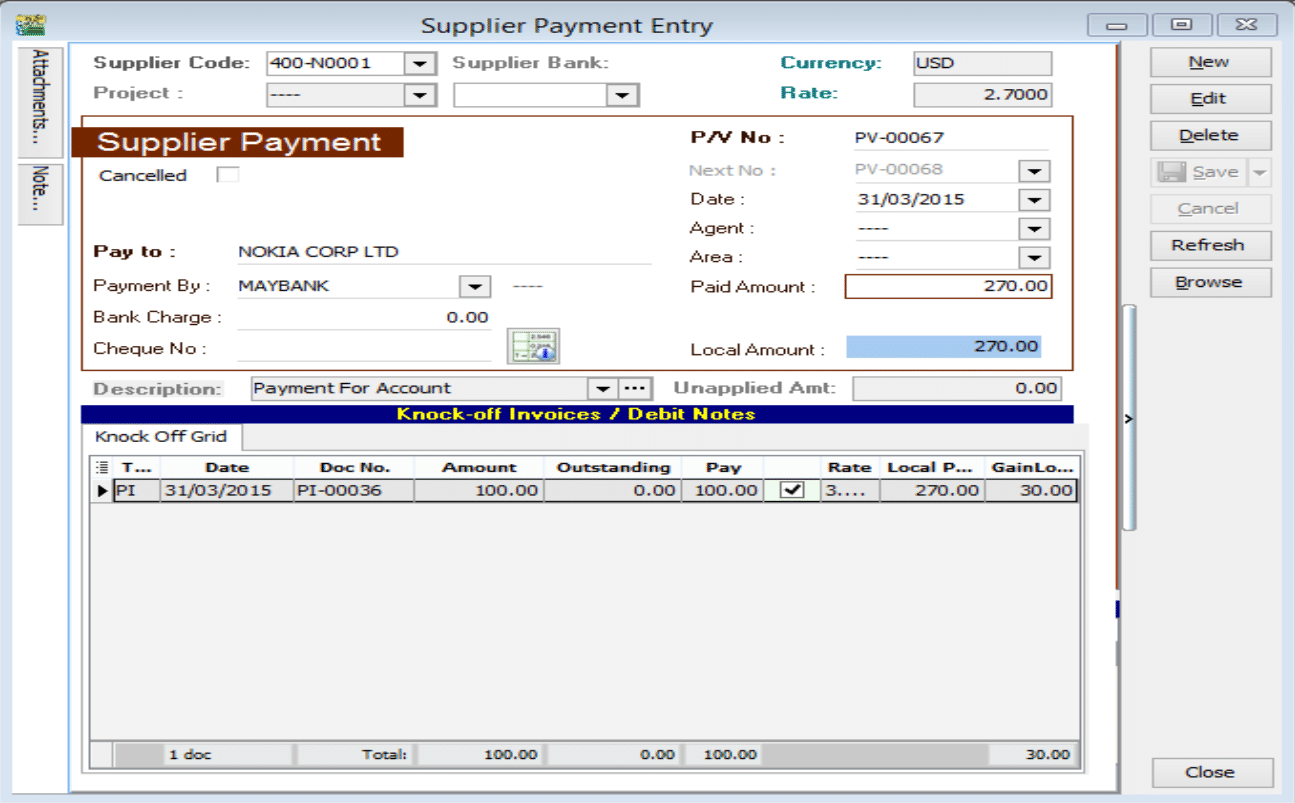
Please follow the steps below to do the bounce payment:
-
Issue a Supplier Debit Note as the previous invoice that had issue.

-
Issue an Official receipt to debit the amount that already knock off.
*Put USD -30 into gain GL account because we pay less USD30 to supplier,but we gain USD30.
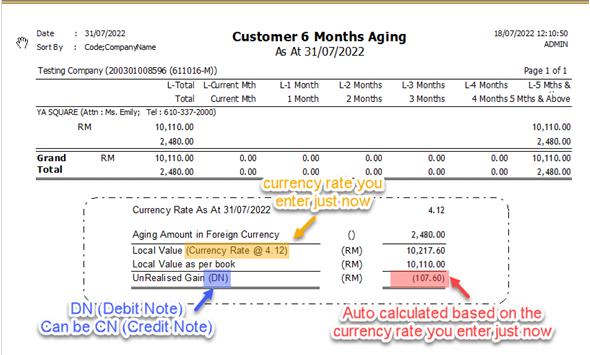
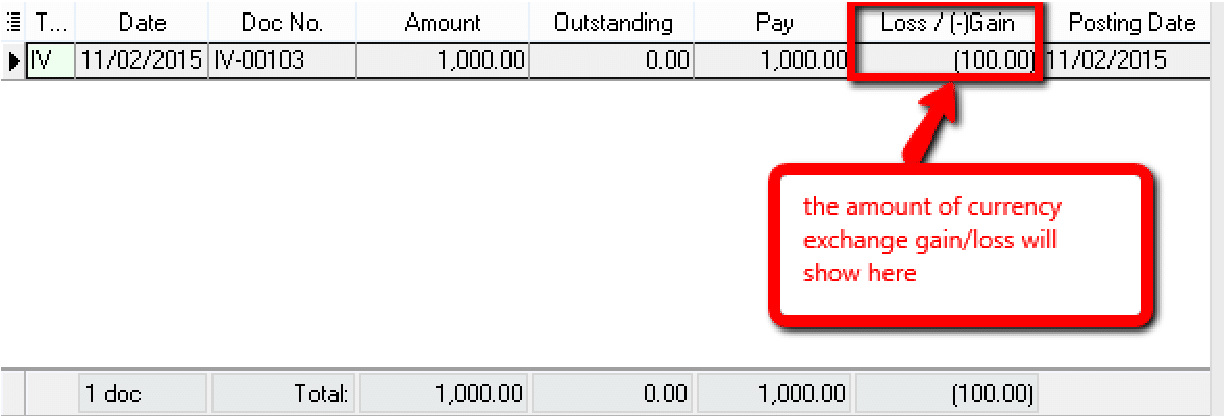
Foreign Customer Unrealised Gain Loss
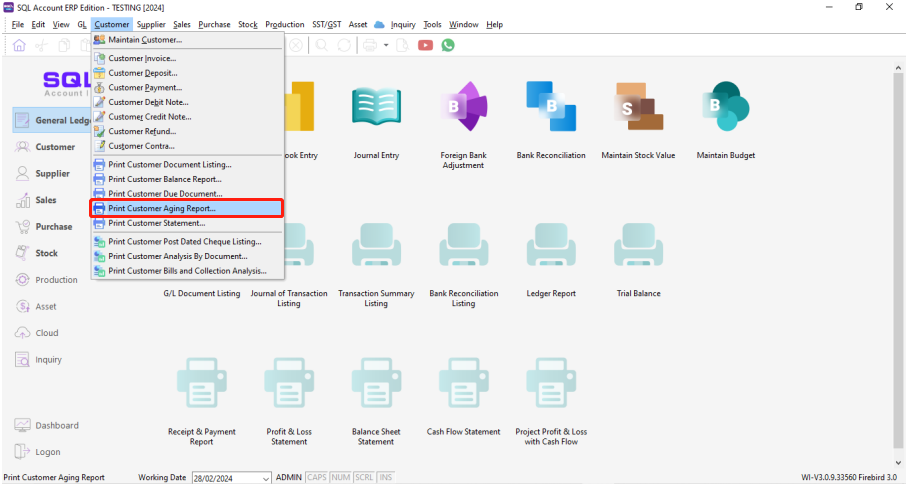
Customer | Print Customer Aging Report
-
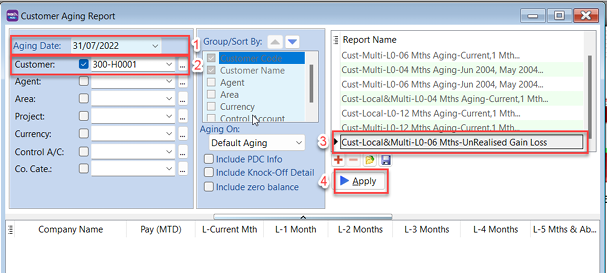
Select Date
-
Select Foreign Customer
-
Select UnRealised Gain Loss report
-
Click Apply
-
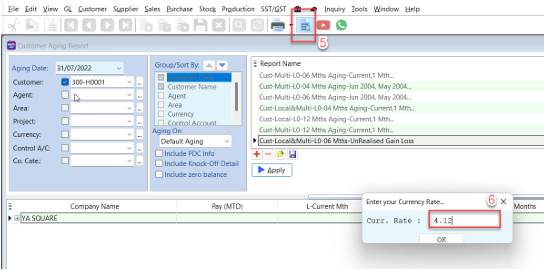
Click Preview, system will prompt a dialog to let you enter currency rate
-
Enter closing currency rate | Click OK
-
System will show the report with the auto-calculated UnRealised Gain/Loss Amount
-
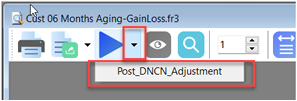
Click Post_DNCN_Adjustment
-
Show Posting Done...

-
Go to Customer Credit Note / Customer Debit Note to check the document posted.
-
Same step for supplier.
-
For more info, may go to the Youtube link
Bank Deposit
Opening Bank Deposit can be done when you are banking in 2 or more cheques at a time in a same transaction slip. After it is done, the transaction will be displayed in grouped form at bank reconciliation for you to reconcile.
Steps to open bank deposit
-
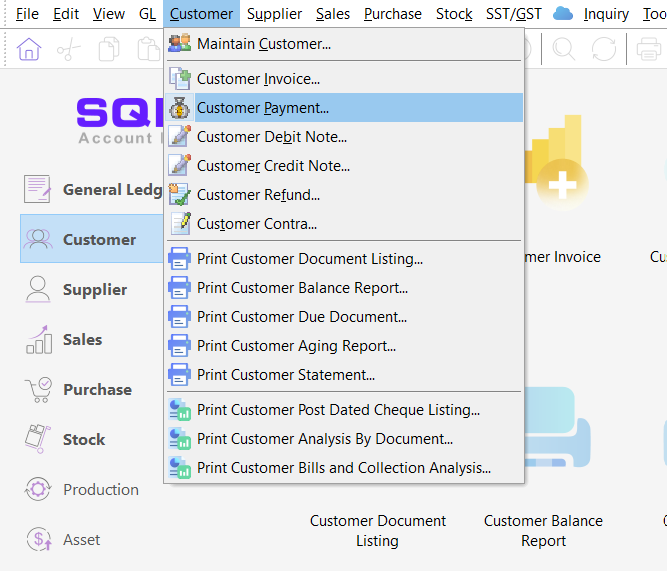
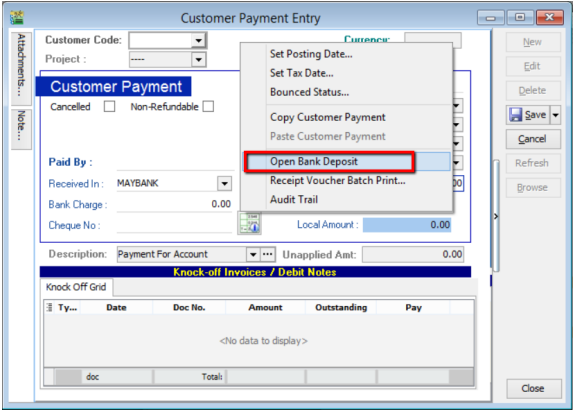
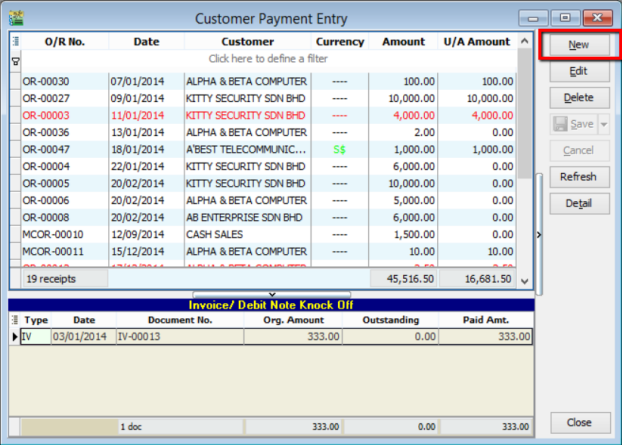
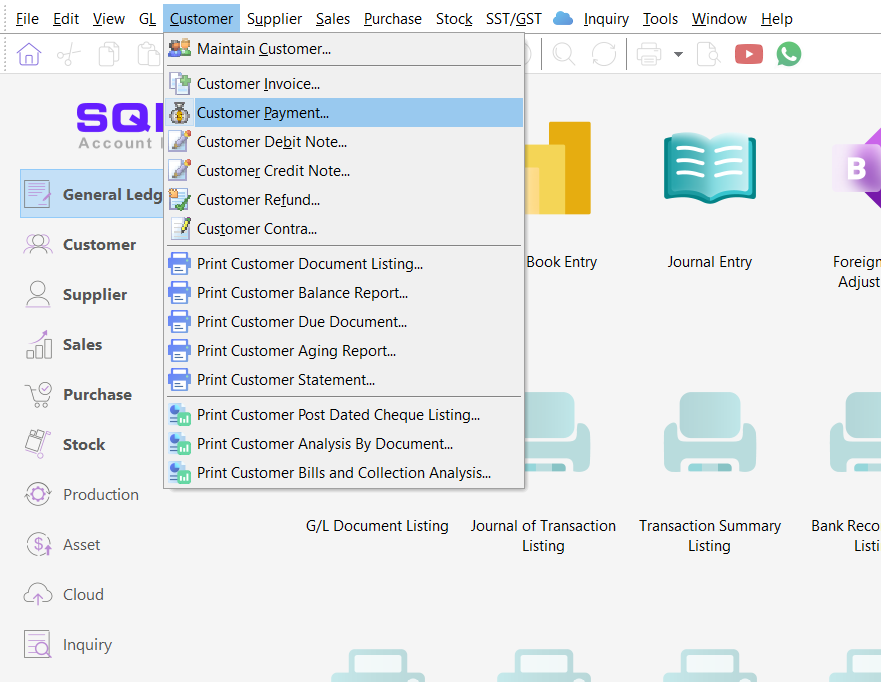
Firstly, point to “Customer” tab and select “Customer Payment”.
-
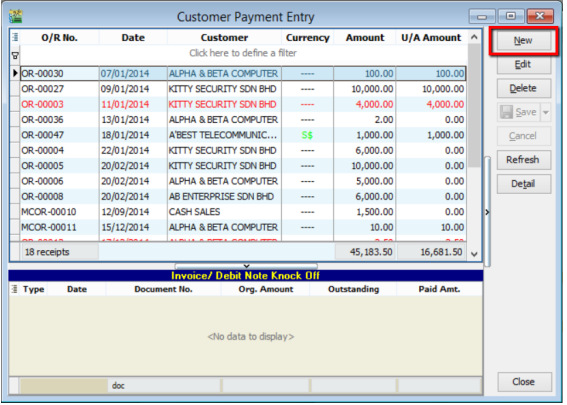
Click on “New”
-
Right click at the blank space, and you will see a panel displayed with “Open Bank Deposit” for you to select. Click on “Open Bank Deposit”
-
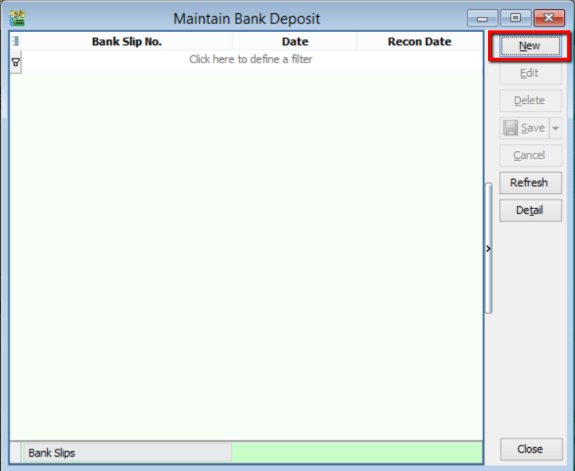
Click on “New”
-
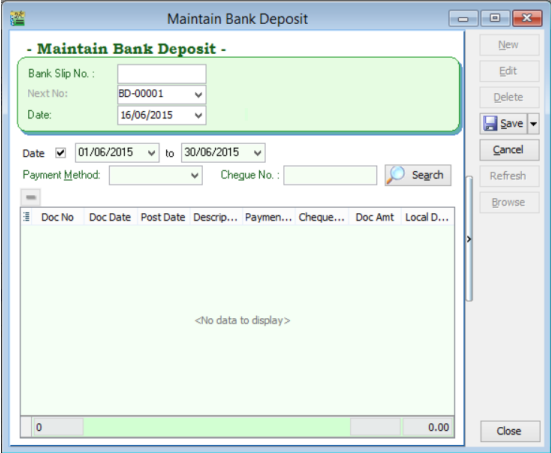
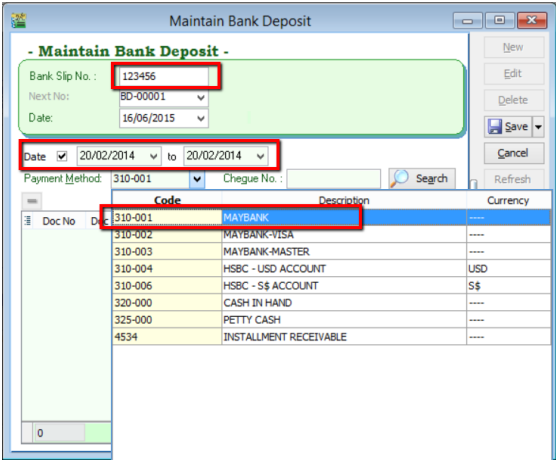
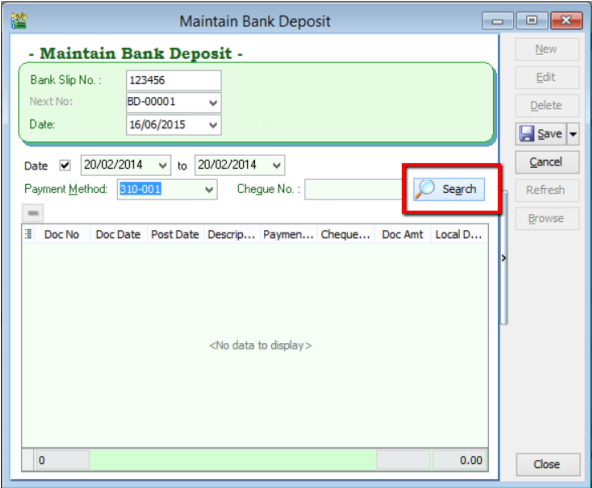
You will come to this interface. Enter the transaction slip number, select the correct date and account.
-
Click “Search”. System will search for customer payment within the selected date.
-
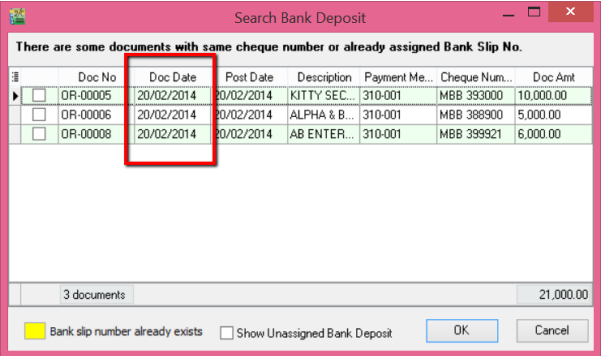
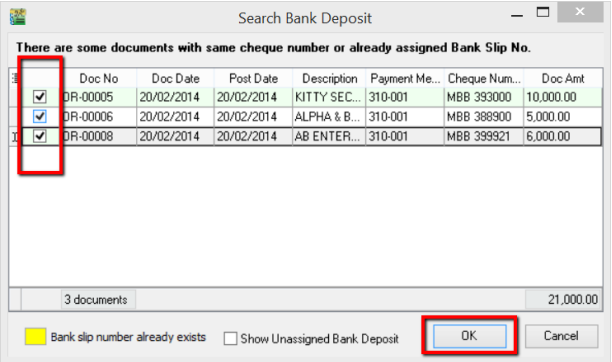
Tick on the payments which are made under the same transaction. Then, click “OK”.
-
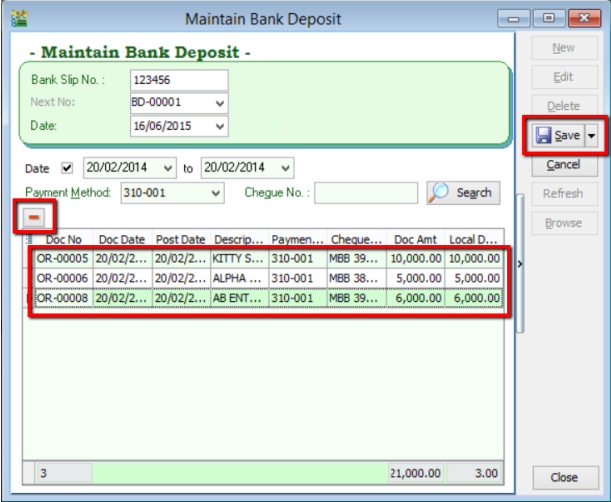
You will see the selected payments displayed in the panel. If you have wrongly selected the payment, you can always remove it by clicking on the “-“button. Click “Save”.
-
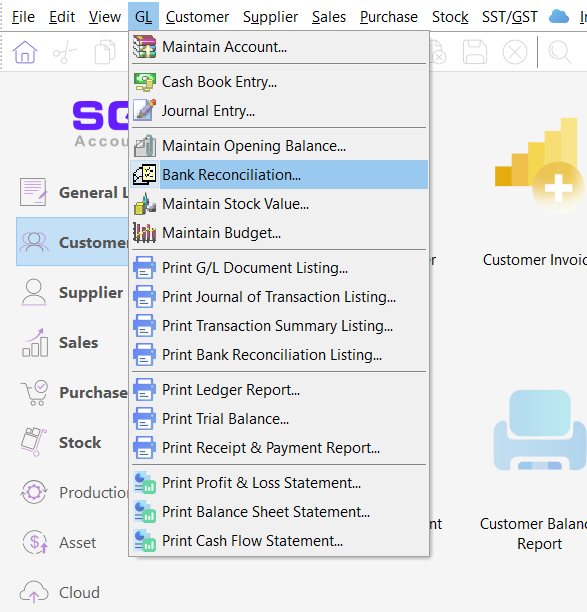
Point to “GL” and click into “Bank Reconciliation”.
-
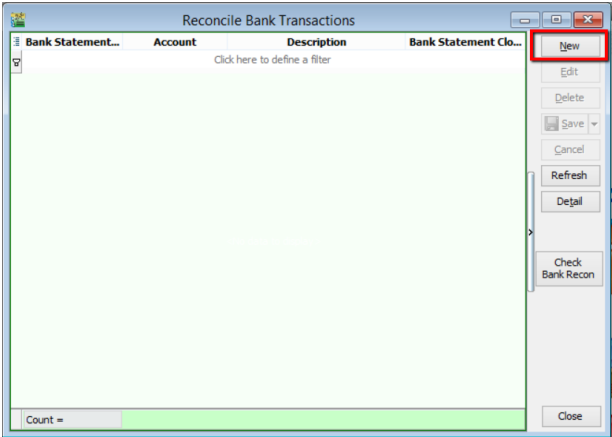
Click on “New”.
-
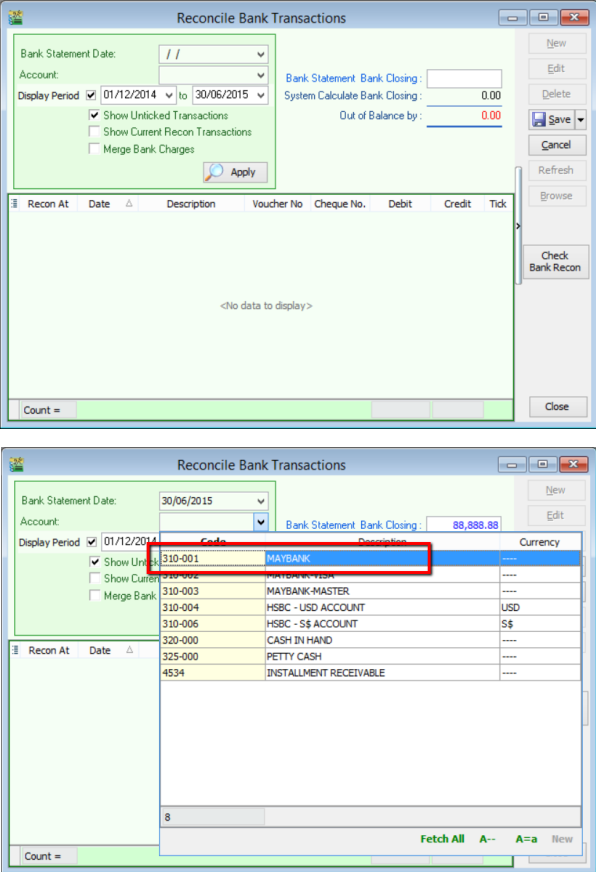
Then, you will come to this panel. Select the bank statement date (When the bank statement is received). Make sure that you have selected the correct account.
-
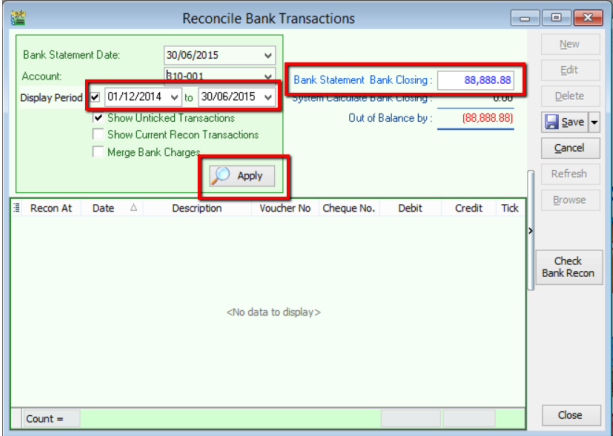
Select the correct display period (including the date of the bank deposit opening made). Key in Bank Statement Bank Closing according to the bank statement you received. Click “Apply”.
-
You will see the cheques from “Opening Bank Deposit” will be displayed together in a row with the total amount added up together. Then, click “Save”.

Opening Bank Deposit at Cash Book Entry
“Opening Bank Deposit” can also be done at cash book entry. Firstly, point to “GL” and select “Cash Book Entry”.

Click on “New”
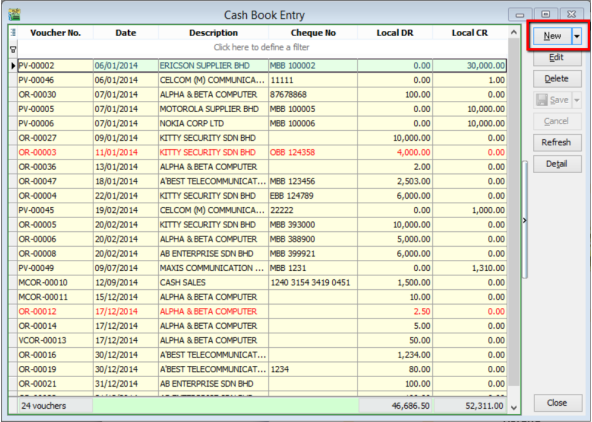
Then, right click at the blank space beside Payment Voucher, you will see “Open Bank Deposit” for you to select.

Payment Guide
Customer Payment Scenario
| # | Customer Pay | You Receive |
|---|---|---|
| 1 | RM | RM |
| 2 | USD | RM |
| 3 | USD | USD |
| 4 | USD | SGD |
1. Customer Paid in RM & Payment Received in RM
-
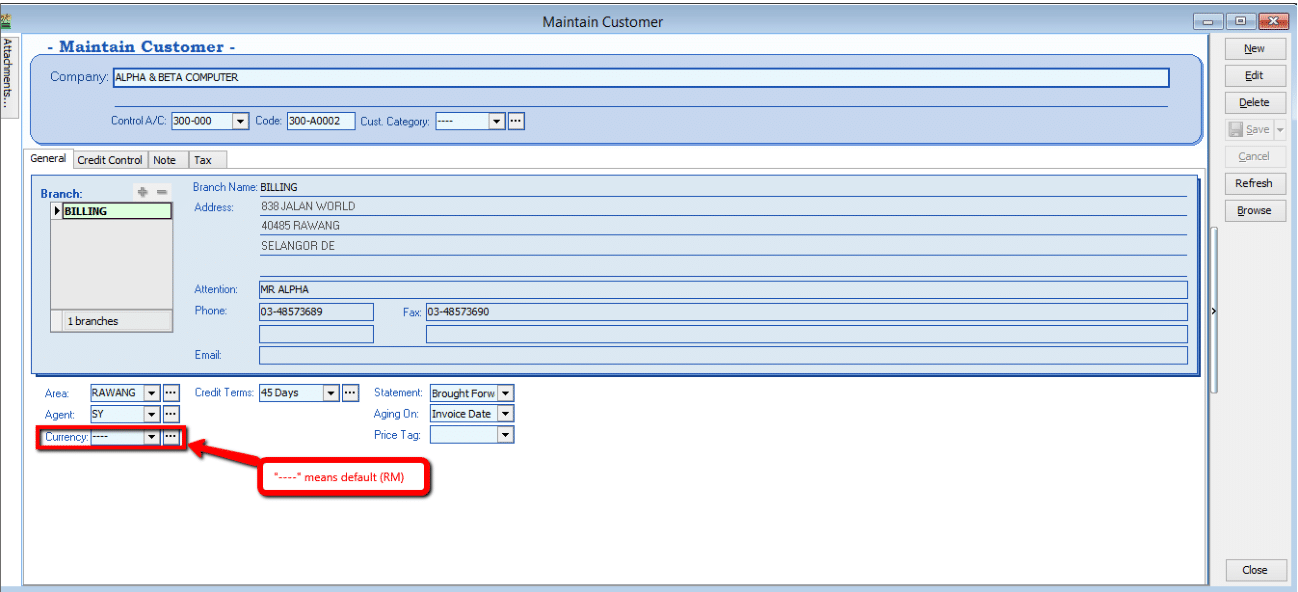
First step to know the customer for currency RM by default is with “----“ sign.
Customer > Maintain Customer
-
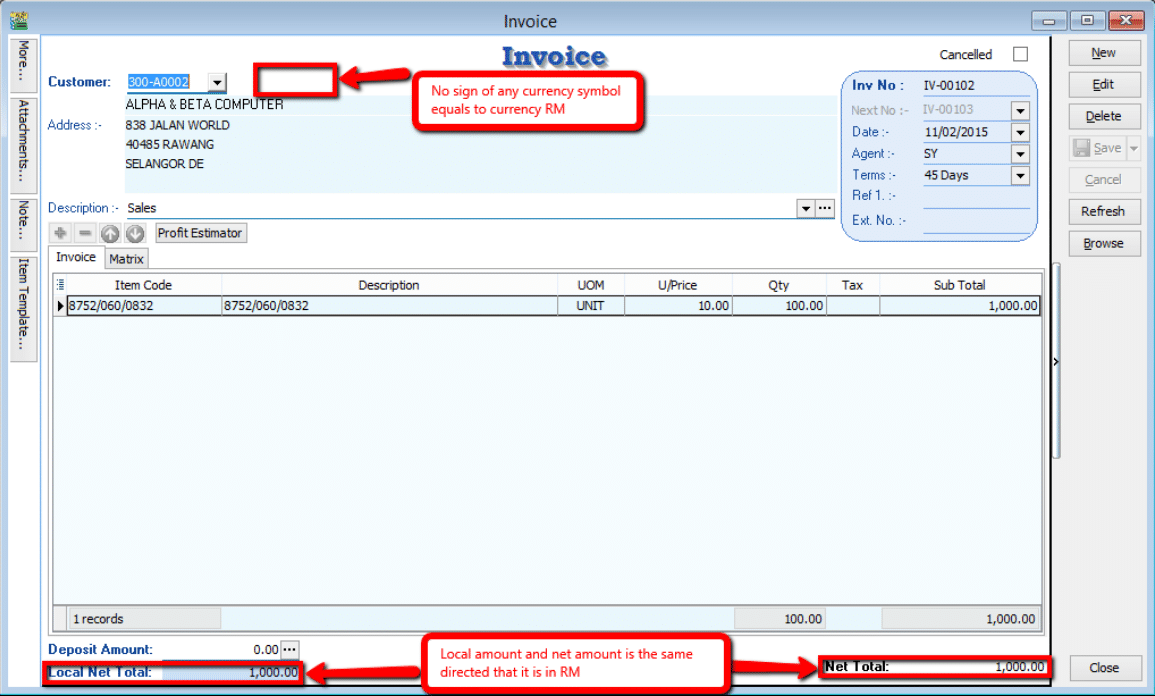
Customer order and proceed to Invoice
Sales > Invoice
-
Proceed to Payment
Customer > Payment
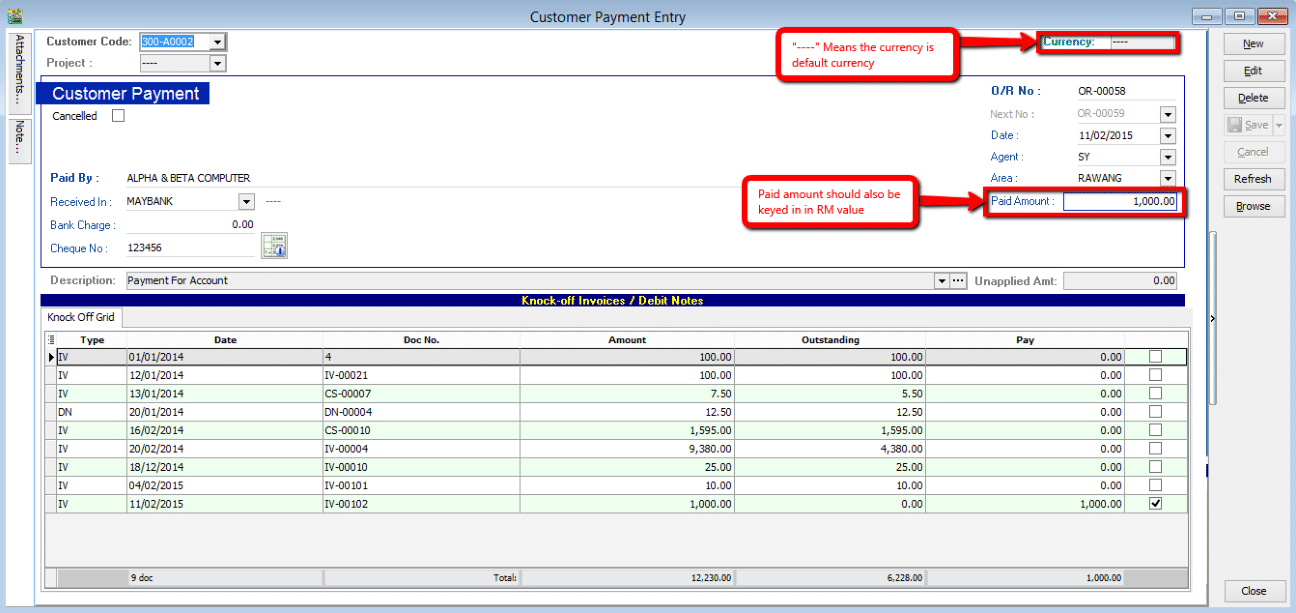
Make sure the above step for Customer in RM currency, payment in default is RM currency also.
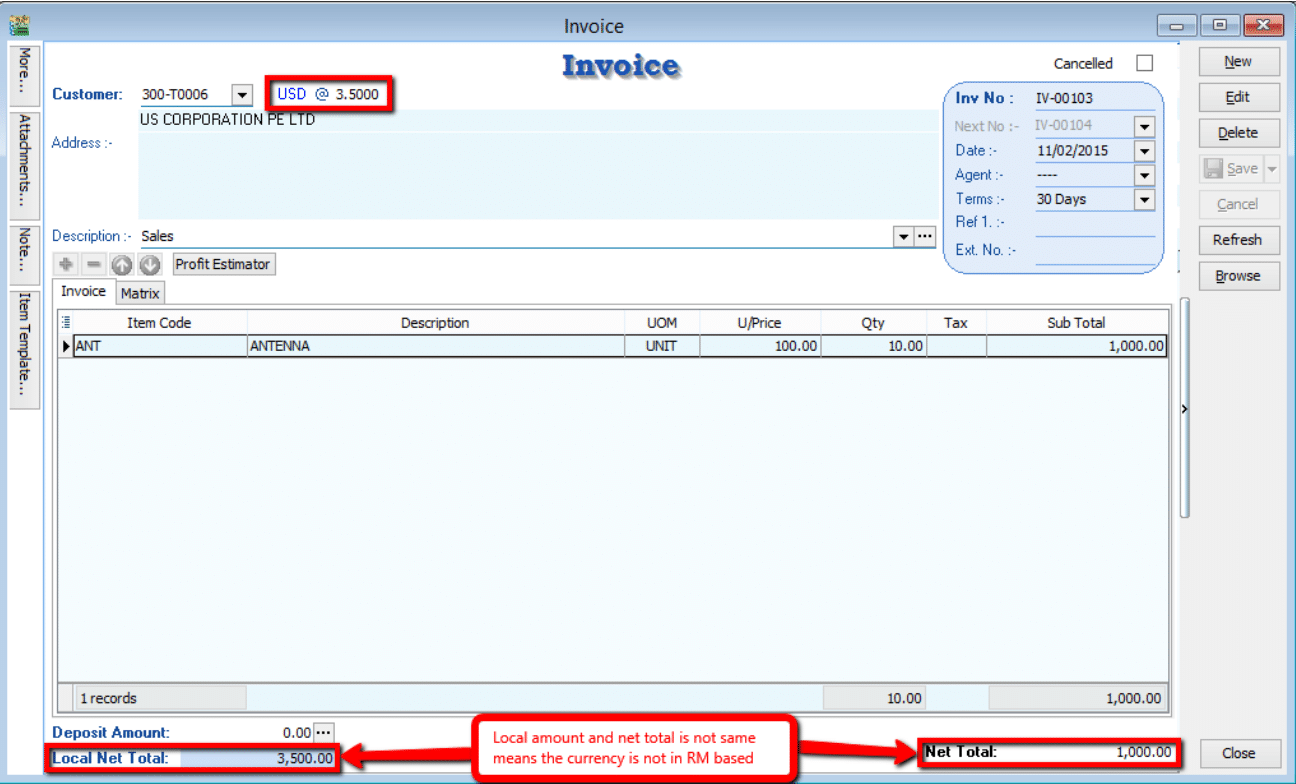
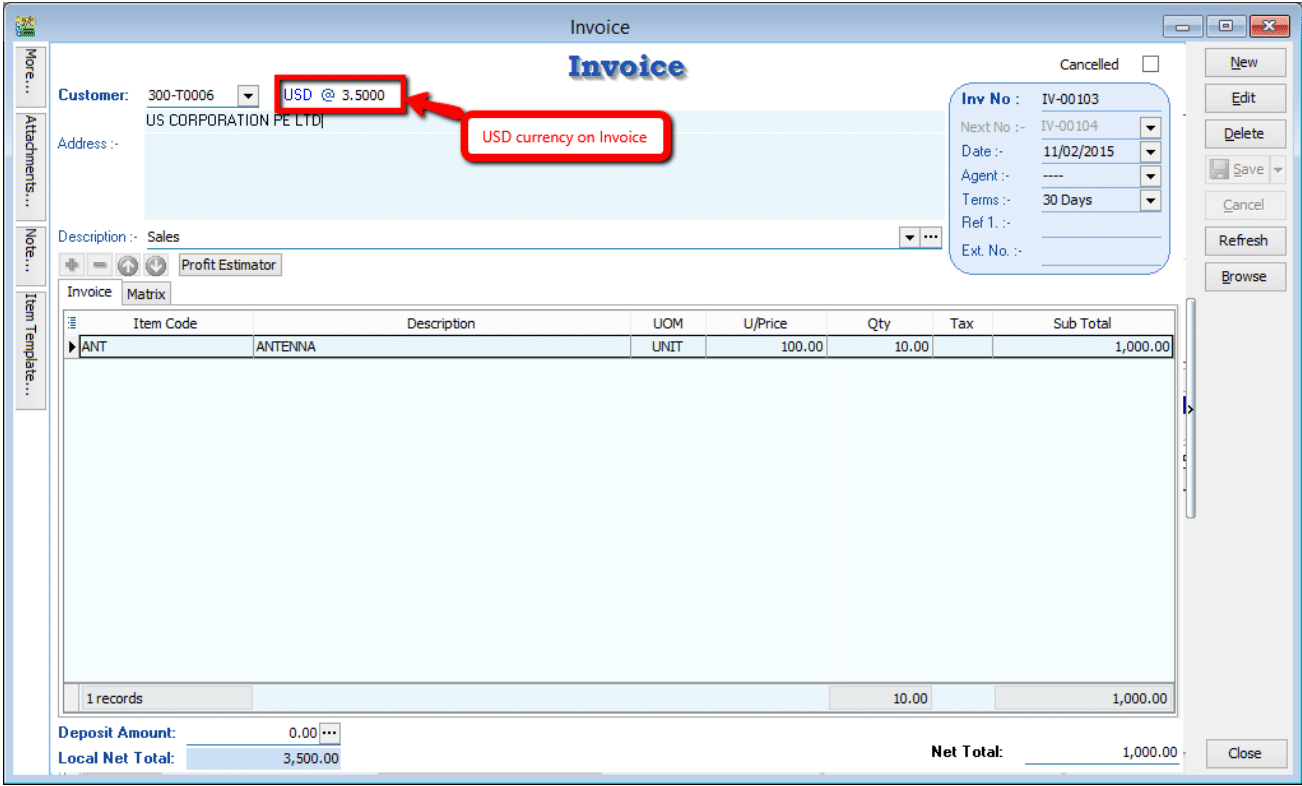
2. Customer Paid in USD & Payment Received in RM
Refer to Step 1 in Scenario 1 to know if the customer using USD currency.
-
Check the local amount and net total. Is it different with the previous one? If yes, proved that the document amount is in USD currency.
Sales > Invoice
-
Proceed to Payment
Customer > Payment
-
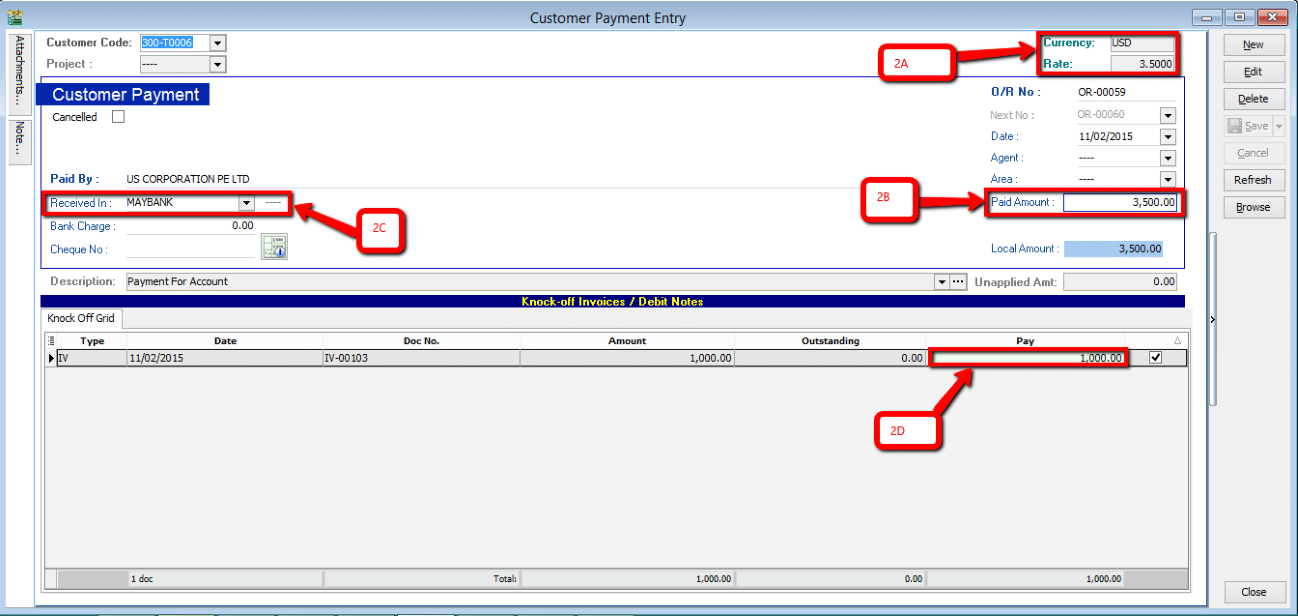
2A. Currency rate for knocking off the payment (System auto calculate)
-
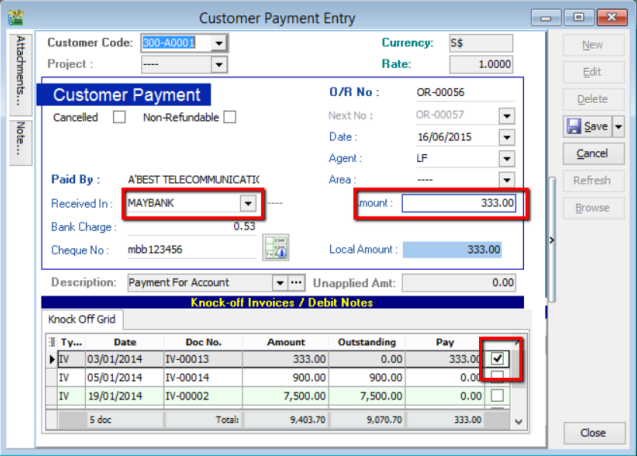
2B. Payment Amount made in RM (Note: This payment amount is based on Bank payment method currency) [check on Tools > Maintain payment method to know more!]
-
2C. Bank payment method, make sure you choose the correct bank.
-
2D. This pay amount you can either put it on your desire amount and check on the 2A, you’ll notice that currency rate will change once you try to knock off the amount.
-
3. Customer Paid in USD & Payment Received in USD
-
For this case where customer currency is USD and payment also in USD, there’ll be a few more step to do.
-
you need to maintain a USD Bank in GL Account (GL > Maintain Account) where this will be the bank you’ll be getting your payment in.
-
After maintained the GL Account, go to Tools > Maintain Payment Method to assign the currency of the payment method in the particular bank.
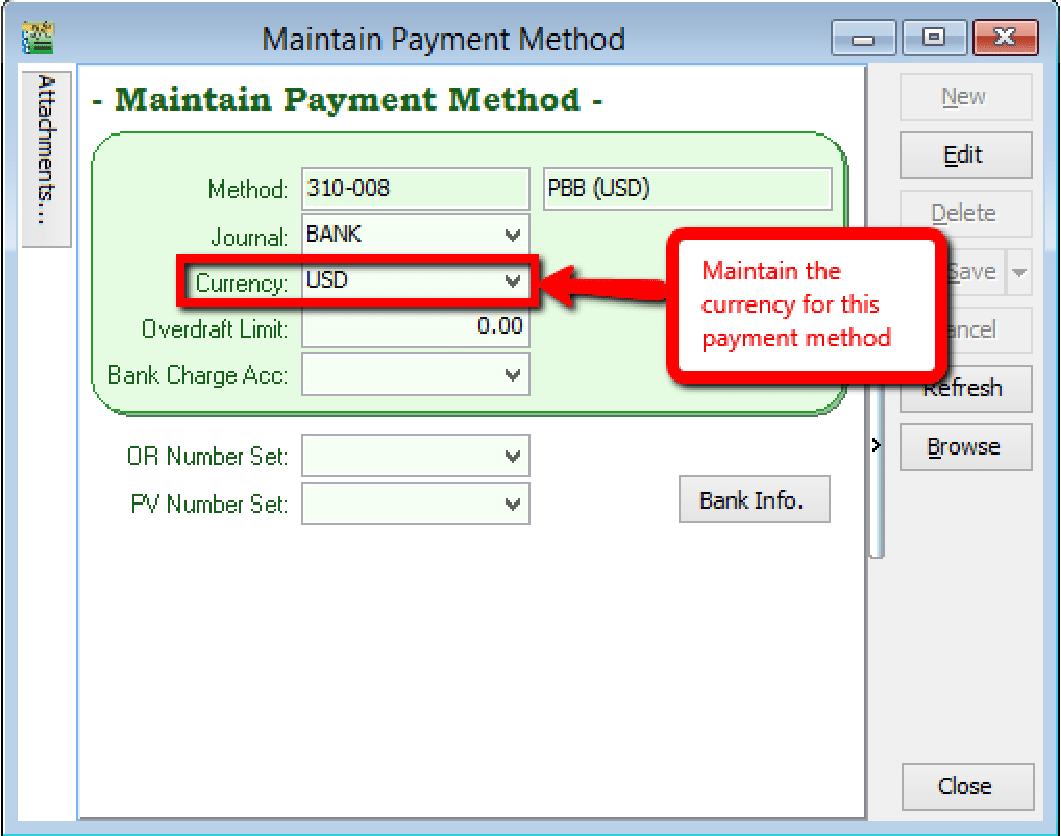
-
-
After maintained payment method, we can proceed to do transaction for cases similar (USD Currency on Invoice).
Sales > Invoice
-
Proceed to Payment
Customer > Payment
infoThe currency rate in the top-right corner can only be edited if the customer's currency matches the payment currency.

-
Now, this rate can be changed as the currency rate change according to the currency rate
-
Select the correct payment method in order to allow USD payment knocking off USD Invoice
-
Paid amount will be the amount of USD you receive
-
Local amount is the amount of conversion of (paid amount x currency rate at the moment)
-
This IV amount will always be following the currency amount not local amount.
After confirming all the related info is correct may save it. If your currency rate is different from the one stated in the Invoice, a message should prompt out defining your gain/loss on foreign exchange.
 note
noteIf your Invoice currency is stated 3.5 at the moment, and when your customer pay to you on 3.6 rate, the system will auto calculate the amount of gain/loss you actually got from this transaction and show to you the amount when you click save. Above prompt dialog will appear.
-
4. Customer Paid in USD & Payment Received in SGD
For customer on USD and receiving payment on different currency you just need to main the payment method.
How to maintain payment method? – Refer to Scenario 3
Payment Listing Commission
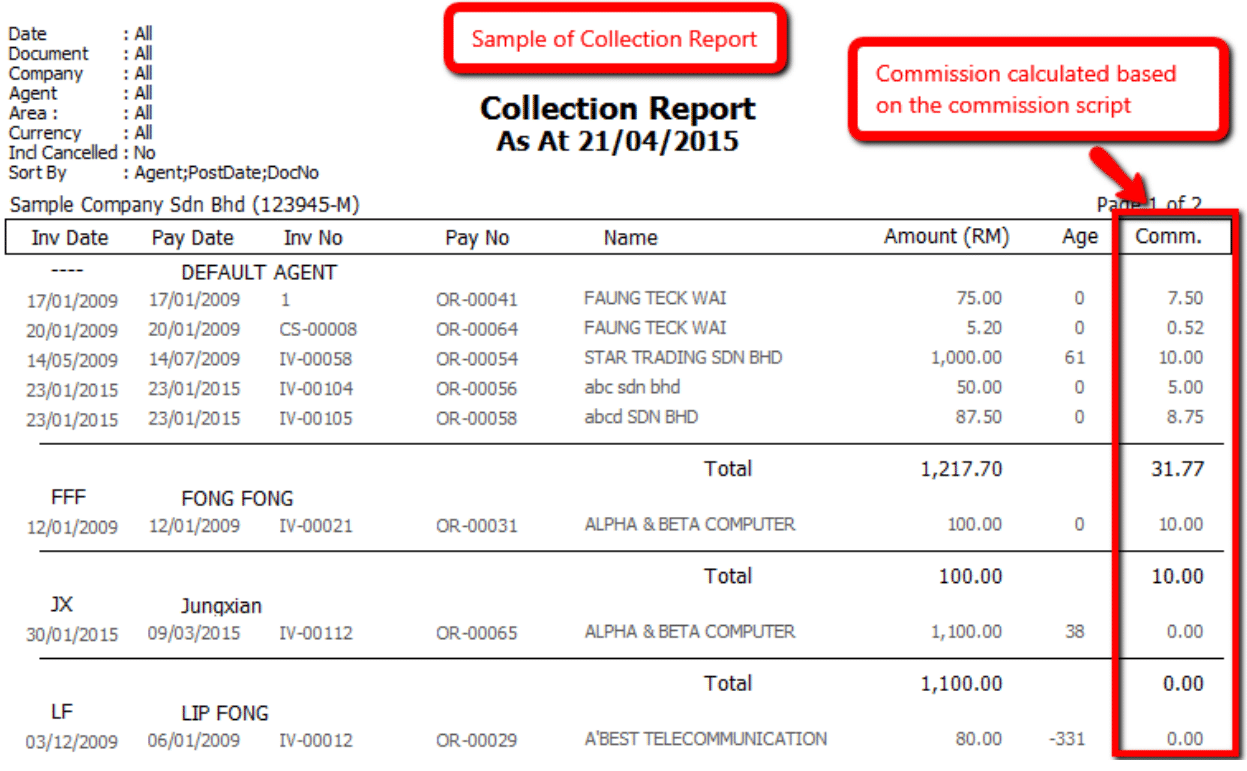
Guideline: Commission Report
-
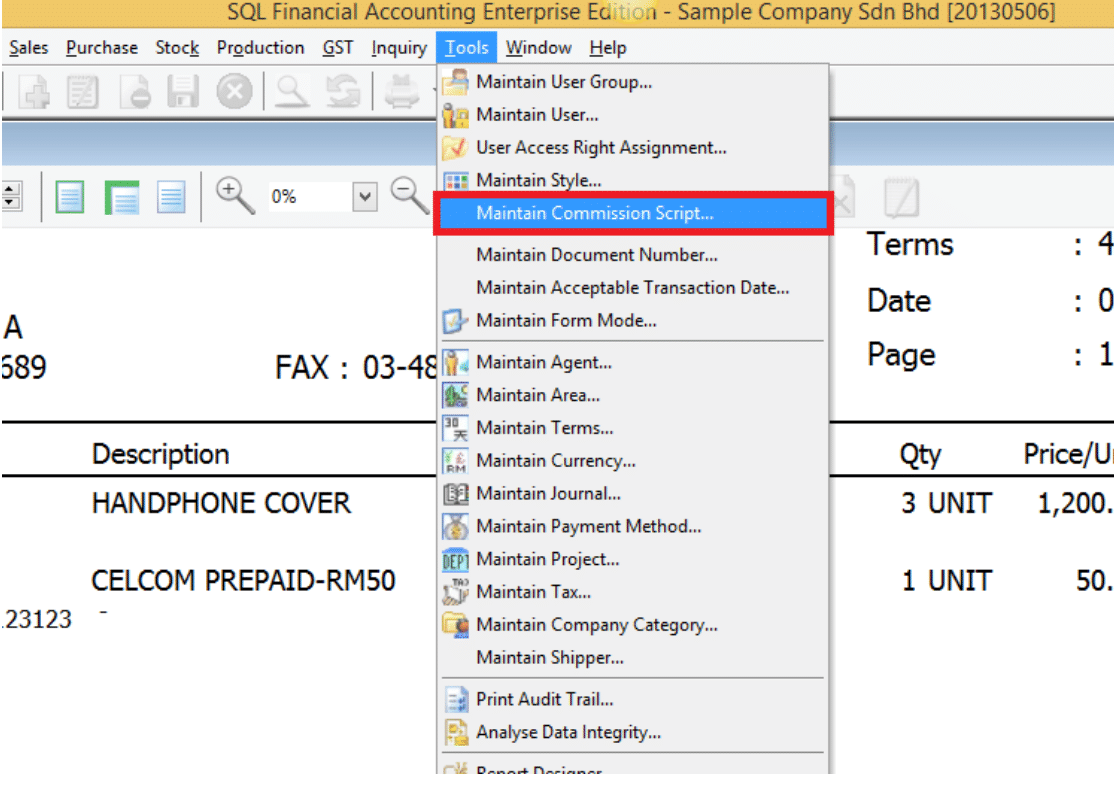
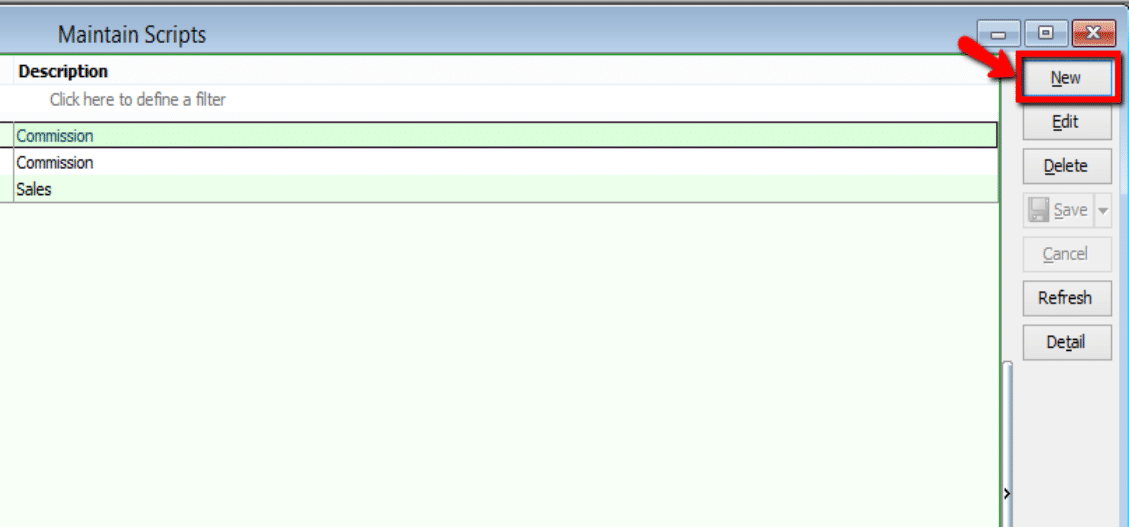
Go to Tools > Maintain Commission Script > New to add in the commission script. Fill in the Code and Description.
noteMaintain Commission Script requires additional module
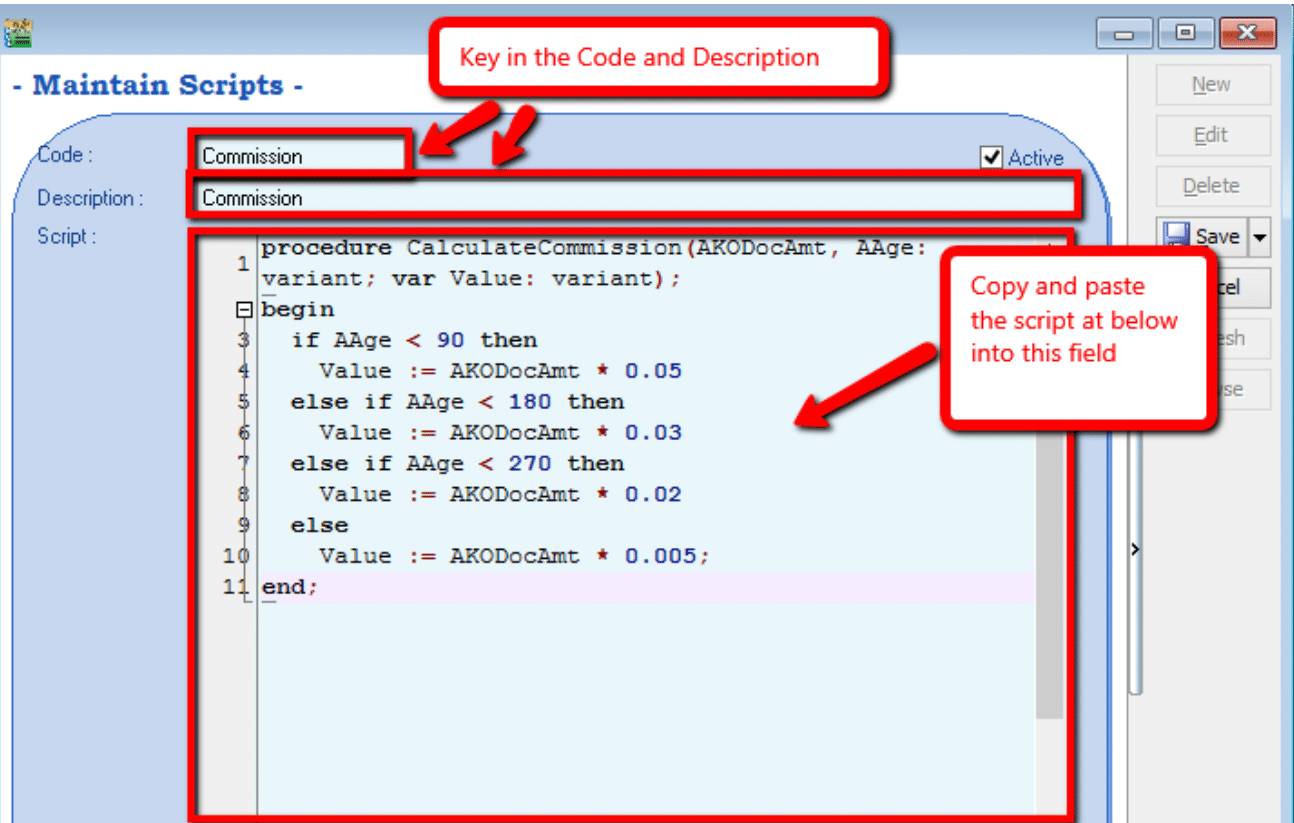
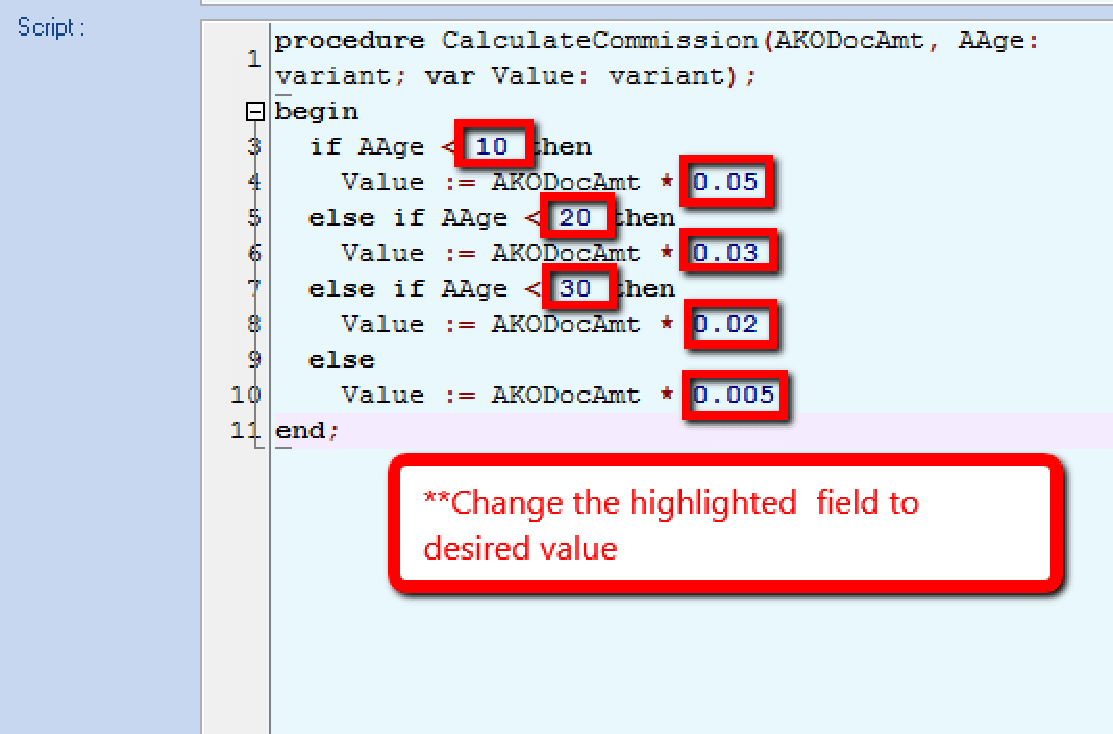
Default commission script:
procedure CalculateCommission(AKODocAmt, AAge: variant; var Value: variant);
begin
    if AAge < 10 then
        Value := AKODocAmt * 0.05
    else if AAge < 20 then
        Value := AKODocAmt * 0.03
    else if AAge < 30 then
        Value := AKODocAmt * 0.02
    else
        Value := AKODocAmt * 0.05005;
end; -
Change the value highlighted as below according to commission rate for agent and Save.
-
Value 10, 20, 30 = Age
-
Value 0.05, 0.03, 0.02, 0.005 = Commission Rate
-
-
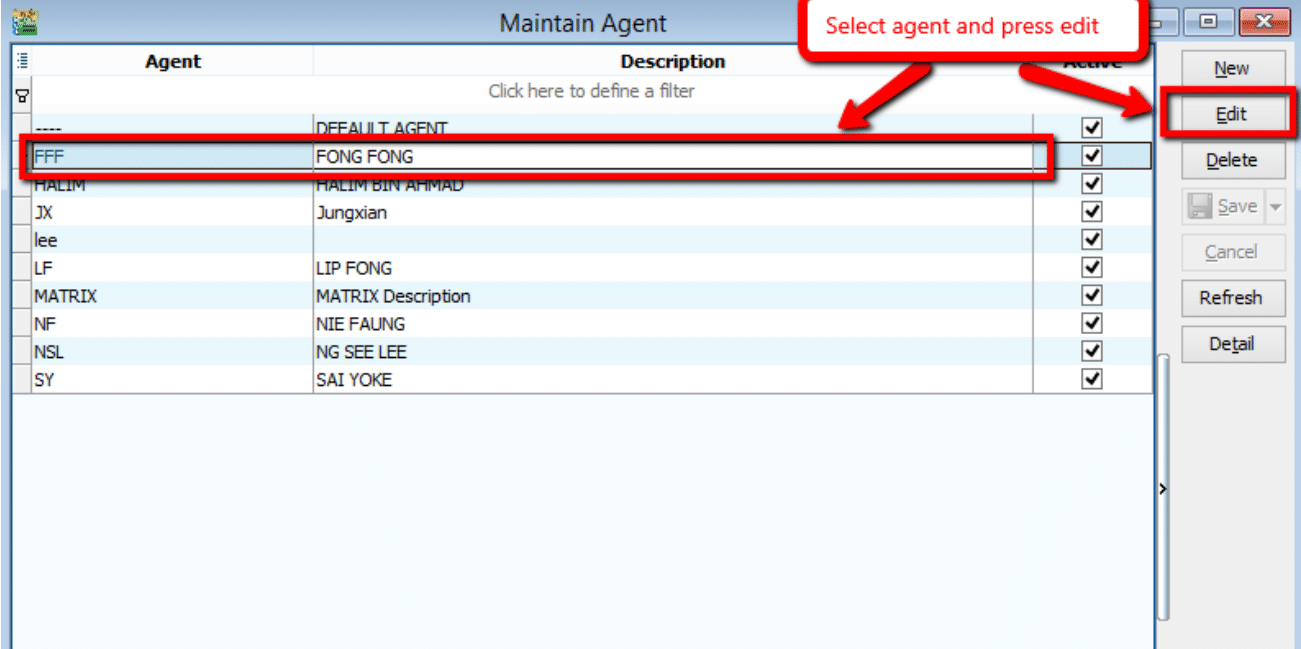
Go to Tools > Maintain Agent and select the agent that need to load the commission script.
-
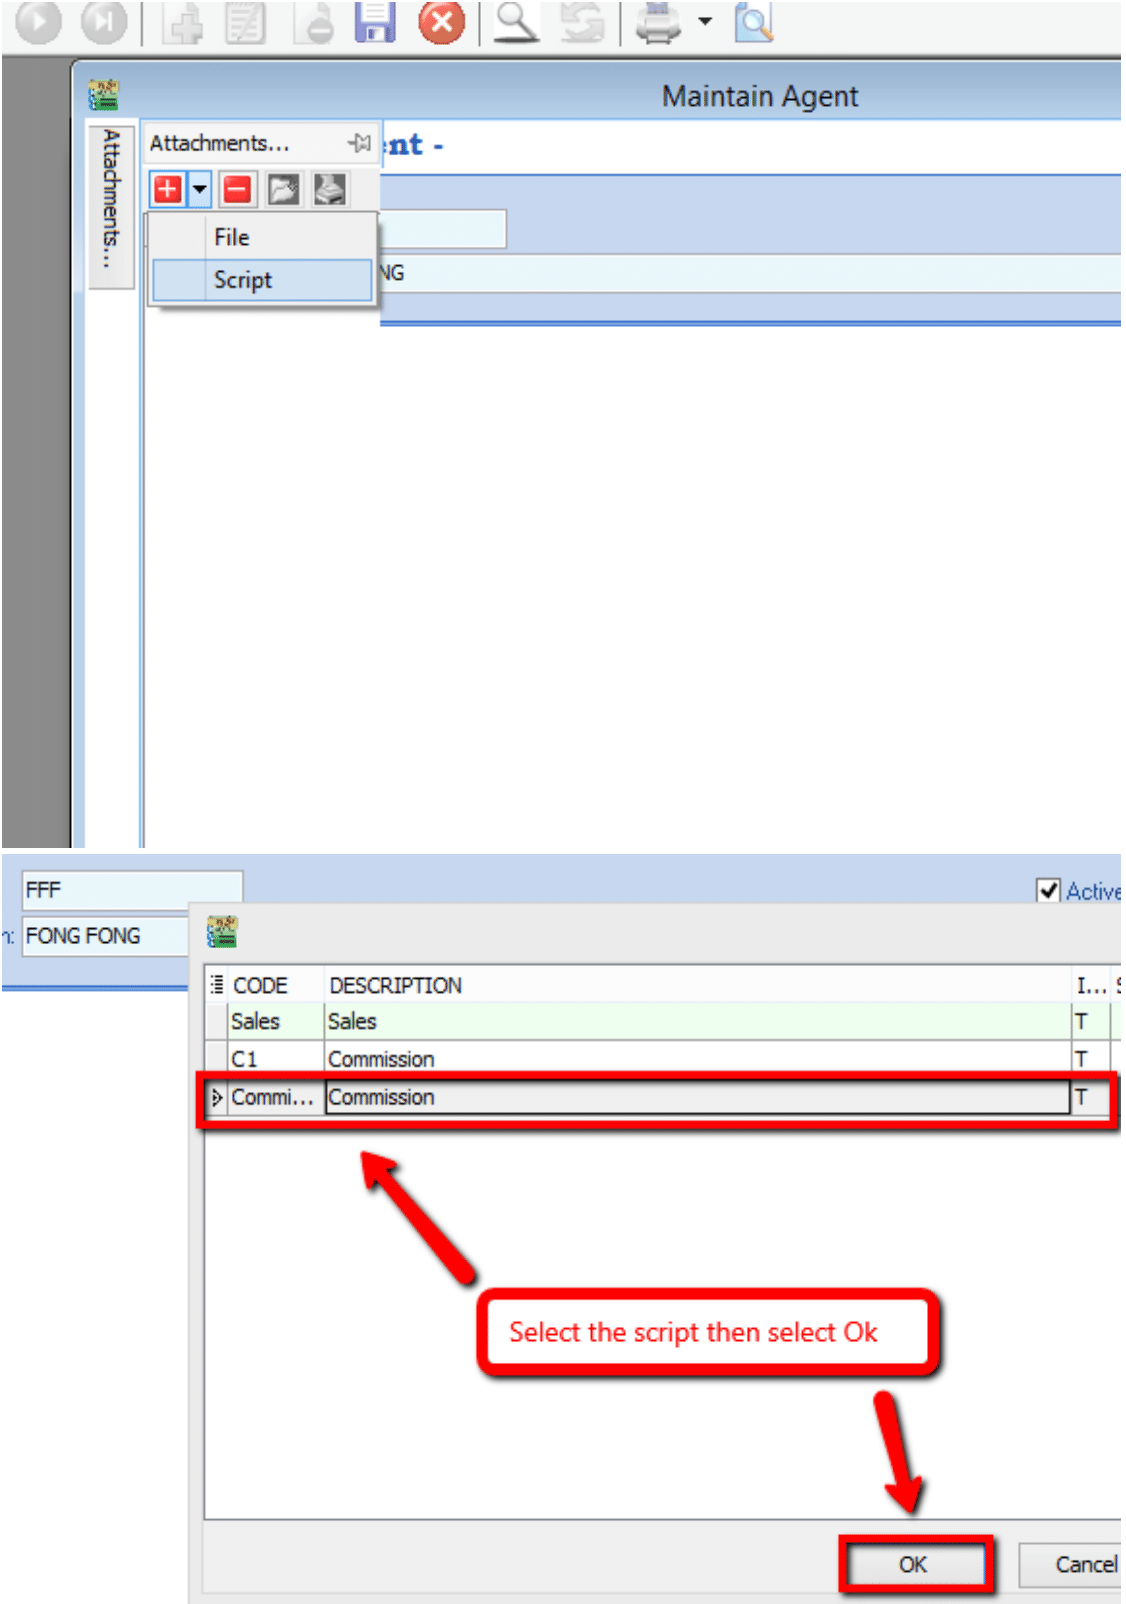
At the attachment tab, add in the commission script by selecting it as shown below and click Save after adding the script.
-
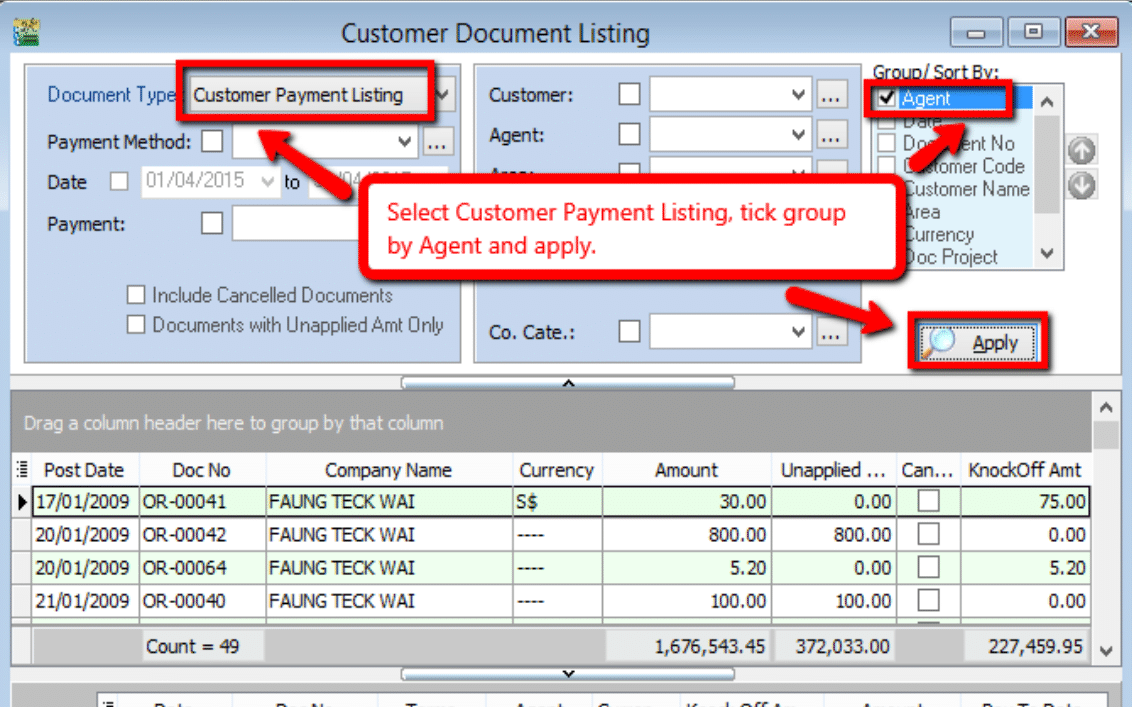
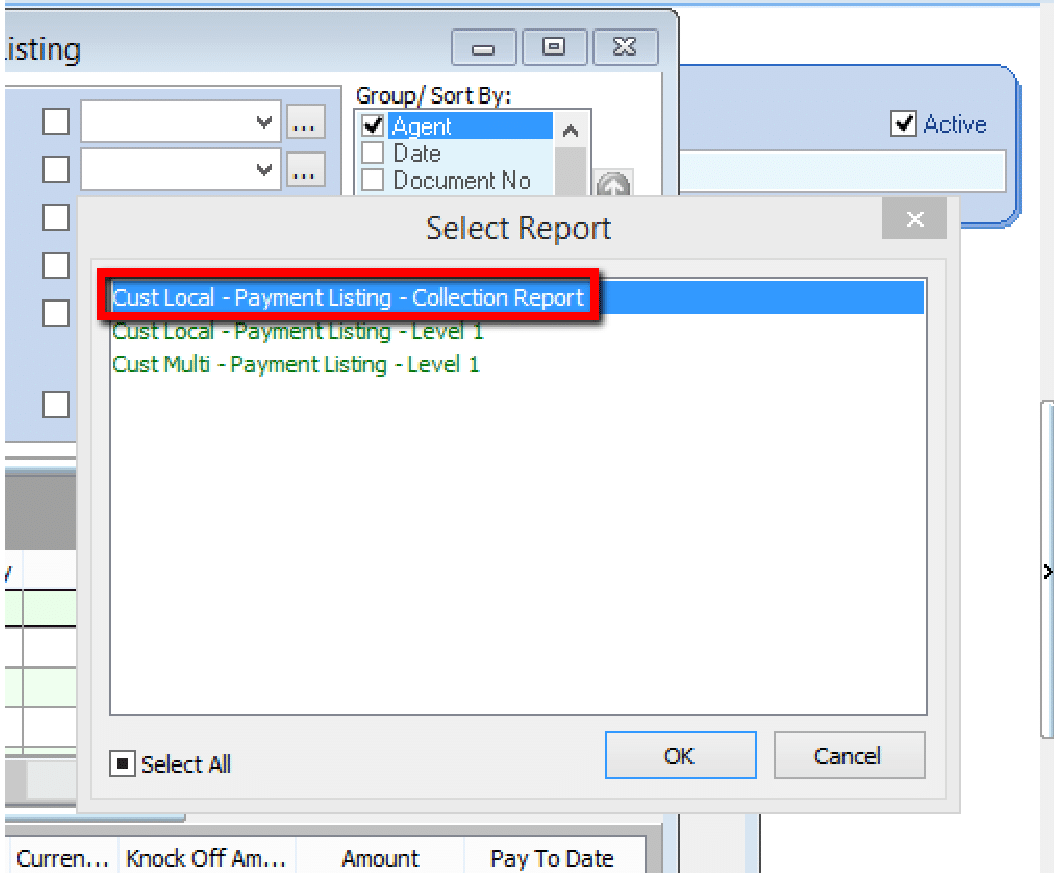
Go to Customer > Print Customer Document Listing, select Document Type as Customer Payment Listing, group by Agent and apply. Preview the result with Cust Local - Payment Listing - Collection Report.
Post-dated & Bounced Cheque
Post-dated Cheque
Post-dated cheque is a cheque written by the drawer (payer) for a date in the future.
-
Firstly, go to Customer > Customer Payment.

-
Click on New to create a new customer payment.
-
As usual, create a customer payment and tick to knock off the corresponding invoice. Make sure the bank account and amount is correct.
-
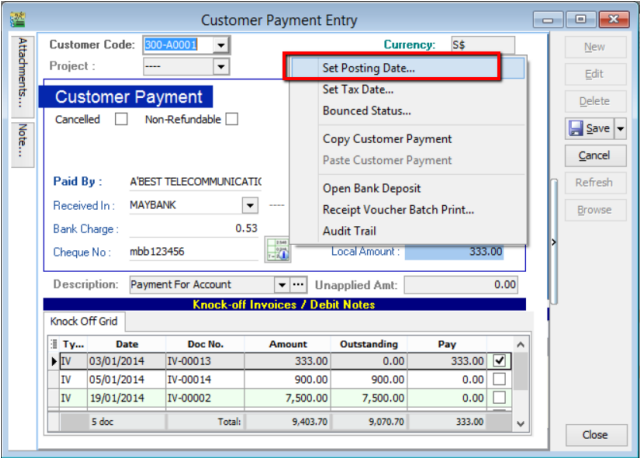
To set the payment as a post-dated cheque, simply point the cursor to the blank space beside Customer Payment and right click. Click into Set Posting Date.
-
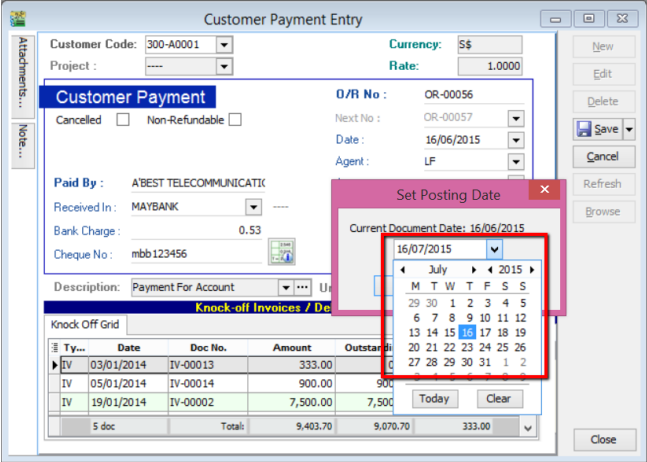
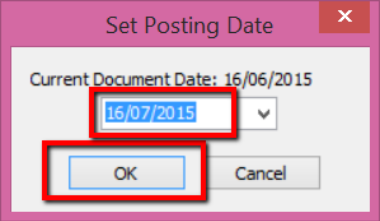
Select the actual posting date of the cheque (e.g., 16th of July 2015). Then, click OK.
-
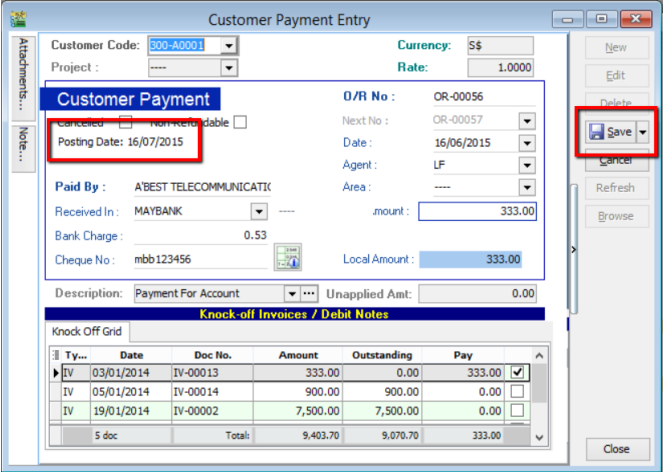
Now, you will see the posting date is clearly stated in the system. Click Save.
-
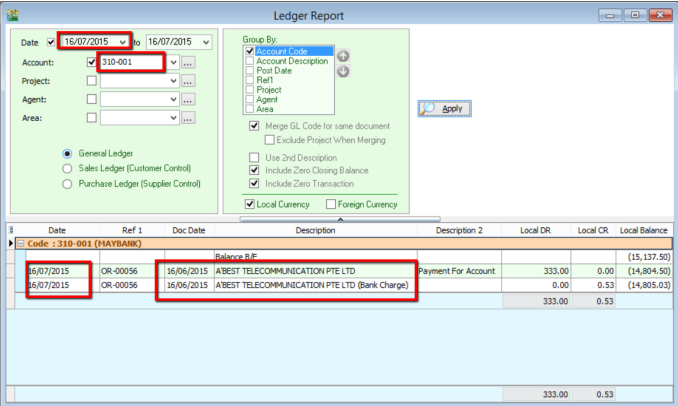
From ledger report, by selecting the posting date and corresponding account, you will see that the document date and transaction is clearly stated.
-
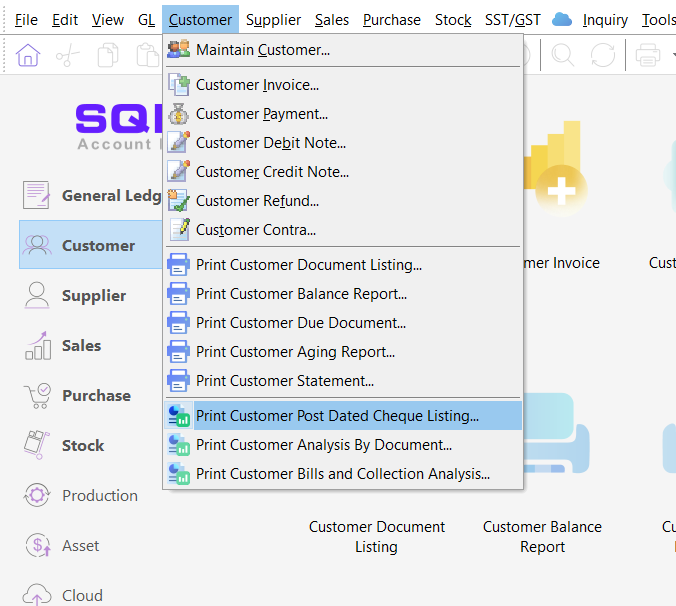
To view the listing of post-dated cheques. Go to Customer Reports and select Print Customer Post Dated Cheque Listing.
-
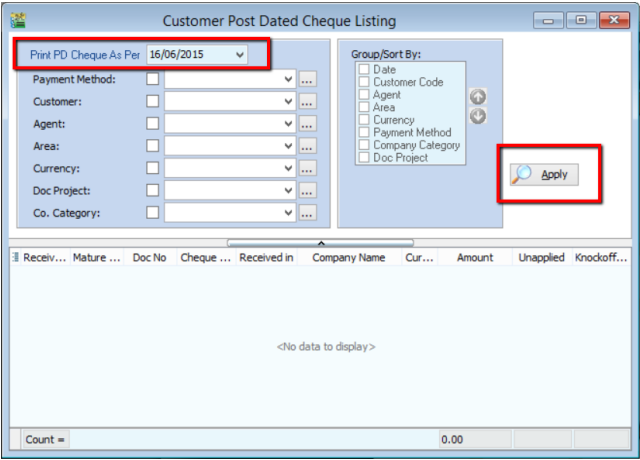
Select the date of the payment made (NOT the cheque posting date), and click Apply. (You can filter the search by payment method, customer, agent and etc. before clicking Apply)
-
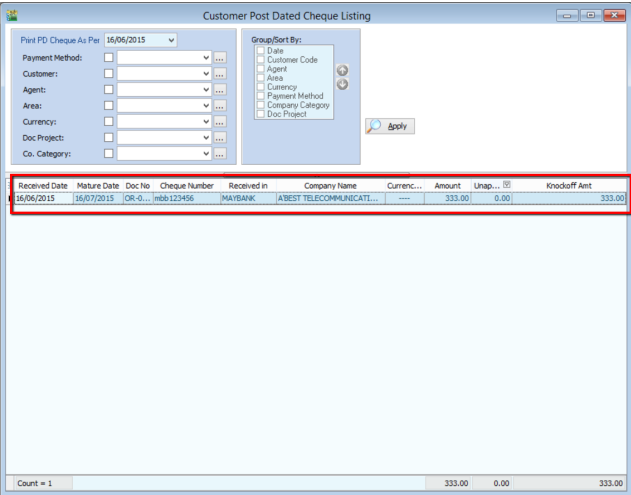
Upon clicking the Apply button, a list of post-dated cheque will be displayed
Bounced Cheque
A bounced cheque is a cheque that cannot be processed because the payer has insufficient funds or written wrong / incomplete information on the cheque.
-
Firstly, go to Customer and click into Customer Payment.
-
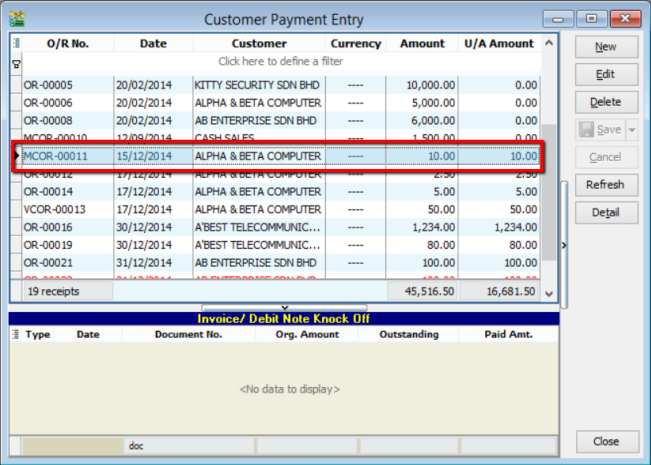
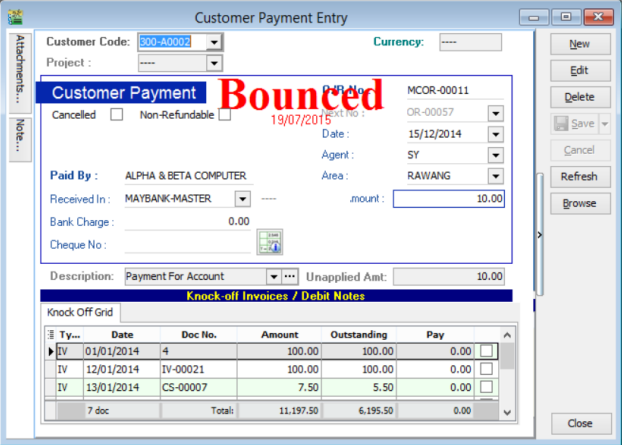
Select the bounced cheque customer payment. Double click into the document.
-
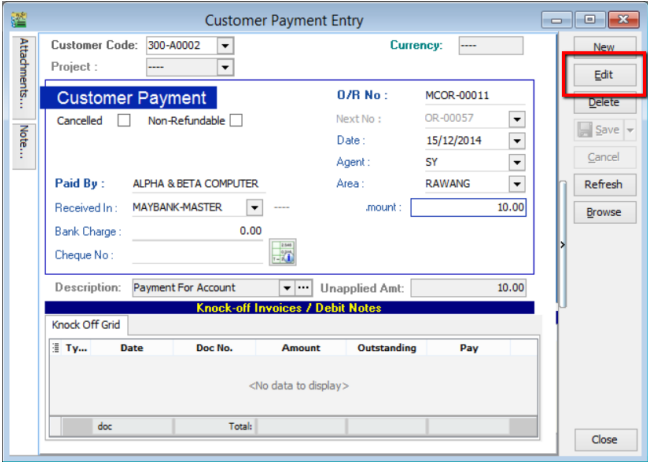
Click Edit.
-
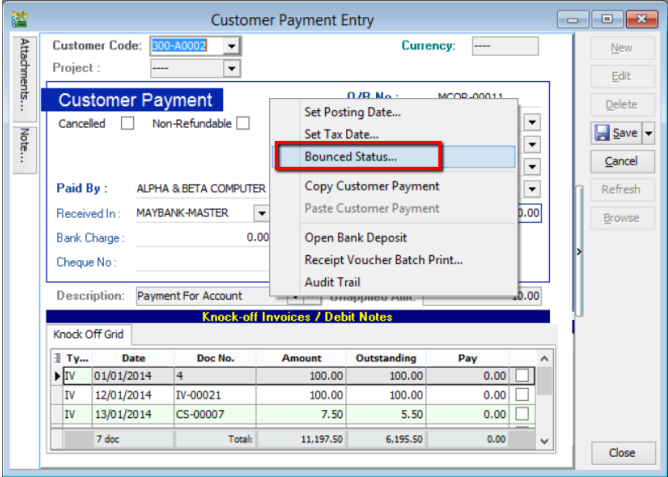
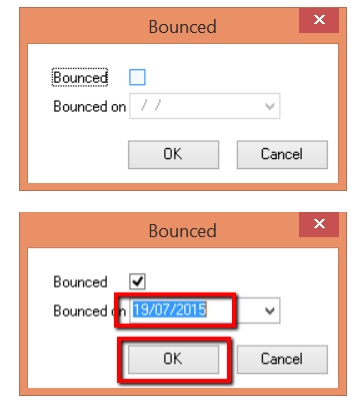
To set the payment as a bounced cheque, simply point the cursor to the blank space beside Customer Payment and right click. Click into Bounced Status.
-
Tick in checkbox to bounce the payment. And set the bounce date. (For this case, the cheque is posted on 16th of July 2015, thus the bounce date should be later that 16th of July 2015). Click OK.
-
The cheque will then be labelled as bounced, and the bounce date will be clearly stated. Then click Save.
-
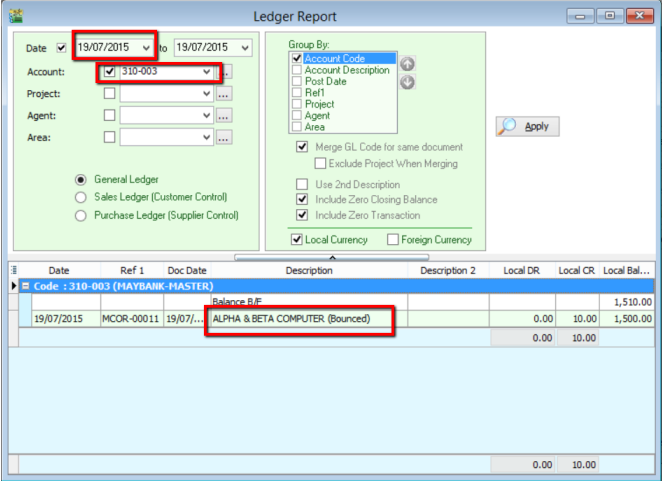
From ledger report, by selecting the bounce date and the corresponding account, you can clearly see the transaction is bounced.
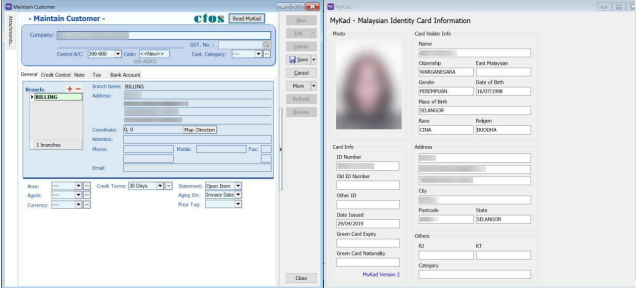
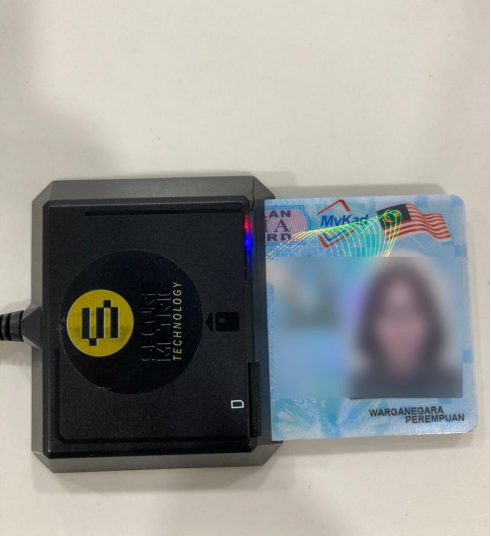
MyKad Reader
Read Customer Info using MyKad Reader
-
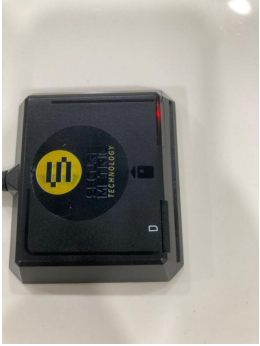
Link your Smart Card Reader to your computer.
-
The reader will display a red light when successfully linked to your computer.
-
Put MyKad into reader
-
The reader will display a blue light when it successfully reads your MyKad.
-
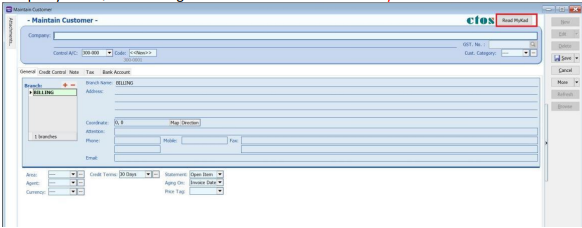
Open your SQL Accounting New Customer Profile > Read MyKad
-
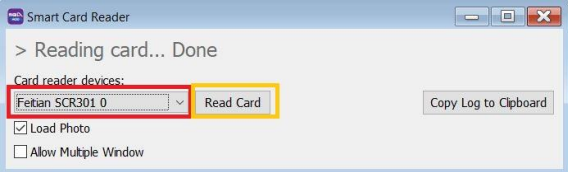
Select Reader Devices > Click Read Card
-
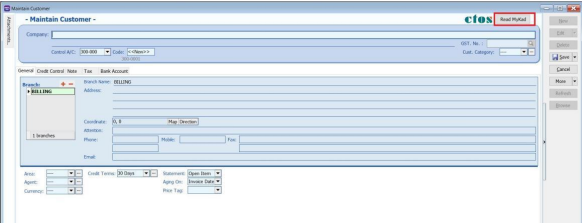
Click Read MyKad
-
The system will automatically fill in MyKad details (NAME , ADDRESS , ID Number)