FAQ
Can I set my first year financial period longer than 12 months (e.g., 18 months)?
Yes. You can set your first financial period for more than 12 months (e.g., from 1st July 2014 to 31st December 2015).
DIY Fields FAQ
DIY Fields FAQ - click to expand
Can I show the detail fields in Header?
Yes , but with the following condition
- Only available in Advance Form Design
- The Data will change/run base on the last selected Record in the Detail Grid
-
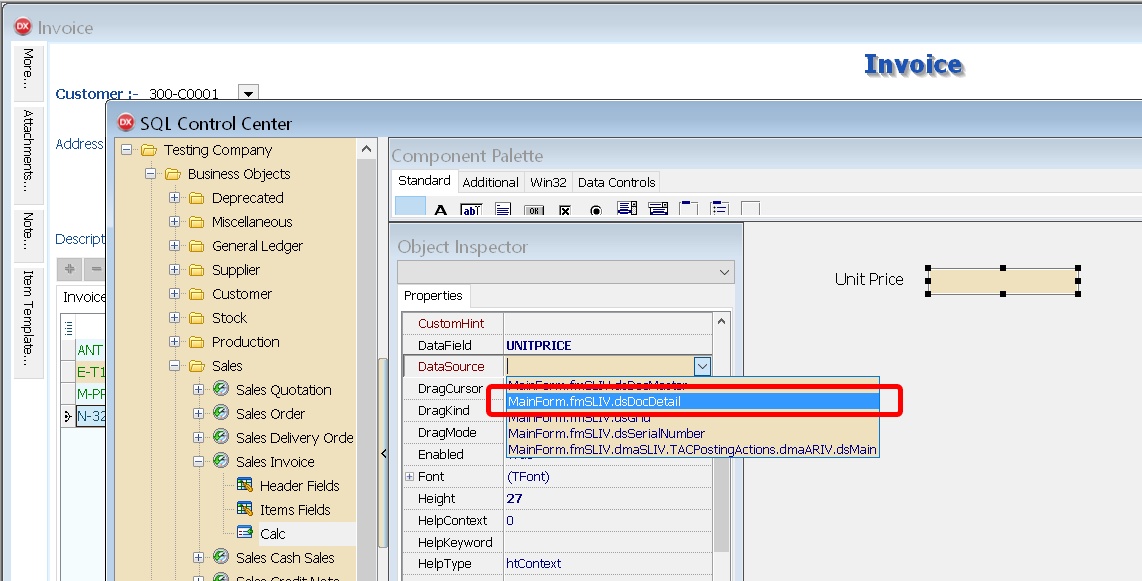
Open the Form you want to Add (eg Sales > Sales Invoice)
-
Open the Advance form
-
Design as usual except you need to select DataSource
-
Select the XXXXX.YYYYY.dsDocDetail
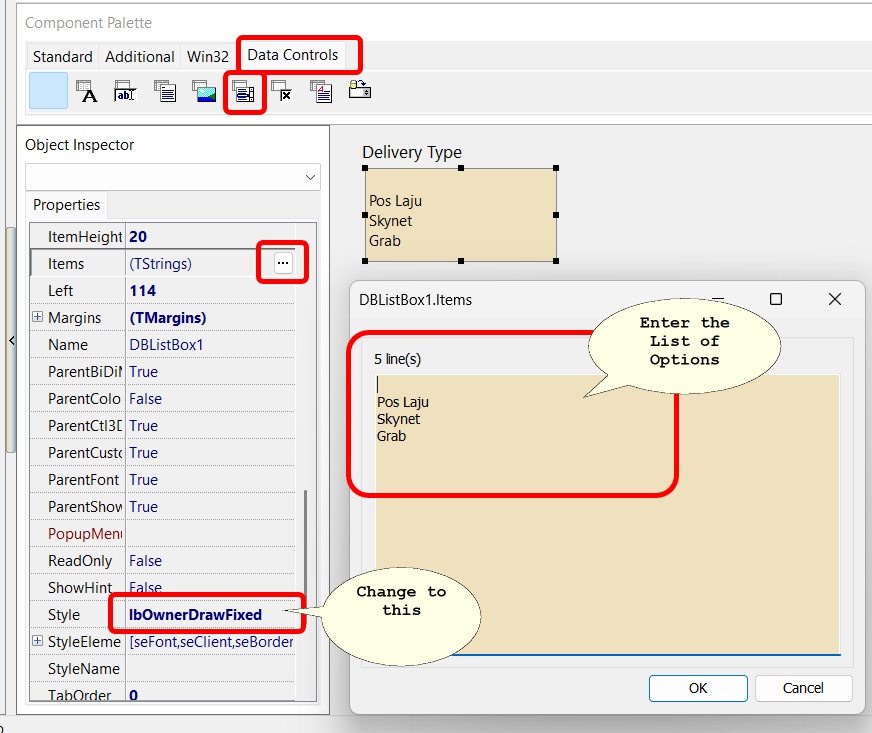
Can I have option selection for 1 UDF?
Yes , using Advance Form Design
Steps :
-
Open the Form you want to Add (eg Sales | Sales Delivery Order)
-
Open the Advance form
-
Design as usual for Label
-
For the UDF you wanted to have option
Set First Year Account more than 12 Months
Set First Year Account more than 12 Months - click to expand
-
This guideline is to guide how to setup your first year account if it is more than 12 month , below example given is first year account in 18 months.
-
First financial period will in 18 month from 1st July 2014 to 31st December 2015.
You are advised to set your financial start period and system conversion date as below.
Setup:
-
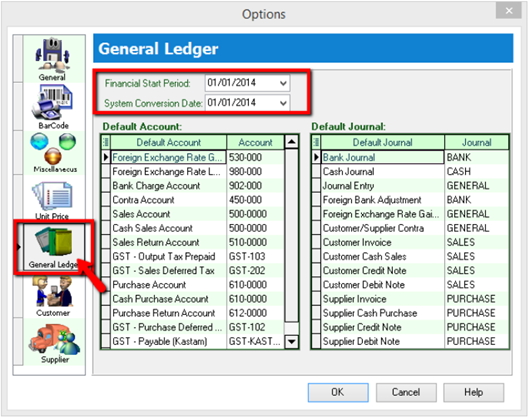
Go Tools > Option > General Ledger
- Set your financial start period and system conversion date as 1/1/2014, so in the following year, you do not need to run year end to set again your financial start period & System conversion date.
-
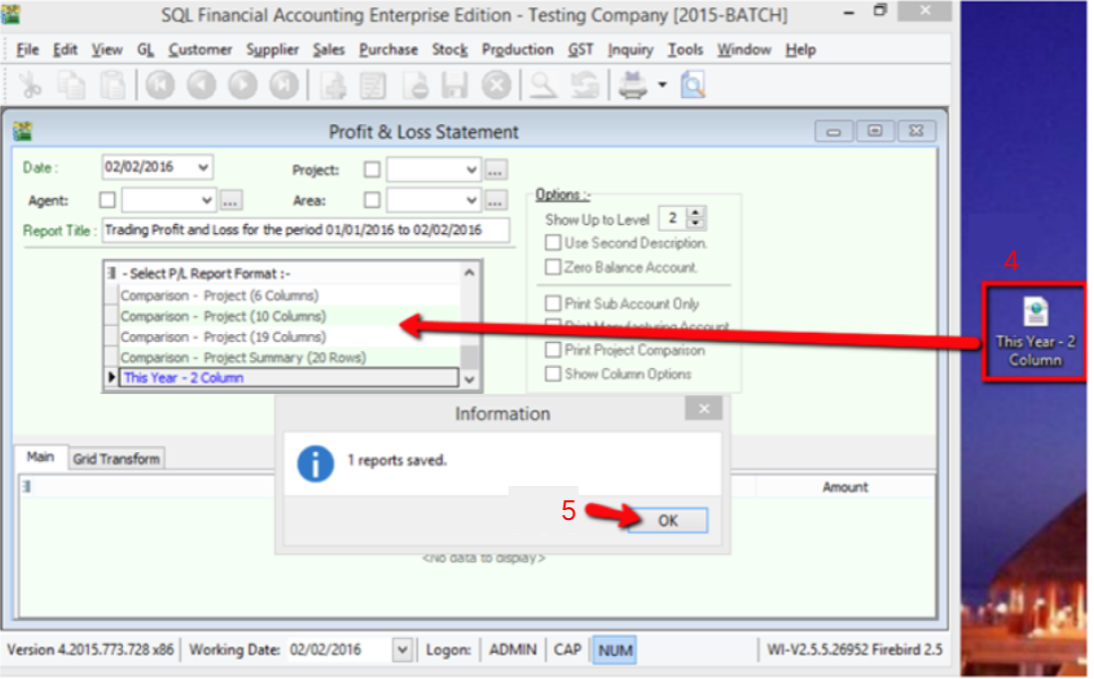
Set profit & loss statement print in 18 months
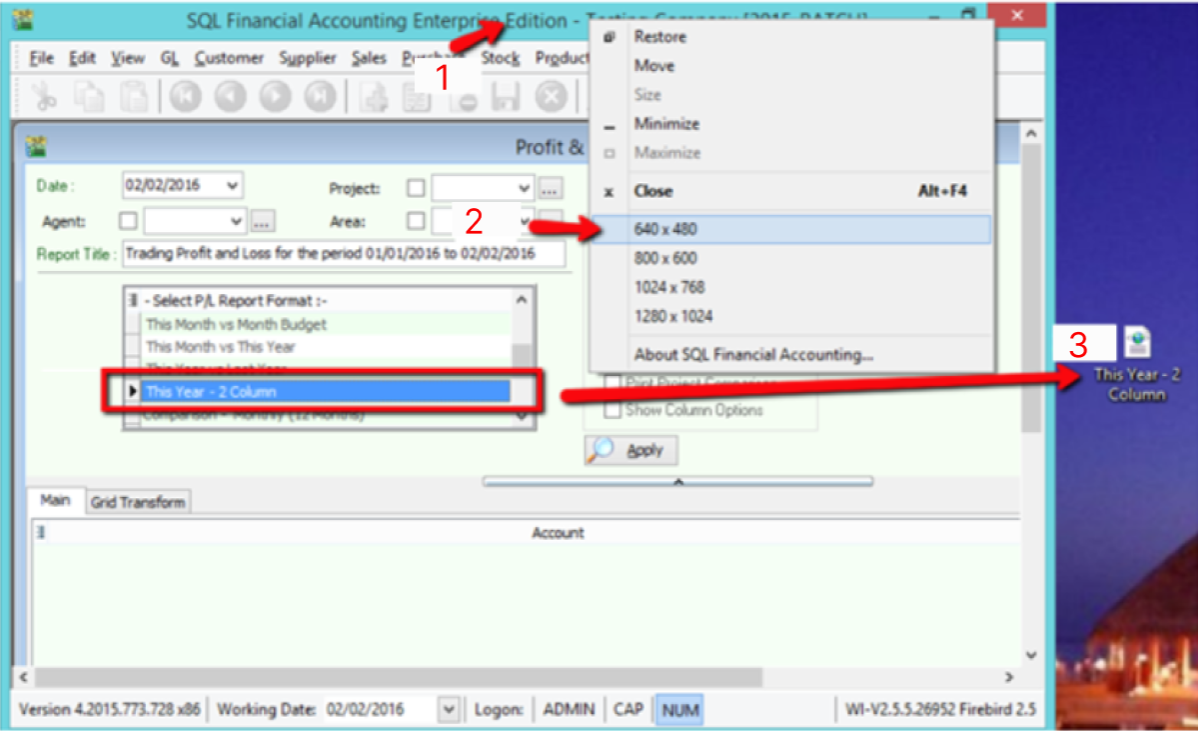
-
Right click as pointed
-
Select 640 x 480 to make your SQL Screen smaller
-
Highlight report name “this year-2column” click and drag it to desktop
-
From desktop click the report “This Year-2Column” drag it back to SQL report section.
-
Click ok
-
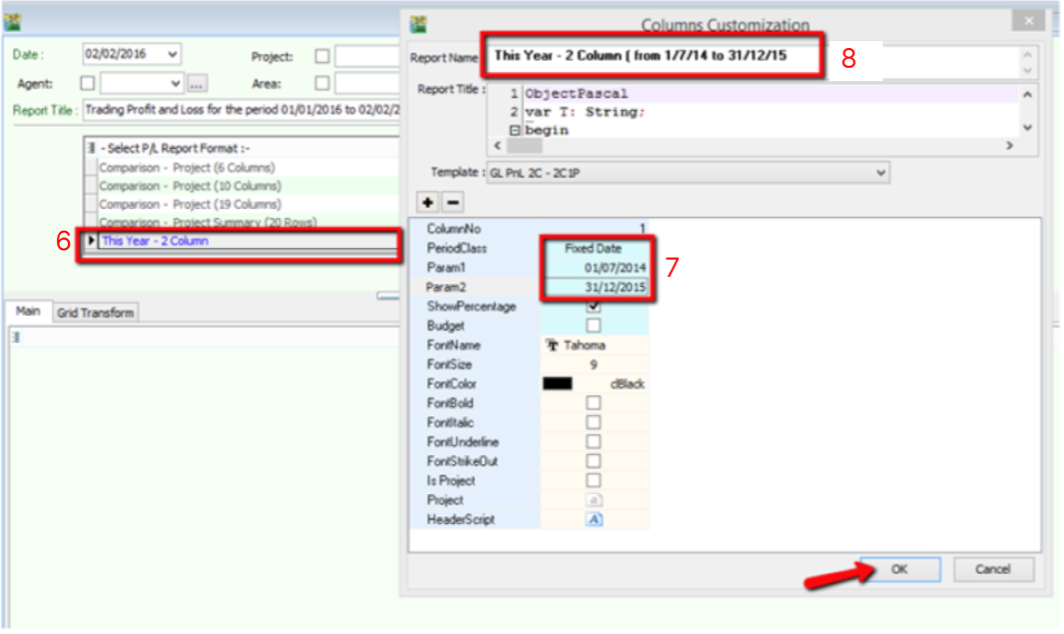
Double click on the new report name “ This year 2 column” in blue color.
-
Change Period Class to Fixed Date
- Param 1 = Date from eg 1/7/2014
- Param 2 = Date to eg 31/12/2015
-
You can insert a report name for you easy to differentiate.
-
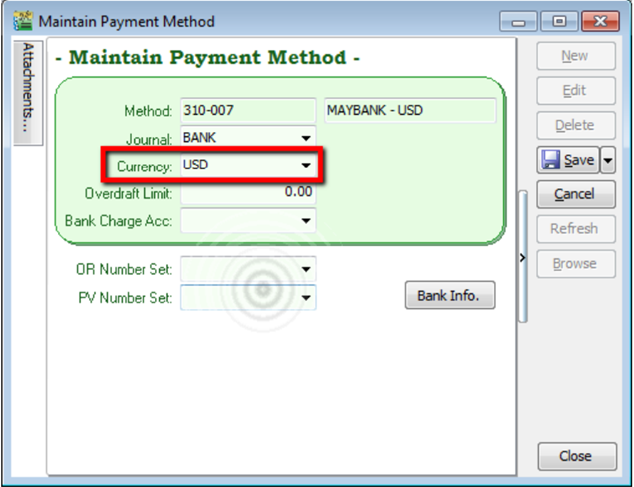
Advanced Currency Module
Advanced Currency Module- click to expand
This module is required if you use foreign banks.
Related: Payment from Foreign Customer
Setup Foreign Currency Payment Method
Steps
-
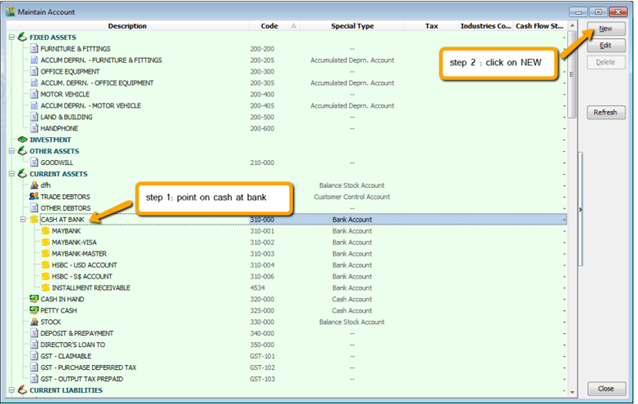
GL > Maintain Account
-
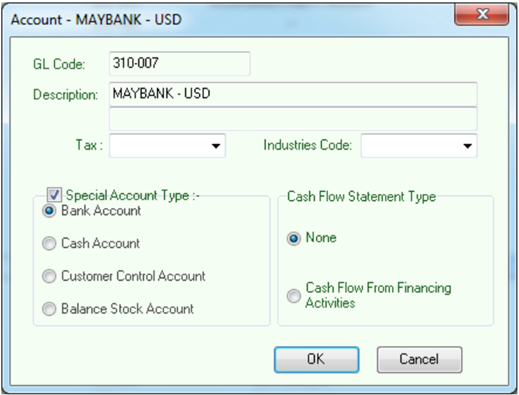
Create your bank respectively
-
Tools > Maintain Payment Method
How do I record transactions in a foreign bank account?
Why can’t I receive payment from a foreign customer in their currency?
How do I handle supplier payments in USD, EUR, etc.?
Do I need to activate any module to use foreign currency in SQL Accounting?
Why does my system show error when applying exchange rate in payment?
These questions goes to one solution , which is Advanced Currency Module
Can I auto-post exchange gain/loss when using foreign banks?
Yes, via Advanced Currency Module and Gain/Loss setup
What is SQL Global Price Change and when should I use it? → SQL Global Price Change
Can I update prices for only specific stock groups or categories? → SQL Global Price Change by category
How to do Customer One Cent Rounding ?
One Cent (0.01$) difference Rounding(Local Currency Fields) for all AR/SL(Subsidiary Ledger) Documents
Setup:
-
Go to Tools > Option > Customer
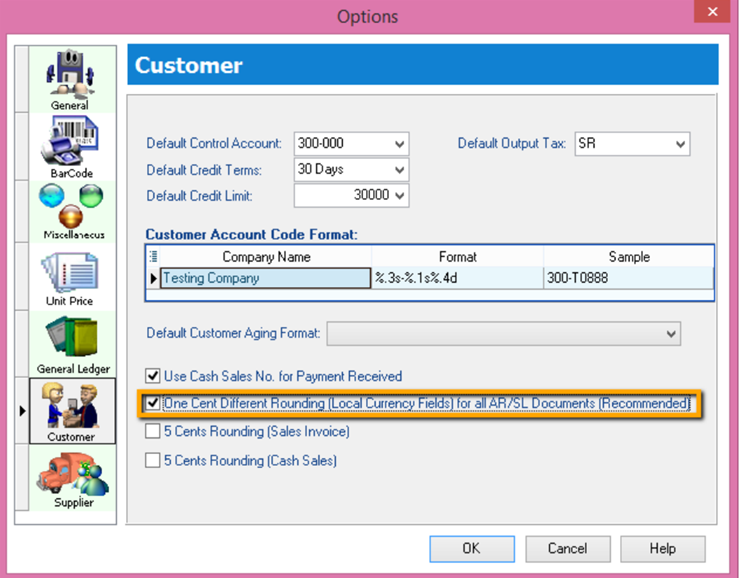
-
Tick One Cent Different Rounding (Local Currency Fields) for all /AR/SL Documents (Recommend)
-
Press OK
-
-
Sales Invoice > New > Refer below screen
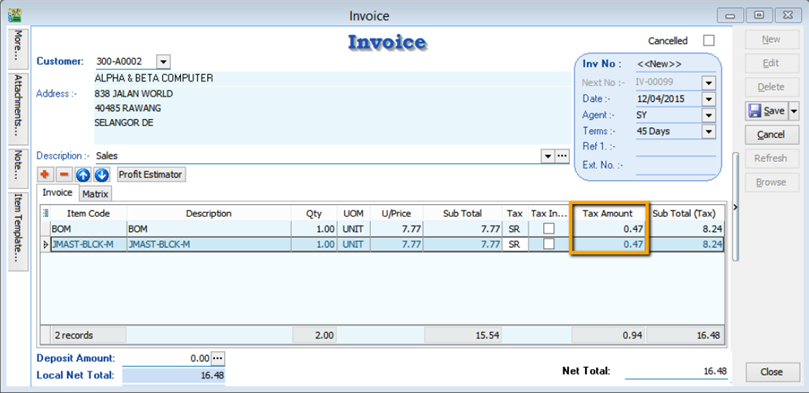 caution
But once you save you will notice the first line of the Tax Amount will be different, this is because system using Total Amount of IV to calculate 6%. Refer below Screen:
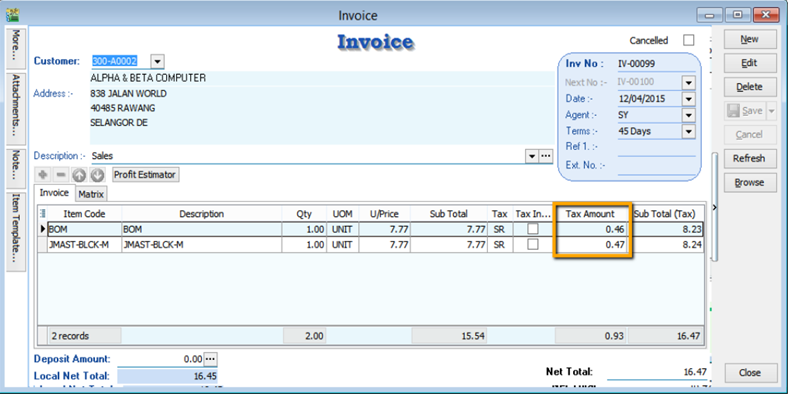
Formula: Sum up SubTotal with Tax, Multiple with 6% (Note : system will exclude the Subtotal if the Tax Rate is 0%)
Tax Amount Calc = RM 15.54 * 6% = 0.93, mostly system will reverse on first line of the Item.
noteIf you don’t want system to help you to do the One Cent Rounding, please refer Step 1 to un-tick the option will do.
How to do Password Policy (with 2 Steps Verification) ?
Password Policy Setup
Go to menu : Tools > Options… click on Password Policy.
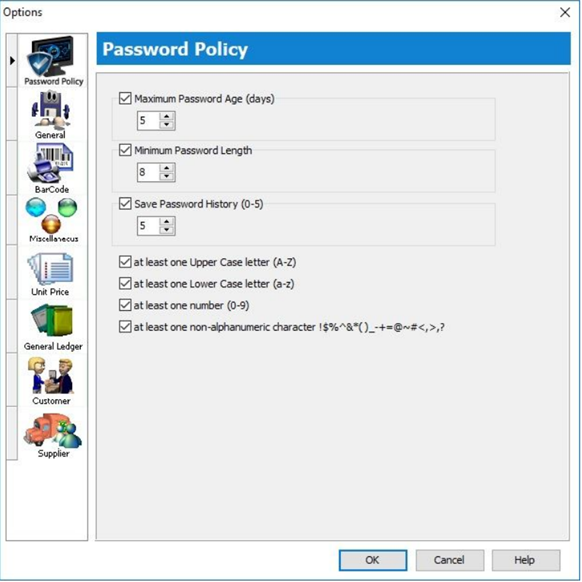
You can choose the following password requirements:
- Maximum Password Age (days): number of days to expire and change password.
- Minimum Password Length: password length cannot less than the minimum,eg. 8.
- Save Password History (0-5): number of password history not allow to re-use
- Password combination of
- At least one Upper Case letter (A-Z)
- At least one Lower Case letter (a-z)
- At least one number (0-9)
- At least one non-alphanumeric character !$%^&*()_-+=@~#<,>.?
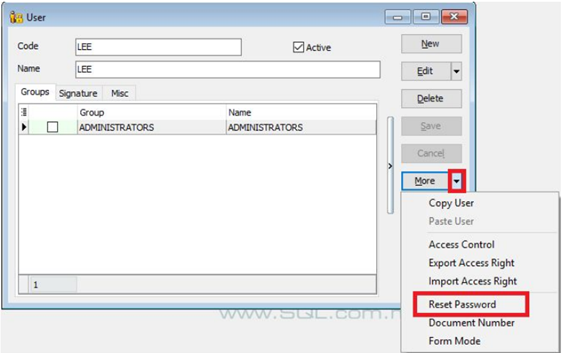
How to reset password for user ?
-
Go to menu : Tools > Maintain User.
-
Click on More (arrow key down), click Reset Password.
-
New password auto generated.
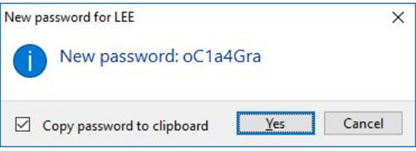
-
Press Yes (Copy password to clipboard = Tick).
-
You can press Ctrl + V to paste the New Password into an email and send to the new user.
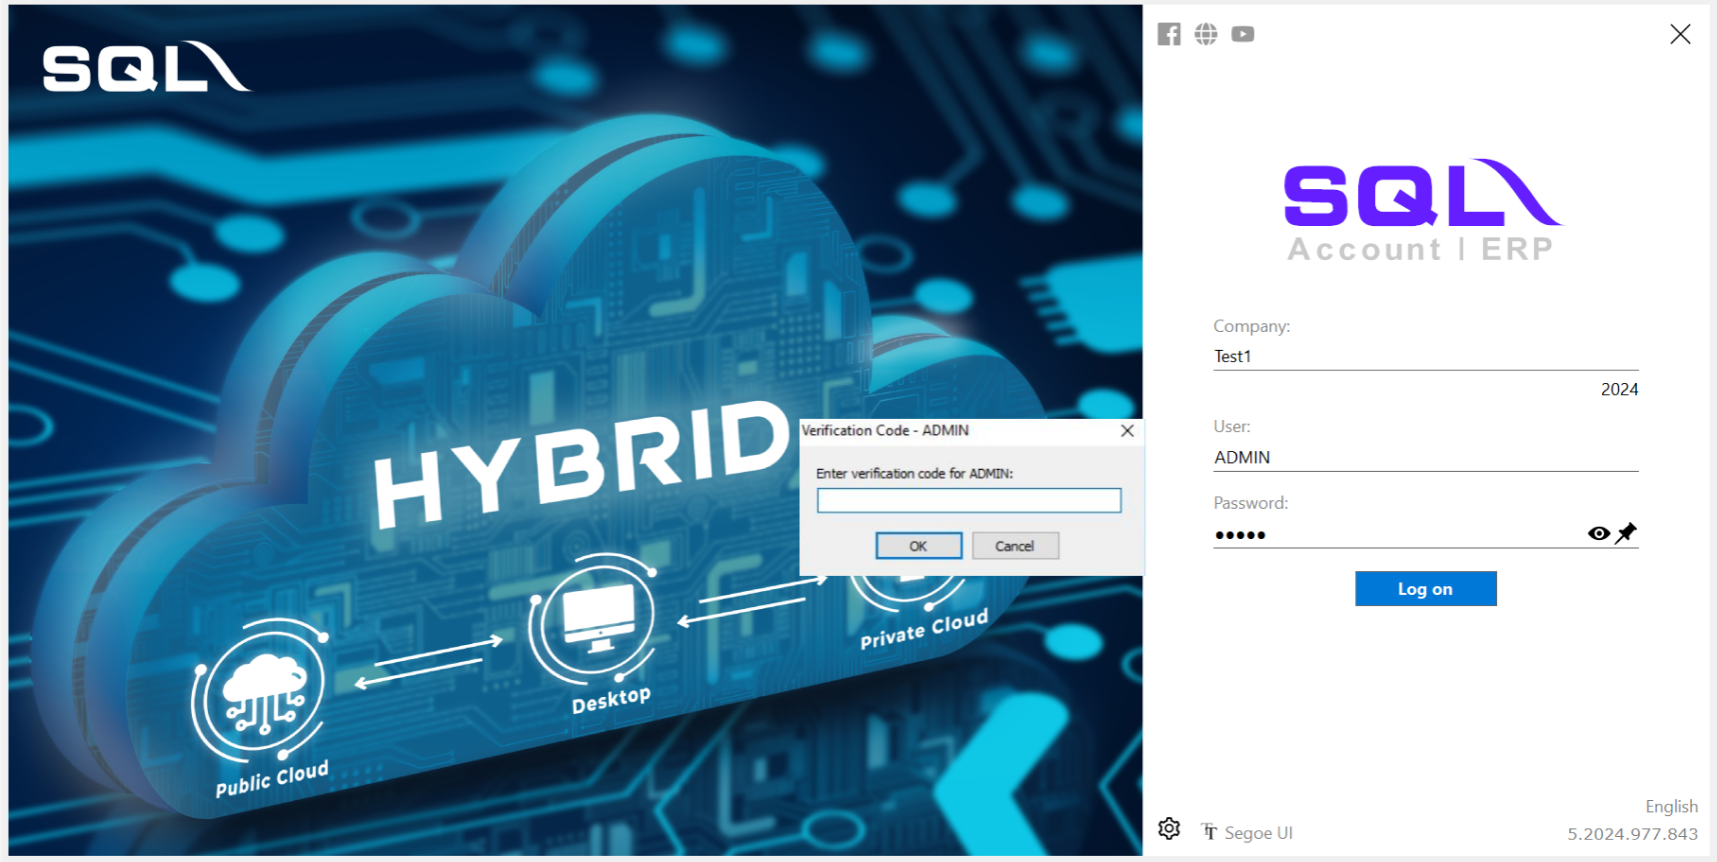
2-Steps Verifications Login
-
Go to menu : File > 2-Steps Verification.
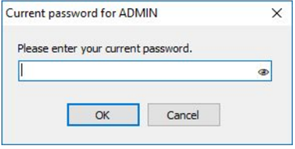
-
Enter your current password, press Ok to proceed.
-
Choose an Authenticator device.
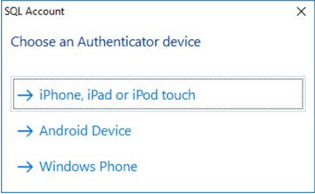
-
Follow the instructions to install and setup the Authenticator on your hand-phone.
-
Each time login, you will be required to enter the verification code generated by the Authenticator in your mobile phone.
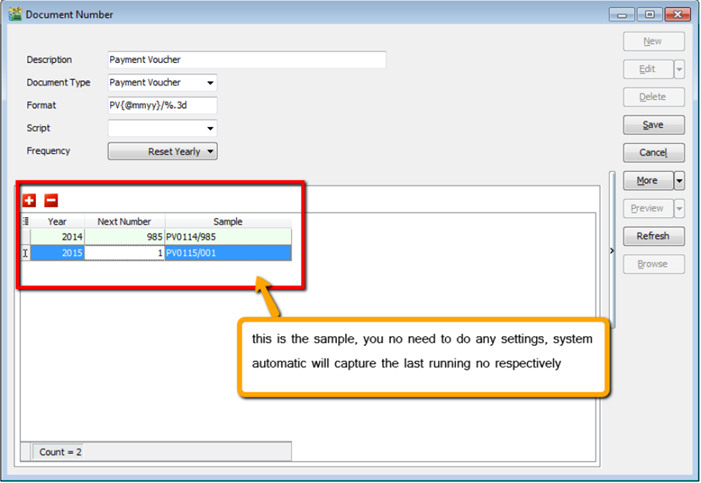
How to set Running Document Number by Date/Year Format ?
PV0615/001 is actually (PVmmyy/001)
-
Tools > Maintain Document No
-
Create New or amend from the existing
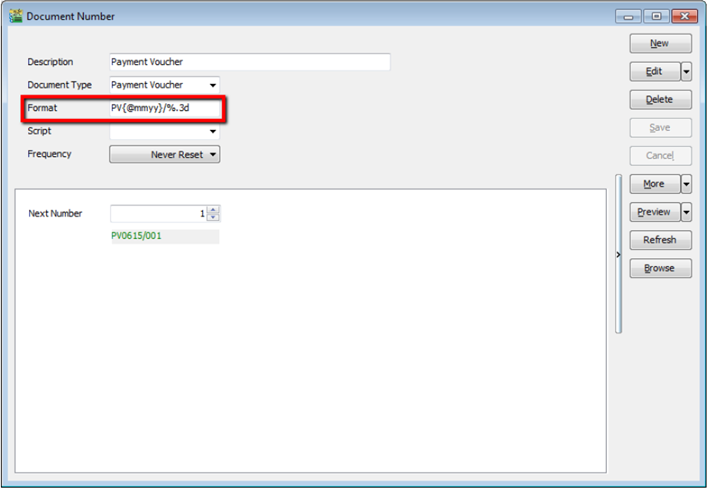 caution
make sure the format is follow the sample attached
-
Select to reset the running no. either Monthly / Yearly / Never.
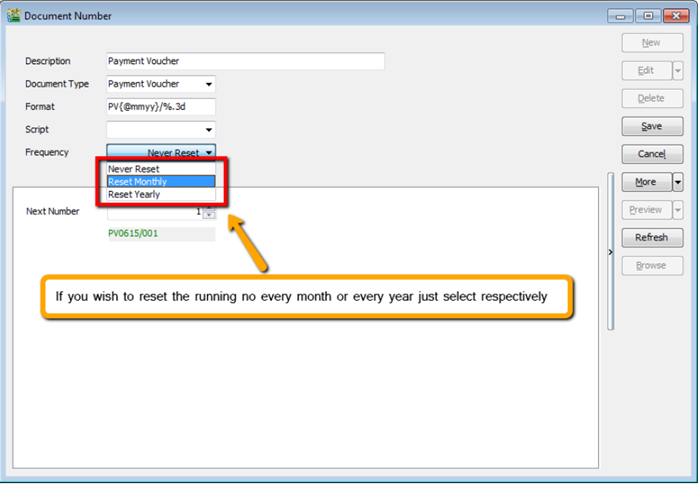
 info
infoWe can also set default running no at for default payment method
-
Go to tools > Maintain Payment Method
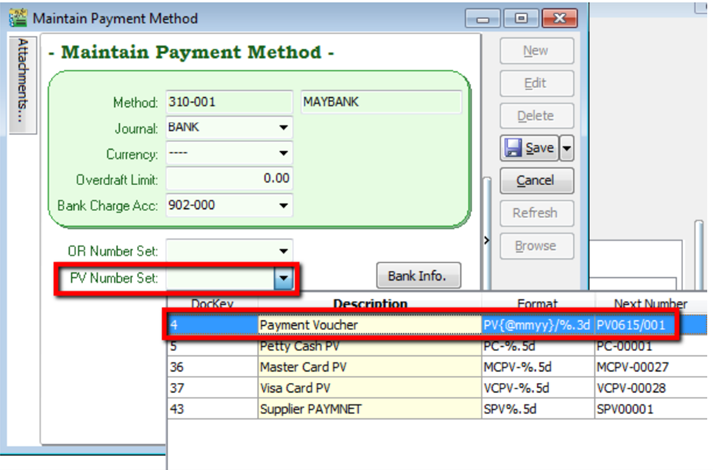
 note
notevice versa for Official Receipt