Checkout Screen
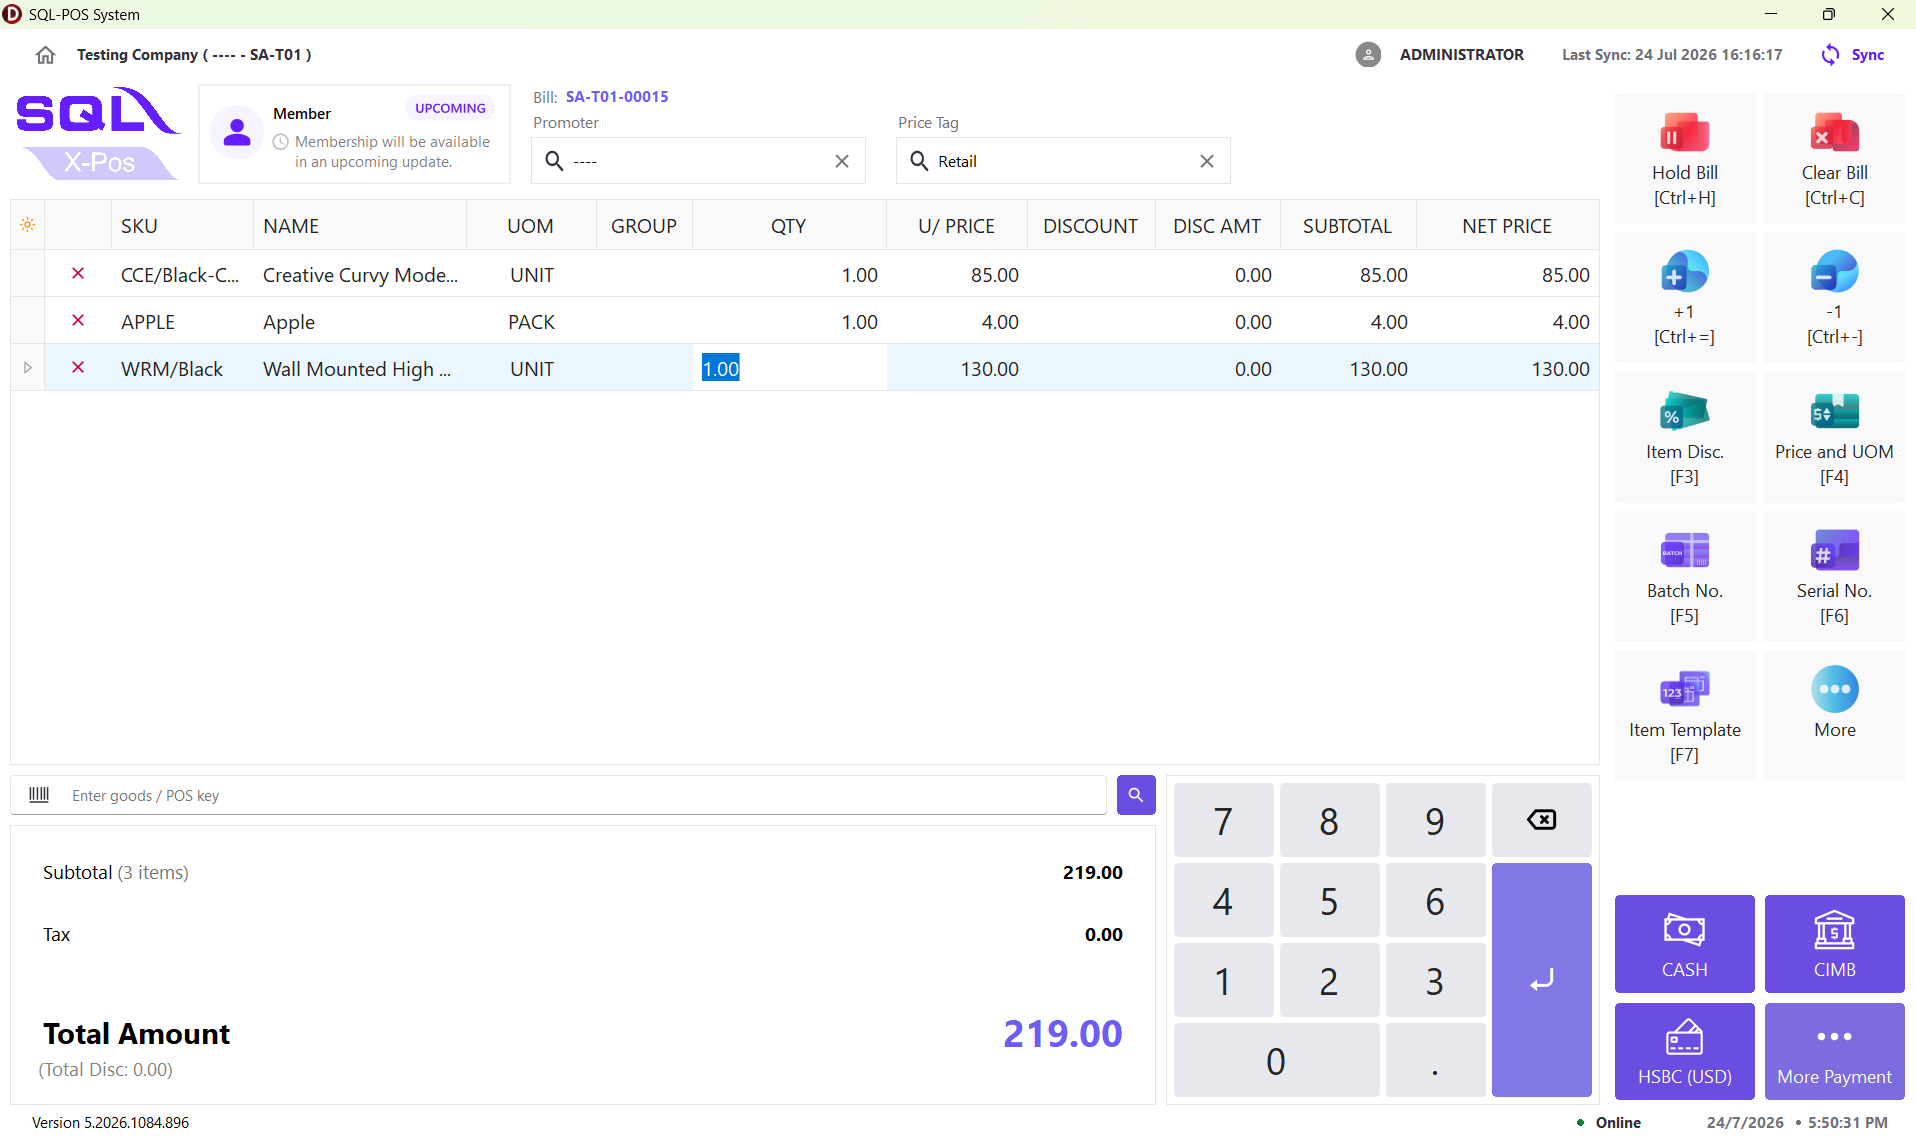
The Checkout screen is the primary workspace of the POS system where users perform sales transactions. It provides a complete set of tools for managing the sales process, including item entry, cart management, pricing, discounts, and payment processing.
Common Checkout Screen Structure
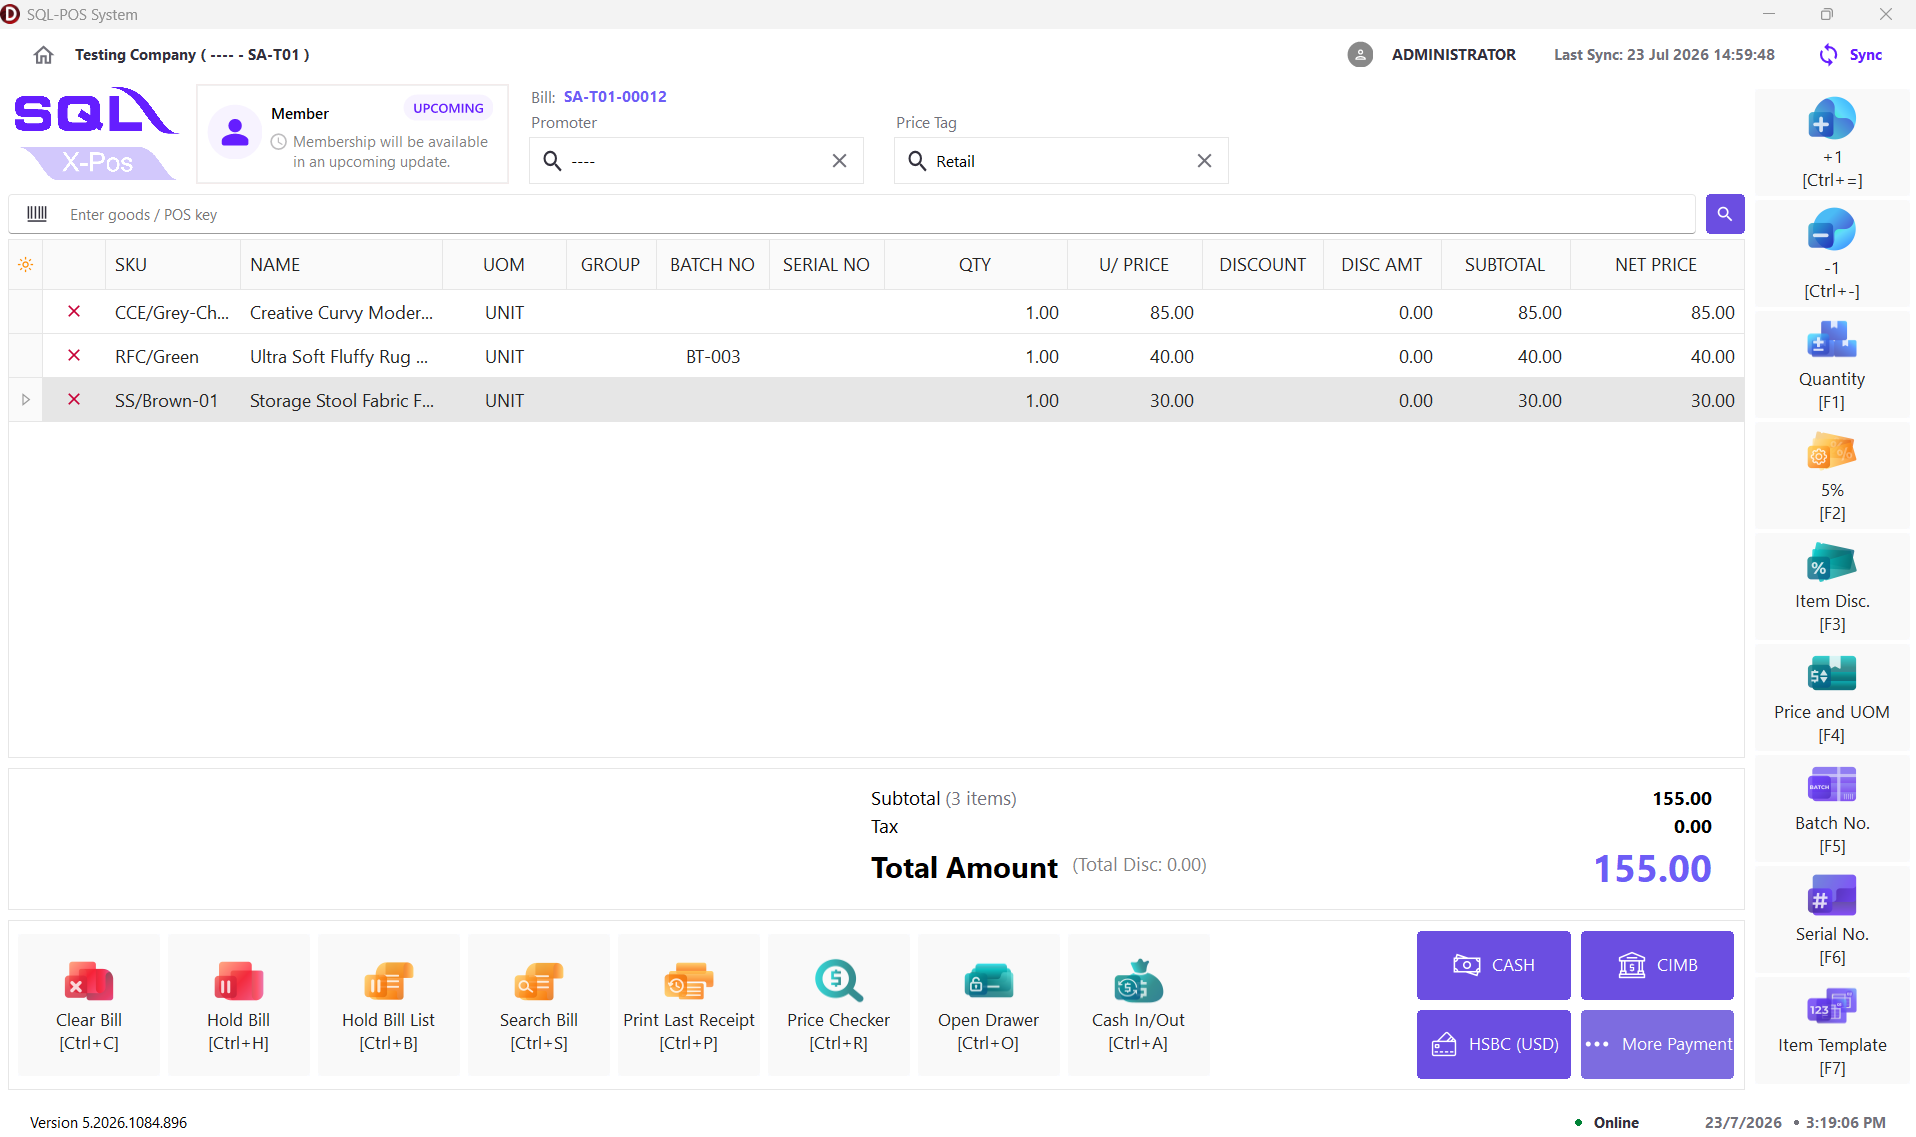
All checkout layouts consist of several common functional areas:
Header Section
This section provides sales information.
| Component | Description | Notes |
|---|---|---|
| Member | Upcoming feature | |
| Bill Number | Displays the current sales number. | Read-only |
| Promoter | Displays the selected promoter for current sales. | Search: Change assigned promoter, x: Reset to default promoter |
| Price Tag | Displays the selected price tag for current sales. | Search: Change assigned price tag, x: Reset to default price tag |
Item Entry and Cart Section
The item entry and cart section is the main area where users manage items in the current transaction.
Search Field:
- Help key - can refer to Main Menu -> Setting -> Shortcuts Configuration -> Default Shortcuts
- Add item into the cart by scanning items using a barcode scanner
- Add item into the cart by entering the item code
- Assign promoter by entering the promoter code
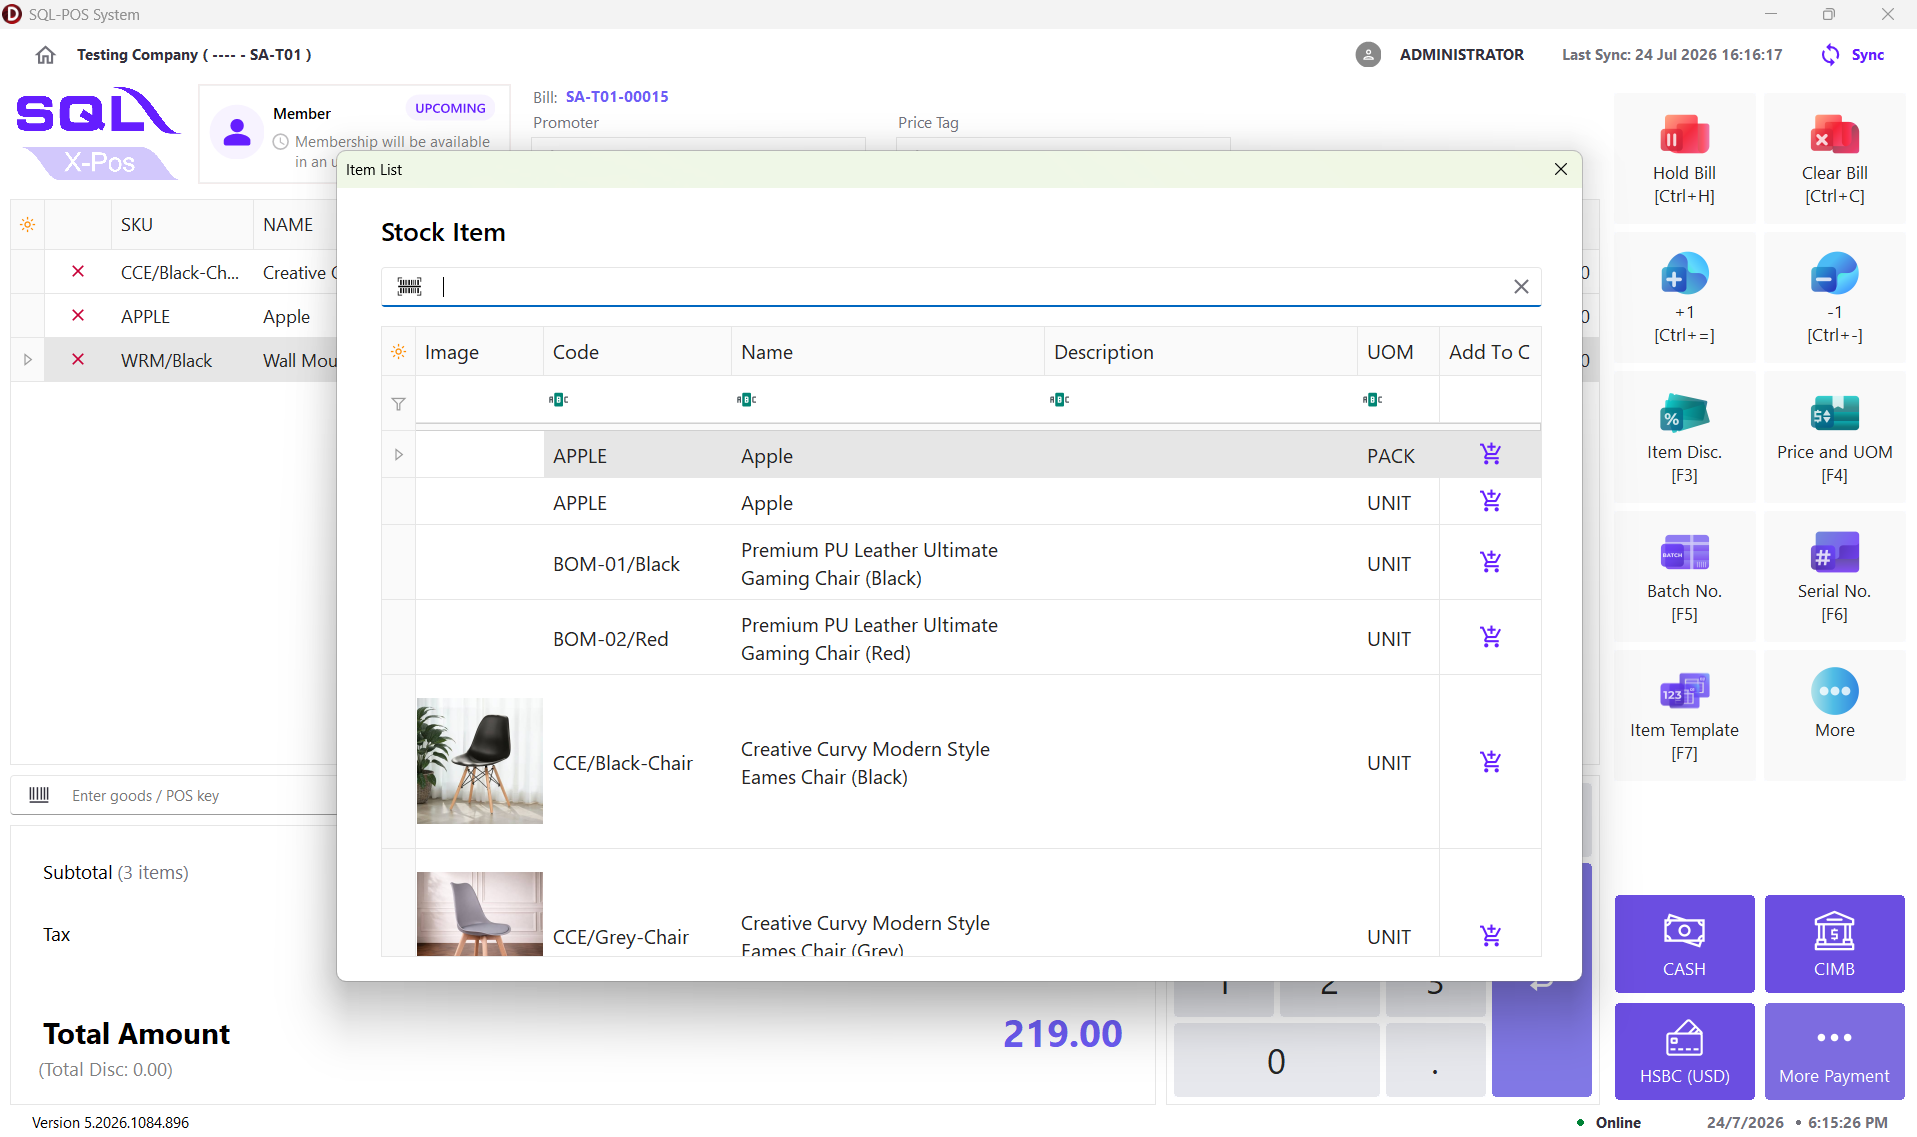
Search Button:
- View stock item list
- Add item from the item list
Cart Table:
| Field | Description |
|---|---|
| X | Remove item from the cart |
| SKU | Item code |
| Name | Item description |
| UOM | Unit of measure |
| Group | Item template |
| Batch No. | Batch number for inventory tracking |
| Serial No. | Serial number for serialized items |
| Quantity | Selling quantity |
| Unit Price | Selling price per unit |
| Discount | Applied discount |
| Discount Amount | Discount value |
| Subtotal | Item subtotal before tax calculation |
| Net Price | Final item amount |
Sales Summary Section
The sales summary section displays the current transaction calculation.
| Field | Description |
|---|---|
| Subtotal | Total amount after discount and before tax |
| Tax | Total tax amount applied |
| Total Disc | Total discount applied to the transaction |
| Total Amount | Final amount payable by customer |
Item Operation Buttons (Right side)
| Button | Description |
|---|---|
| +1 | Increase selected items' quantity by 1 |
| -1 | Descrease selected items' quantity by 1 |
| Quantity | Edit item quantity |
| 5% | Apply discount of 5% |
| Item Disc. | Edit item discount |
| Price and UOM | Change item unit price and UOM |
| Batch No. | Select the batch number |
| Serial No. | Enter the serial number |
| Item Template | View the item template list |
User can configure the shortcut key for the buttons in Main Menu -> Setting -> Shortcuts Configuration -> Action Buttons.
Sales / System Operation Buttons (Bottom side)
| Button | Description |
|---|---|
| Clear Bill | Clears the current item cart |
| Hold Bill | Saves the current item cart temporarily |
| Hold Bill List | Retrieves the hold bills |
| Search Bill | Searches existing sales |
| Print Last Receipt | Reprints the previous sales' receipt |
| Price Checker | Checks item prices |
| Open Drawer | Opens the cash drawer |
| Cash In/Out | Records cash movement |
User can configure the shortcut key for the buttons in Main Menu -> Setting -> Shortcuts Configuration -> Title Commands.
Payment Section
The payment section allows users to complete transactions using available payment methods.
Item and System Buttons
Quantity
User can direct change the quantity of selected item

Edit quantity to 0 will direct remove the item from the cart.
Item Disc.
-
Subtotal: displays the current amount (Quantity * Unit Price) before discount
-
Discount: user can input discount expression as shown in the image below
-
Reason(optional): user can input the reason of discount
-
New Subtotal: displays the amount after discount
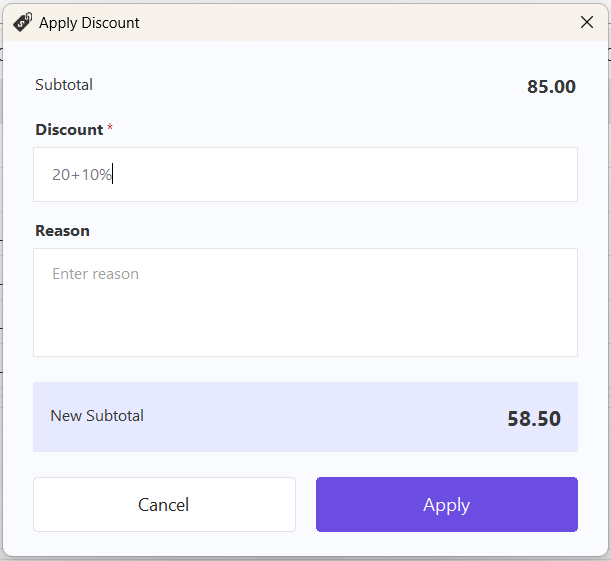
The discount amount cannot exceed the subtotal.
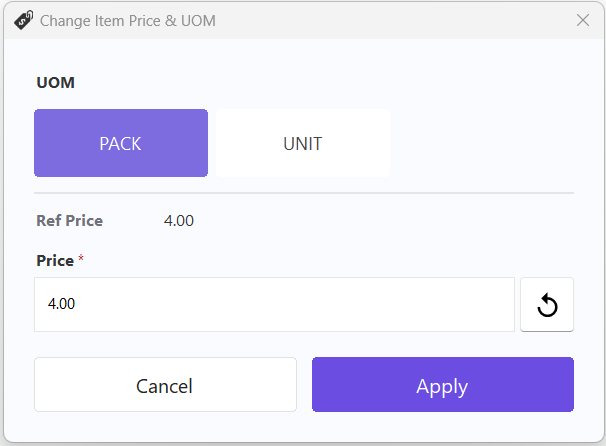
Price and UOM
- Select one of the available Units of Measure (UOM) for the selected item
- The Reference Price will be display based on the selected UOM
- The Selling Price can be edited manually
- Reset icon: restore the selling price to the refer price of the selected UOM.
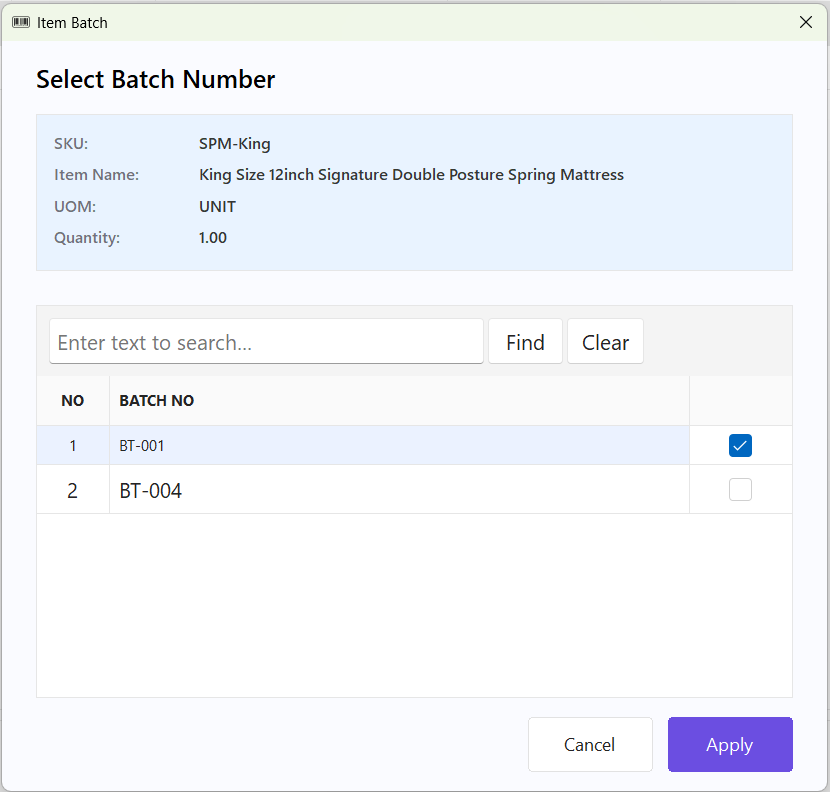
Batch No.
-
Assigning a batch number is optional
-
Only one batch number can be assigned to each item row
-
For information on creating and maintaining batch numbers, refer to Maintain Batch
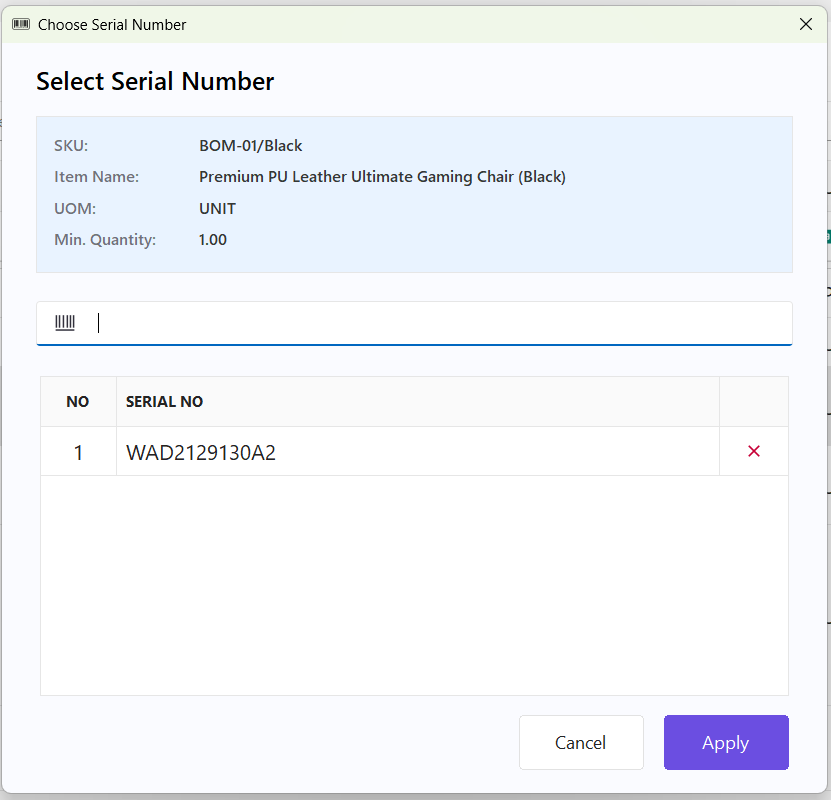
Serial No.
To enable serial number tracking for a stock item:
SQL Accounting → Stock → Maintain Stock Item → Select the item → Enable Serial No.
- Each serial-controlled item must have a serial number assigned
- One serial number is required for each quantity of the item
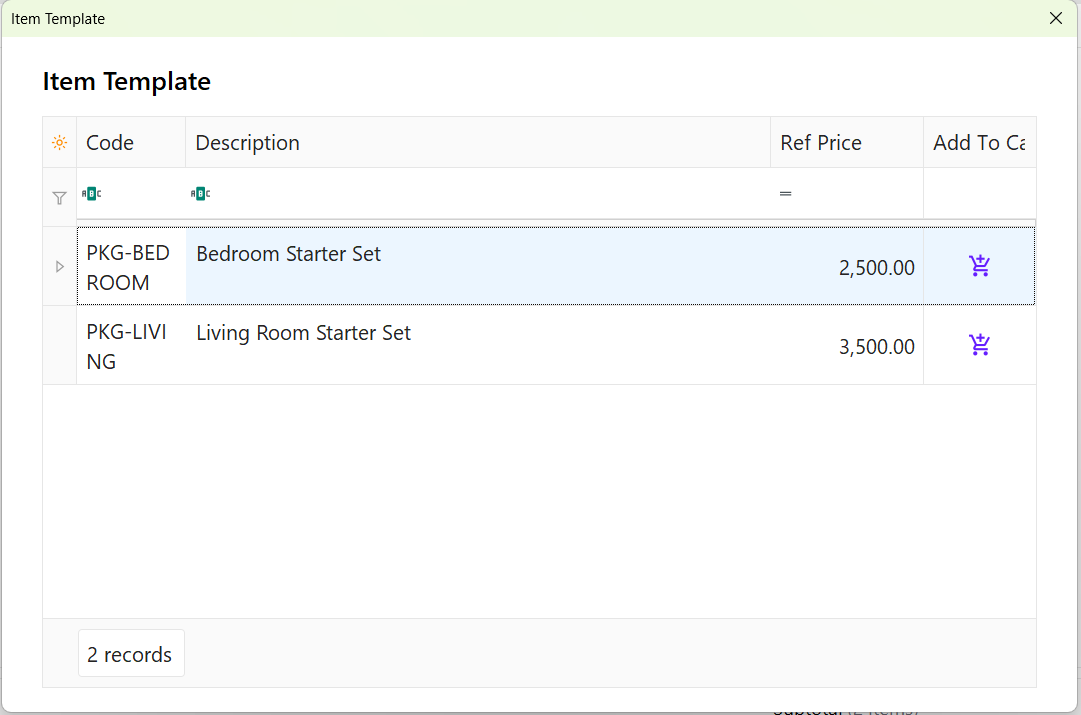
Item Template
- User can quickly add a predefined group of items to the cart
- The quantity, selling price and selling price of each item are based on the item template configuration
- For information on creating and maintaining batch numbers, refer to Maintain Item Template
Hold Bill
- Remark (Optional): Enter a remark for the hold bill
- Print Hold Bill Receipt: Enable this option to print a hold bill receipt after saving
- User can temporarily save the current sales transaction and continue it later

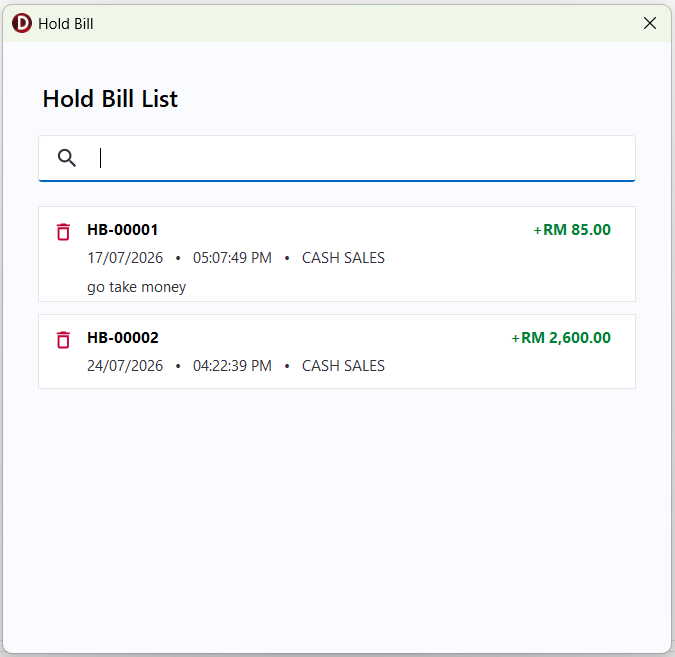
Hold Bill List
-
Displays all saved hold bills and allows users to resume or manage them
-
View the hold bill information, including:
- Date
- Time
- Customer
- Remark
-
Click a hold bill card to load the transaction back into the cart
-
Click the Delete icon to permanently remove the selected hold bill
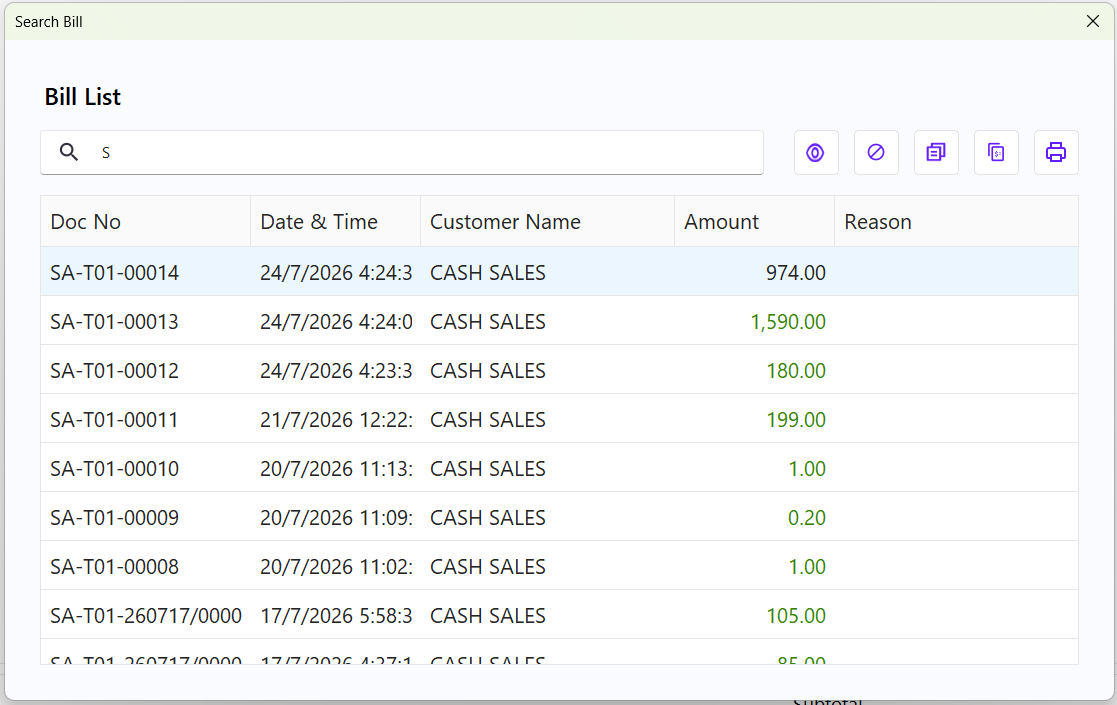
Search Bill
- Search for a sales transaction using the Invoice Number
- Available actions:
- View – Display the sales transaction details.
- Void – Void the selected sales transaction.
- Copy with Original Price – Copy all items to the cart using the original selling prices.
- Copy with Updated Price – Copy all items to the cart using the latest reference prices.
- Print – Print the selected sales transaction.
Void bill is not allowed for a new counter session.
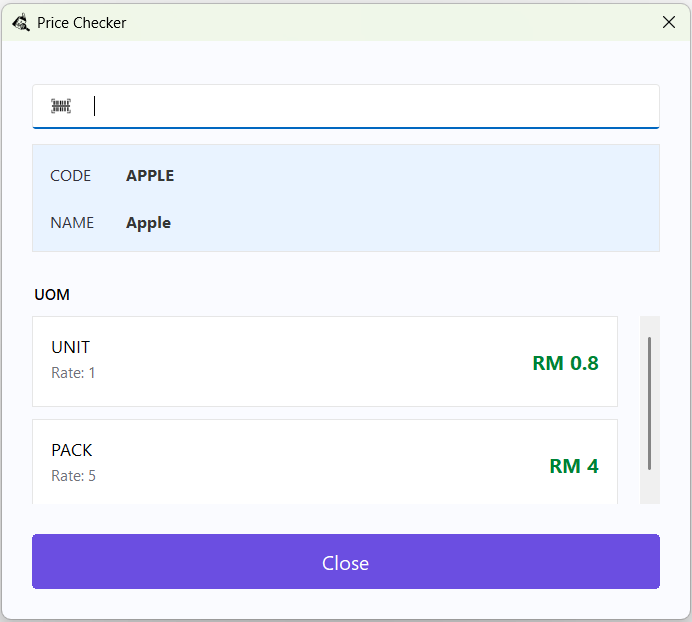
Price Checker
- Allows users to quickly check an item's available units of measure (UOM) and reference prices
- Search for an item using its Item Code or Barcode.
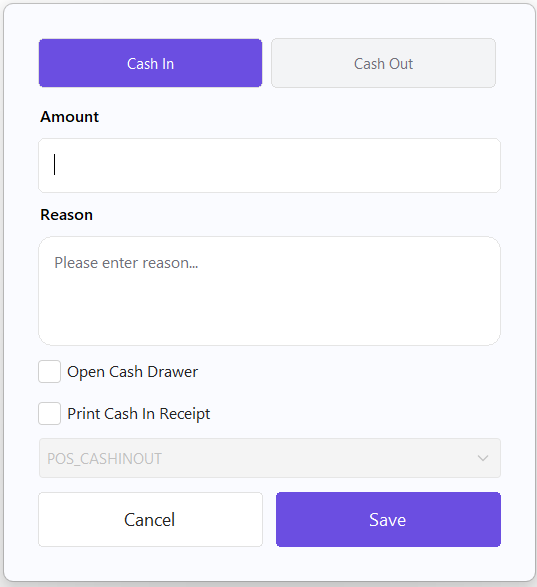
Cash In/Out
-
records cash movements that are not related to sales transactions
-
Cash In – Record cash received into the cash drawer (for example, float money or miscellaneous income)
-
Cash Out – Record cash removed from the cash drawer (for example, petty cash expenses or bank deposits)
-
Enter the transaction amount and an optional remark before saving
-
All cash in/out transactions are recorded for audit and counter balancing purposes
-
Layouts
The following checkout layouts are available:
Each layout is designed to support different business environments and cashier workflows, providing flexibility for various retail operation needs.
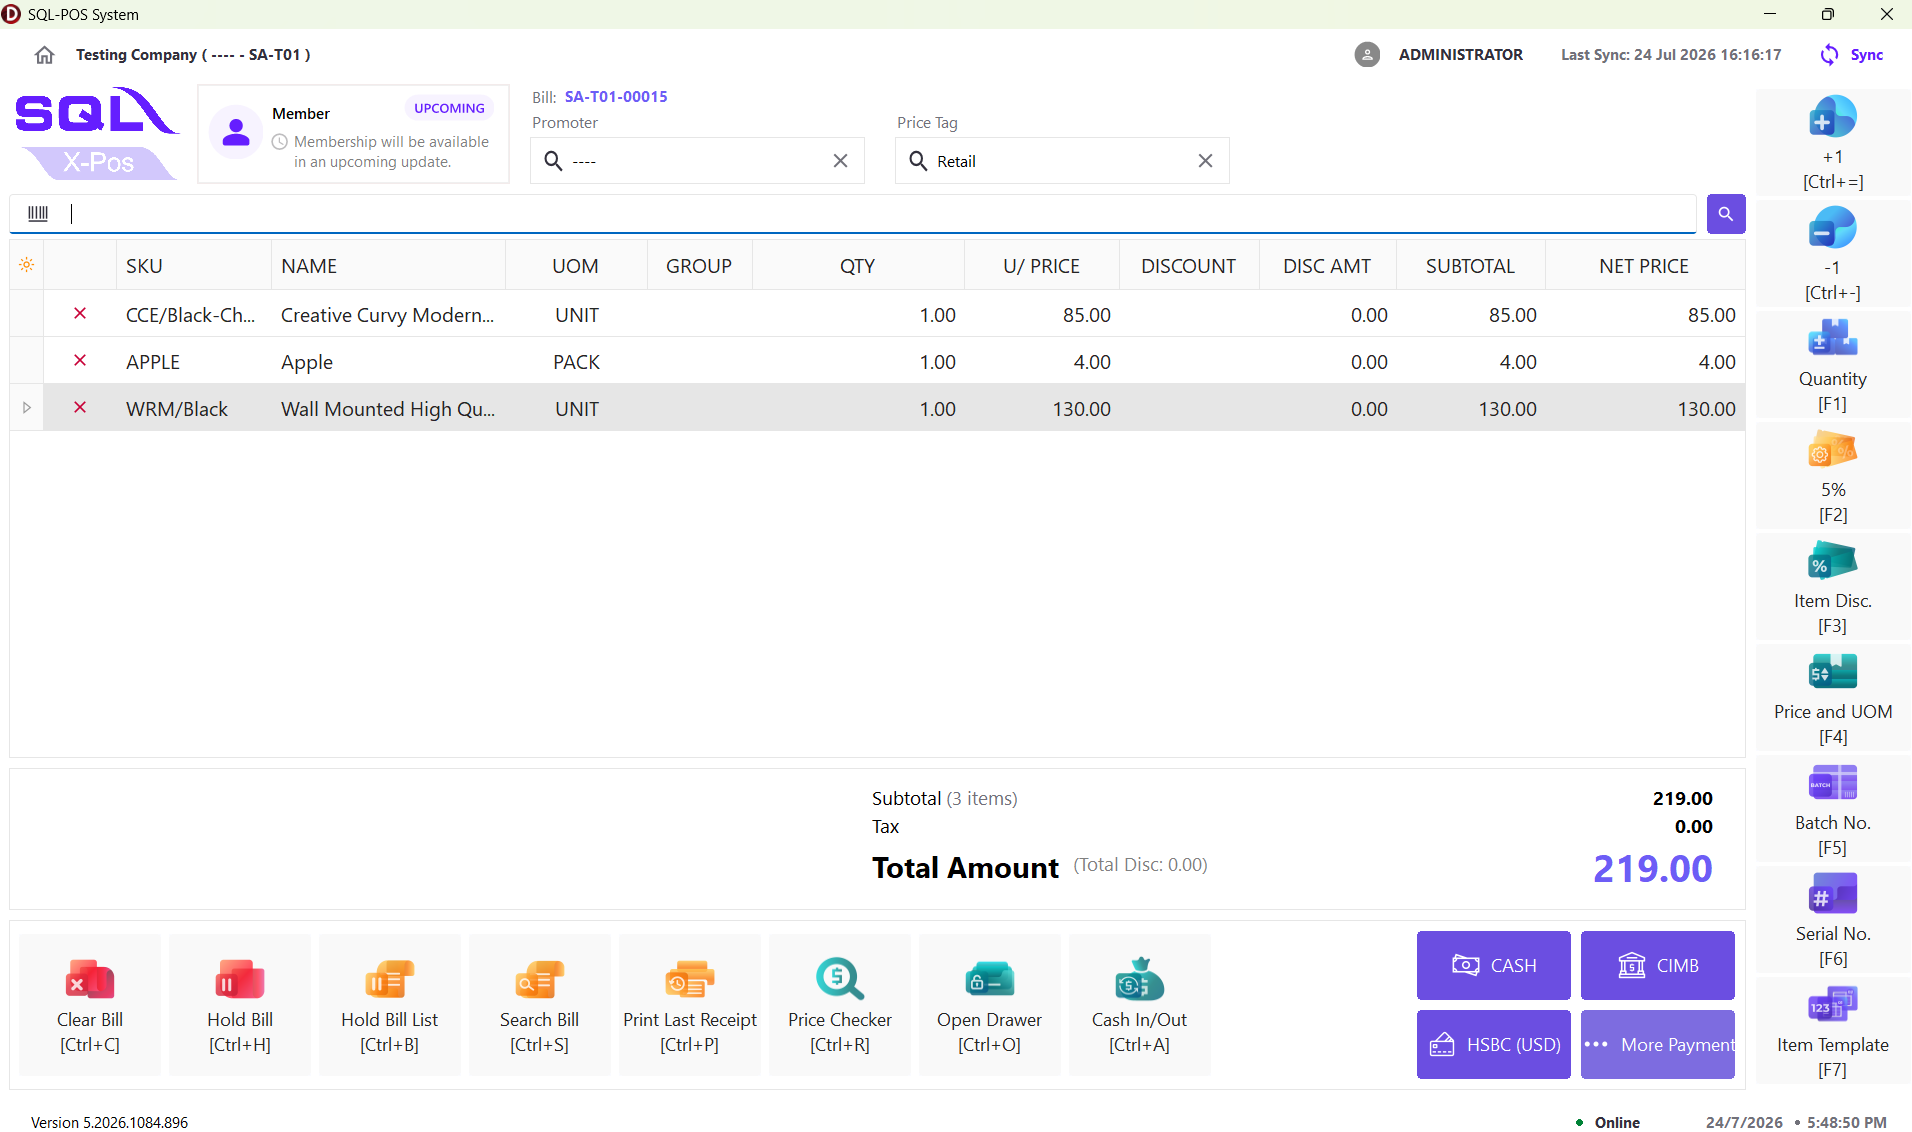
Classic
-
There are 3 button modes for the classic checkout layout, including:
- Standard (only displays the essential buttons)
- Complex (displays all available buttons)
- Custom (displays the buttons configured in the settings)
-
No touch-specific affordances (no numpad, no inline qty steppers) — this is the traditional keyboard/mouse counter screen, built for a cashier who knows the shortcut keys
-
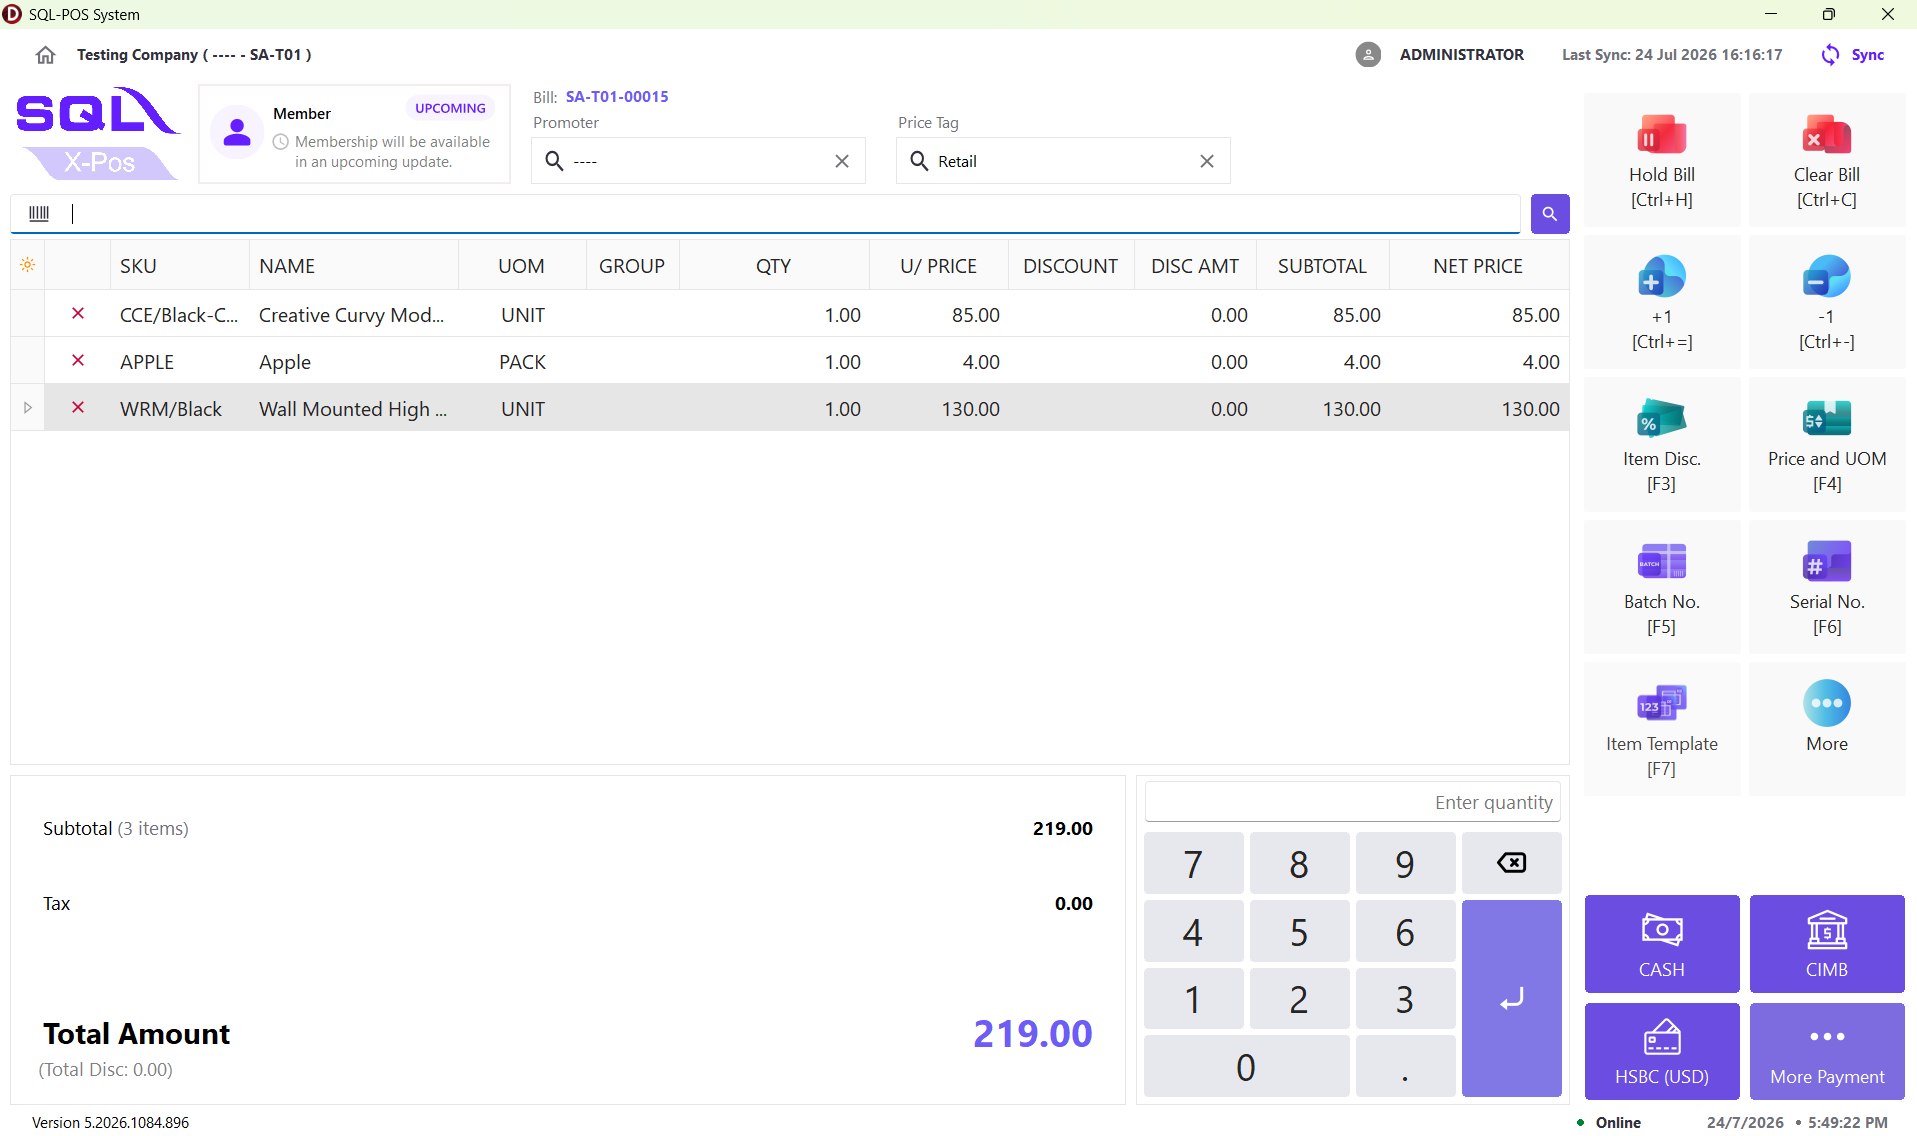
Numpad
-
Dedicated on-screen numeric keypad with an "Enter quantity" field — used for typing quantities without a physical keyboard
-
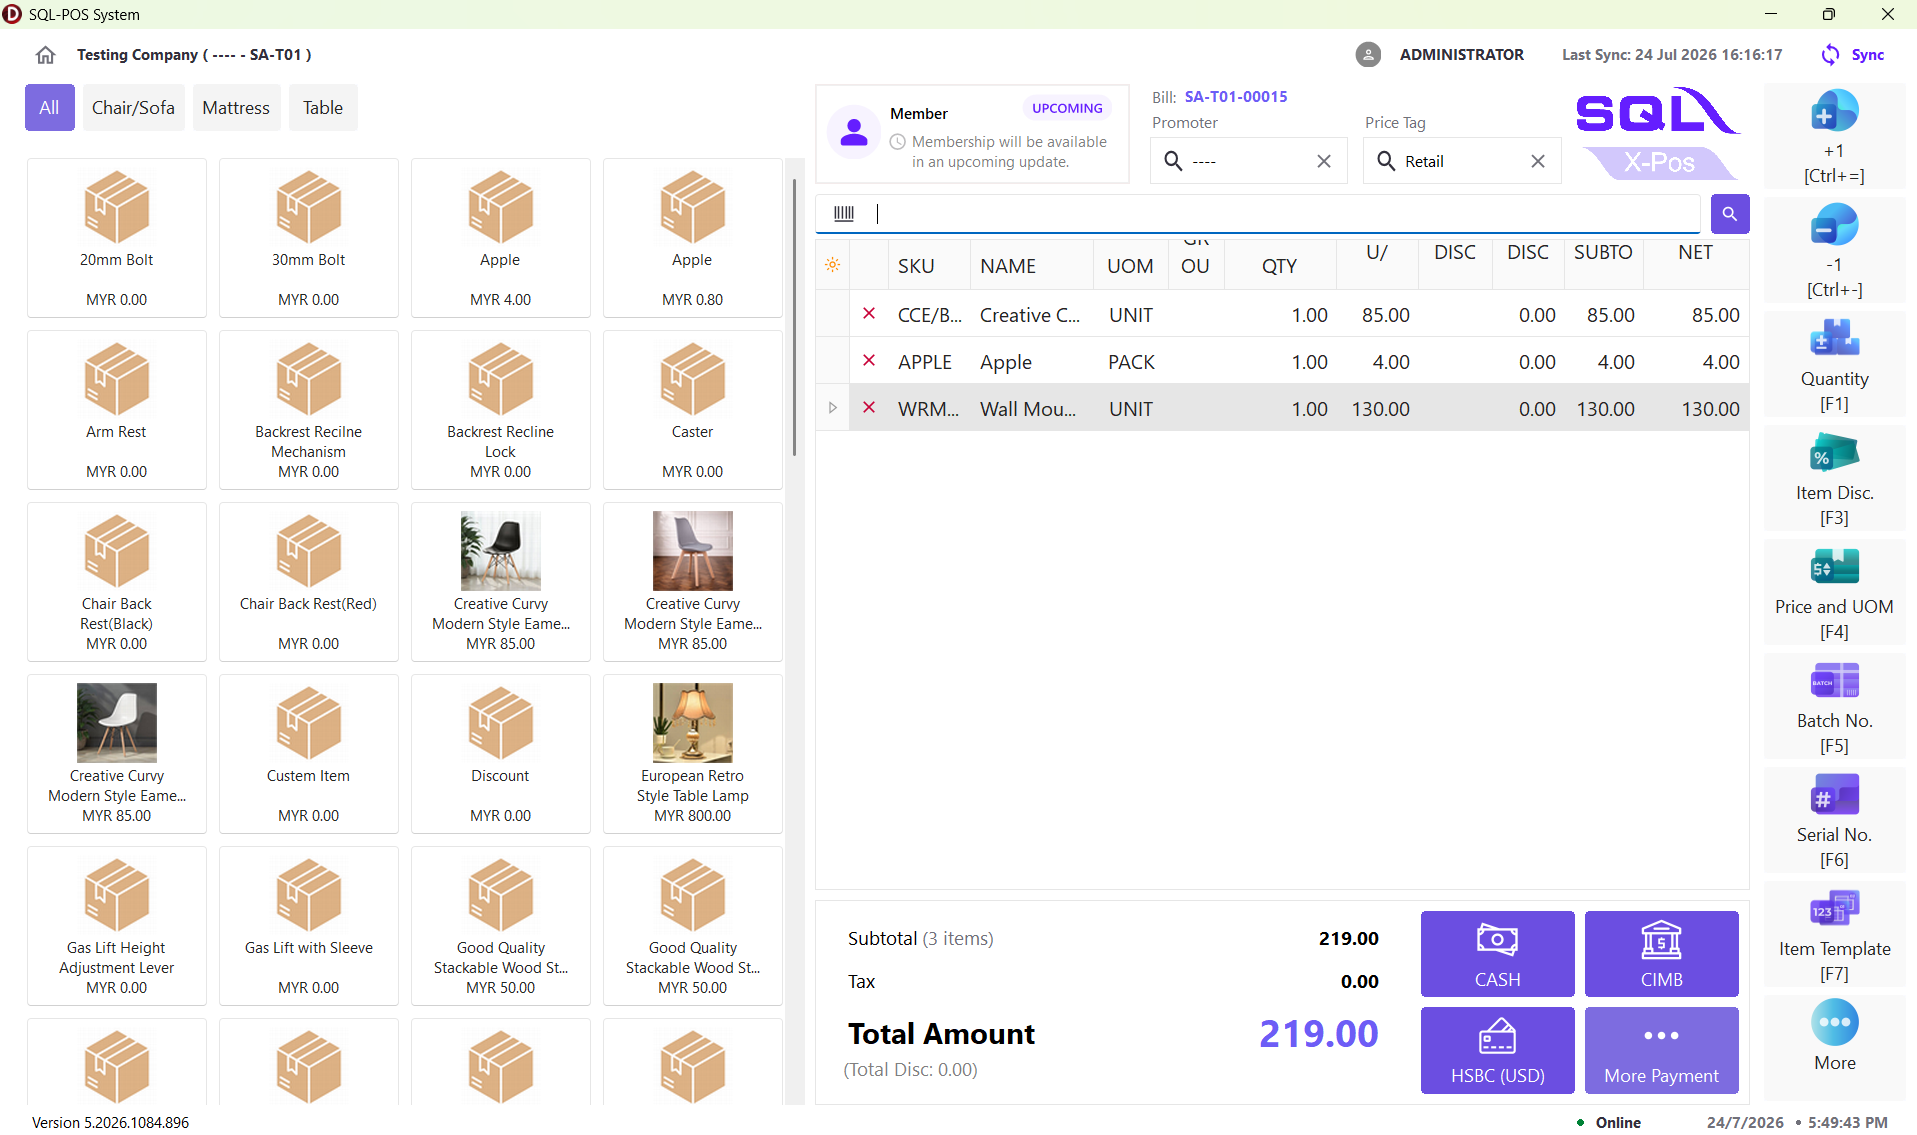
Catalogue
-
The only layout with a visual product grid: category tabs across the top of a scrollable tile grid, each tile showing image, name, and price — tap a tile to add it to the cart
-
Built for browsing/selecting items visually rather than scanning or searching by SKU
-
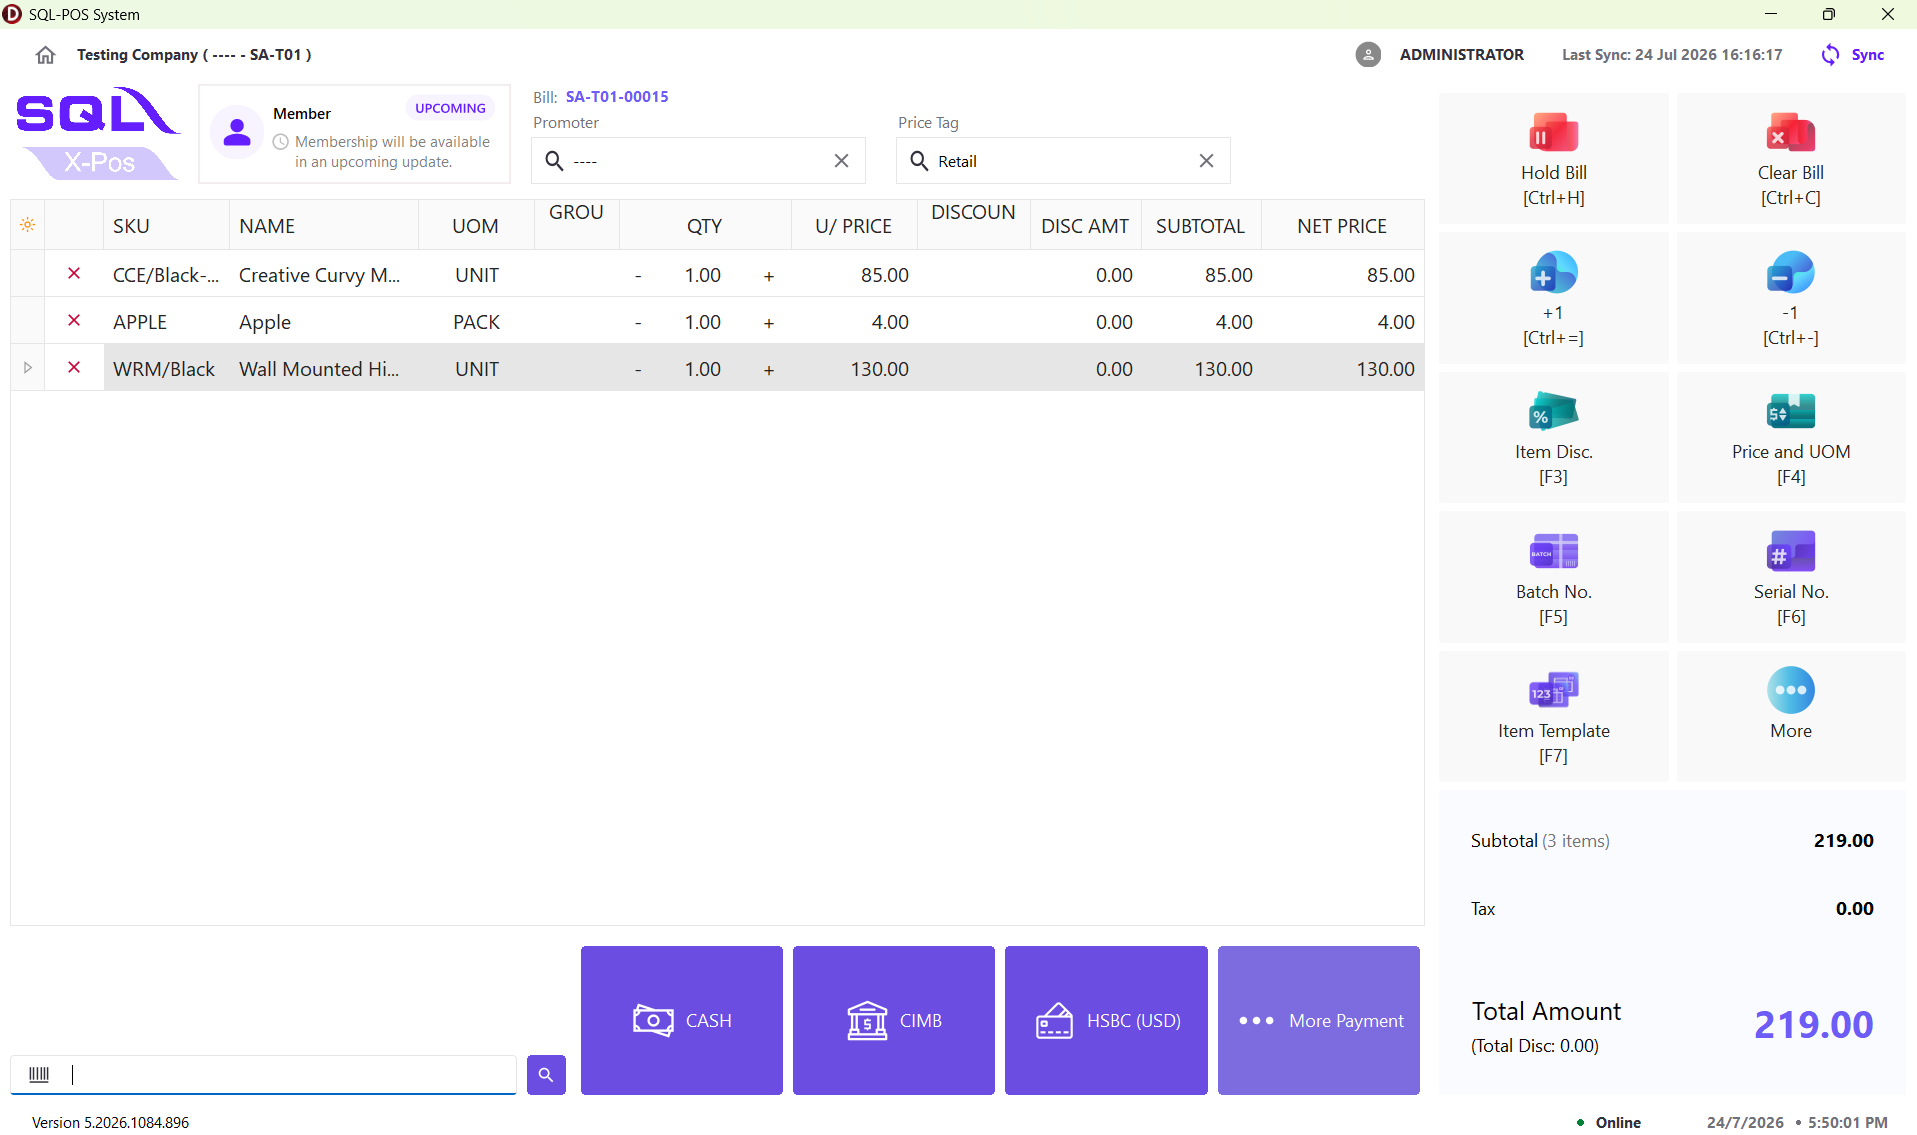
Simple Touch
-
No numpad. Instead, each cart row gets its own inline "−" and "+" buttons flanking the QTY value — tap to increment/decrement directly in the grid
-
Touch
-
No inline +/- steppers. Instead, tapping a row's QTY cell selects/highlights it (shown in blue), and an on-screen numpad appears bottom-right to type an exact new quantity straight into that cell
-